Installation guide
 Owner’s manual
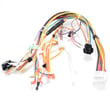

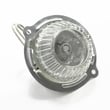
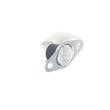
Can you replace just the microwave in a GE microwave oven combo?
For the GE JKP86BF3BB wall oven/microwave combo, you typically cannot swap in a standalone replacement microwave; the microwave is built into the combo chassis and matched to the trim, mounting, and controls. In most cases, you either repair the microwave section or replace the entire combo unit.
What you can do instead
- Repair the microwave section using model-correct parts (door switches, turntable parts, controls).
- Use the troubleshooting steps and safety guidance in the owner's manual.
- If the microwave is dead or intermittent, start with door interlock switch checks (a common failure point).
- If heating is weak or stops, focus on high-voltage components and professional service.
- If the cabinet, trim, or mounting is damaged, replacement of the full combo is usually the practical path.
Parts that commonly apply to microwave-side repairs
These are examples of microwave-related parts available for GE JKP86BF3BB that are often involved when the microwave will not start, stops mid-cycle, or has door-related issues:
| Symptom | Common area to check | Example part on this model |
|---|---|---|
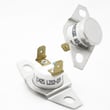
| Won’t start, runs only with door pressure | Door interlock switches | Switch-micro WB24X829 |
| Blows fuse or won’t run when door closes | Monitor/interlock circuit | Monitor switch WB24X830 |
| Runs but does not heat | High-voltage system | Microwave magnetron WB27X10516 |
| Hums, heats poorly, or trips protection | High-voltage capacitor | Microwave high-voltage capacitor WB27X10073 |
Why “replace just the microwave” usually does not work
A built-in combo microwave is designed around a specific cutout, mounting points, ventilation path, and control interface. Even if another microwave physically fits, the trim alignment, wiring harness connections, and safety interlocks often will not match.
Why it matters
Trying to retrofit a different microwave into a combo can create door-seal and interlock problems, poor ventilation, and control incompatibility. Repairing with correct GE JKP86BF3BB parts keeps the unit safe, properly mounted, and operating as designed.
Last updated: February 2026
Do all GE microwaves use the same mounting bracket?
No. GE microwaves do not all use the same mounting bracket; the bracket is model-specific and should be matched to the exact unit being installed. For your GE JKP86BF3BB wall oven/microwave combo, follow the bracket and fastener requirements shown in the installation guide.
What to do when replacing a microwave or combo unit
- Use the mounting bracket designed for the replacement model (do not reuse an older bracket unless the instructions explicitly allow it).
- Use the screws and hardware specified for the installation; correct fasteners help keep the unit secure and aligned.
- Confirm cabinet cutout and support requirements before lifting the unit into place.
- Verify the junction box location and wiring method match the installation requirements.
- Keep the installation instructions with the appliance for future service.
Why brackets are not universal
Mounting brackets vary by model because they must match the appliance’s:
- Chassis mounting points and hole pattern
- Weight distribution and support points
- Cabinet cutout overlap and trim fit
- Venting and clearance design (where applicable)
Quick comparison: universal vs model-specific
| Item | “Universal” approach | Correct approach for JKP86BF3BB |
|---|---|---|
| Mounting bracket | Reuse any bracket that “fits” | Use the bracket specified for the installed model |
| Hardware | Reuse old screws/bolts | Use the specified installation screws/hardware |
| Fit and alignment | Often slightly off | Designed to align with the cutout and mounting points |
Why it matters
A mismatched bracket can cause poor alignment, door fit issues, vibration, or unsafe mounting. Using the correct bracket and hardware helps the unit sit square in the cabinet and stay secure over time.
Last updated: February 2026
What is the average lifespan of a GE microwave?
A GE microwave typically lasts about 8 to 10 years with normal household use. For your GE JKP86BF3BB wall oven/microwave combo, lifespan depends most on door use, ventilation, and avoiding overheating from running the microwave empty; see the care and safety guidance in the owner's manual.
What affects microwave lifespan the most
- Door and latch wear from frequent opening and slamming (interlock switches take the stress)
- Running empty or overheating food, which can damage internal components
- Grease and steam buildup around the control area and vents
- Power quality (surges can shorten control board life)
- Cooling airflow (blocked vents raise internal temperatures)
Quick care steps that add years
- Keep the unit clean; wipe the control panel with mild soap and water or a 50/50 vinegar and hot water mix (no abrasives).
- Do not run the microwave empty.
- Make sure the door closes firmly before pressing Start.
- Use microwave-safe containers; remove wire twist ties from packaging.
- If you see repeated “SENSOR ERROR,” avoid opening the door too early during sensor cooking.
Parts that commonly wear first (and what they do)
| Part | What you may notice | Example part for this model |
|---|---|---|
| Door interlock switches | Won’t start, stops when door moves, intermittent operation | Monitor switch WB24X830 |
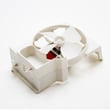
| Cooling fan | Overheating, loud fan noise, shutdowns | Range control panel cooling fan WB26T10018 |
| Magnetron | Heats weakly or not at all (often still “runs”) | Microwave magnetron WB27X10516 |
Why it matters
Microwave issues often start as small symptoms (intermittent starting, weak heating, overheating). Catching them early helps protect higher-cost components like the magnetron and control board.
Last updated: February 2026