- Kenmore refrigerator water filters
- Whirlpool refrigerator water filters
- Samsung refrigerator water filters
- GE refrigerator water filters
- LG refrigerator water filters
- Frigidaire refrigerator water filters
- KitchenAid refrigerator water filters
- Maytag refrigerator water filters
- Kenmore Elite refrigerator water filters
- Estate refrigerator water filters
- GE Profile refrigerator water filters
- Amana refrigerator water filters
- Bosch refrigerator water filters
- Dacor refrigerator water filters
- Electrolux refrigerator water filters
Top DIY repair help
View All Repair Categories
Appliances
Lawn & Garden
Power Tools
Home Improvement
Sports & Leisure
Heating & Cooling
Quick Links
How to replace a snowblower shave plate
less than a minute readMay 20Lyle Weischwill
Repair time and Difficulty
15 minutes or less
Tools Required
- Wrench set
- Cardboard
- Work gloves
The shave plate is a scraper blade that runs along the bottom of the auger housing. It protects the auger housing from wear and scrapes up snow the auger leaves behind.
Check the shave plate regularly and replace it using the steps in this repair guide/video if the plate is worn or damaged.
The shave plate wears out quickly if you don’t keep the skid shoes adjusted properly to lift the shave plate ¼-inch high. Watch our How to adjust the snowblower skid shoes video to see how to position skid shoes to avoid excessive shave plate wear.
This repair procedure works for common Craftsman, Ariens, Husqvarna, Troybilt, MTD, Murray, Snapper, Poulan and Noma snowblowers.
Instructions
- 1. Drain the engine fuel
Remove the gasoline from the engine.
- 2. Reposition the drift cutters
Reposition the drift cutters so you can tip the snowblower onto its impeller housing.
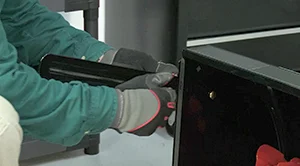
PHOTO: Reposition the drift cutters.
- 3. Tip the snowblower forward
Carefully tip the snowblower forward onto its impeller housing.
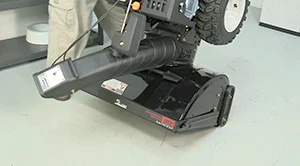
PHOTO: Tip the snowblower forward.
- 4. Remove the skid shoes
Remove the skid shoe bolts and pull the skid shoes off the impeller housing.
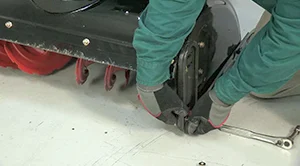
PHOTO: Remove the skid shoes.
- 5. Replace the shave plate
Remove the shave plate mounting bolts and pull off the shave plate.
Install the new shave plate.
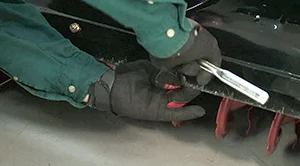
PHOTO: Replace the shave plate.
- 6. Reinstall the skid shoes
Loosely reinstall the skid shoes.
Tip the snowblower down and set the skid shoes to the recommended height. Adjusting the skid shoes as they wear keeps the shave plate from scraping the ground, helping it last longer.
- 7. Reposition the drift cutters
Adjust the drift cutters to their original positions.