- Kenmore refrigerator water filters
- Whirlpool refrigerator water filters
- Samsung refrigerator water filters
- GE refrigerator water filters
- LG refrigerator water filters
- Frigidaire refrigerator water filters
- KitchenAid refrigerator water filters
- Maytag refrigerator water filters
- Kenmore Elite refrigerator water filters
- Estate refrigerator water filters
- GE Profile refrigerator water filters
- Amana refrigerator water filters
- Bosch refrigerator water filters
- Dacor refrigerator water filters
- Electrolux refrigerator water filters
Top DIY repair help
View All Repair Categories
Appliances
Lawn & Garden
Power Tools
Home Improvement
Sports & Leisure
Heating & Cooling
Quick Links
How to replace the flywheel key on a riding lawn mower
less than a minute readMar 19Lyle Weischwill
Repair time and Difficulty
60 minutes or less
Tools Required
- Wrench set
- Socket wrench set
- Flywheel puller
- Slot screwdriver
- Hammer
- Work gloves
This step-by-step riding mower repair guide explains how to replace the flywheel key on a riding lawn mower or lawn tractor. The flywheel key is a small rectangular piece of metal that keeps the crankshaft and flywheel aligned when you tighten the flywheel nut. To protect expensive engine components from damage, the flywheel key shears off if the mower blade hits an object hard enough to make the flywheel slip out of alignment with the crankshaft. Replace a broken or sheared flywheel key using a manufacturer-approved lawn mower part.
These repair steps show how to replace the flywheel key on common Briggs & Stratton engines used in Craftsman, Husqvarna, Toro, MTD, Murray, Cub Cadet, Troybilt and Ariens riding mowers and lawn tractors.
Instructions
- 1. Disconnect the battery
Park the tractor on a level surface and set the parking brake.
Turn the ignition switch off and remove the key.
Let the engine cool.
Wear work gloves to protect your hands.
Lift the seat.
Remove the bolt connecting the negative cable to the battery and tuck the cable away from the battery so it doesn't touch the battery post.

PHOTO: Disconnect the negative battery cable.
- 2. Remove the engine blower housing
Lift the tractor hood.
Remove the air duct mounting screws and pull off the air duct.
Turn each air filter cover retaining knob counterclockwise and pull off the air filter cover.
Remove the air filter.
Remove the air filter housing screw.
Remove the front and rear blower housing mounting bolts and lift off the blower housing.
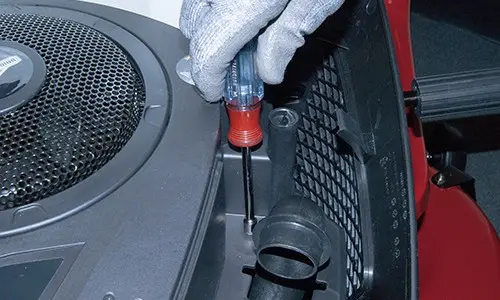
PHOTO: Remove the filter housing screw. Tip: Remove the hood to have more room to work.
- 3. Remove the flywheel bolt and fan
Remove the flywheel screen cap.
Disconnect the spark plug wire and remove the spark plug.
Insert nylon rope into the spark plug hole to jam the piston and keep the crankshaft from turning while you remove the flywheel bolt.
Leave some rope out of the cylinder so it’s easy to remove the rope later.
Remove the flywheel bolt, washer and flywheel screen.
Pull off the flywheel fan.
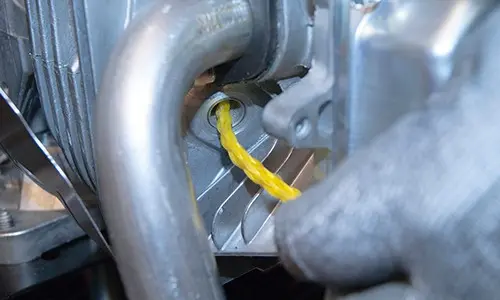
PHOTO: Insert nylon rope into the cylinder. Tip: Use an impact wrench to avoid inserting the rope into the cylinder.
- 4. Loosen the flywheel
Thread the flywheel bolt into the crankshaft.
Position the flywheel puller tool above the flywheel bolt and thread the puller bolts into the pre-drilled holes on the flywheel.
Turn one flywheel puller bolts clockwise to tighten it slightly, and then slightly tighten the other one. Alternate between the two to screw in the bolts, raising the flywheel evenly until the flywheel breaks free from the crankshaft.
If the flywheel doesn't break loose on its own, tap the top of the flywheel with a mallet to break it free.

PHOTO: Break loose the flywheel using a puller.
- 5. Remove the old flywheel key
After freeing the flywheel, remove the flywheel puller and flywheel bolt.
Pull the flywheel off the crankshaft.
Remove the remnants of the flywheel key from the crankshaft and flywheel.
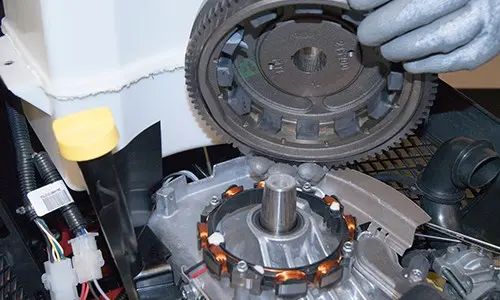
PHOTO: Remove the flywheel.
- 6. Install the new flywheel key
Push the flywheel onto the crankshaft and line up the notch in the flywheel with the slot in the crankshaft.
Insert the new flywheel key into the crankshaft slot and push it down flush with the top of the crankshaft.

PHOTO: Install the new flywheel key.
- 7. Reinstall the flywheel bolt and fan
Reinstall the flywheel fan and screen.
Position the washer over the crankshaft hole.
Thread the flywheel bolt into the crankshaft and hand tighten the flywheel bolt.
Use a torque wrench to tighten the flywheel nut to 100 ft-lbs.
Pull the rope out of the engine cylinder.
Reinstall the spark plug and reconnect the spark plug wire.
Reinstall the flywheel screen cap.
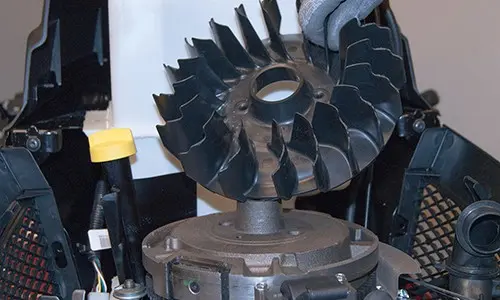
PHOTO: Reinstall the blower fan.
- 8. Reinstall the engine blower housing
Position the blower housing on the engine and align the air diverter in the housing.
Reinstall the blower housing mounting bolts.
Reinstall the air filter housing screw.
Reinstall the air filter.
Position the air filter cover on the engine and turn each retaining knob clockwise on the cover.
Reinstall the air duct and secure it with the mounting screws.
Lower the tractor hood.
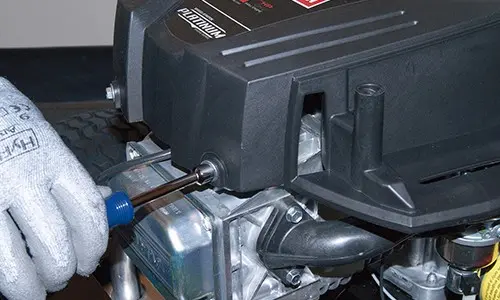
PHOTO: Reinstall the blower housing mounting bolts.
- 9. Reconnect the battery
Reconnect the negative cable to the negative battery terminal.
Lower the seat.