- Kenmore refrigerator water filters
- Whirlpool refrigerator water filters
- Samsung refrigerator water filters
- GE refrigerator water filters
- LG refrigerator water filters
- Frigidaire refrigerator water filters
- KitchenAid refrigerator water filters
- Maytag refrigerator water filters
- Kenmore Elite refrigerator water filters
- Estate refrigerator water filters
- GE Profile refrigerator water filters
- Amana refrigerator water filters
- Bosch refrigerator water filters
- Dacor refrigerator water filters
- Electrolux refrigerator water filters
Top DIY repair help
View All Repair Categories
Appliances
Lawn & Garden
Power Tools
Home Improvement
Sports & Leisure
Heating & Cooling
Quick Links
How to replace the blade belt on a zero-turn riding mower
less than a minute readFeb 18Lyle Weischwill
Repair time and Difficulty
30 minutes or less
Tools Required
- Socket wrench set
- Work gloves
This DIY repair guide shows how to replace the blade belt on a zero-turn riding mower. The blade belt connects the engine pulley to the deck pulleys that spin the cutting blades. A damaged or worn blade belt won't spin the mower blades well, and a broken belt won't spin the blades at all. Replace the blade belt with the riding mower part if it's damaged or broken.
This procedures works for common Craftsman, Toro, Troybilt, MTD and Cub Cadet zero-turn riding mowers.
See all our riding mower and lawn tractor repair guides for more step-by-step instructions.
Instructions
- 1. Disconnect the spark plugs
Move the mower to a work area on a hard, level surface and set the parking brake.
Disconnect the spark plug wires.

PHOTO: Disconnect the spark plugs.
- 2. Lower the mower deck
Lower the mower deck to the lowest cutting position.
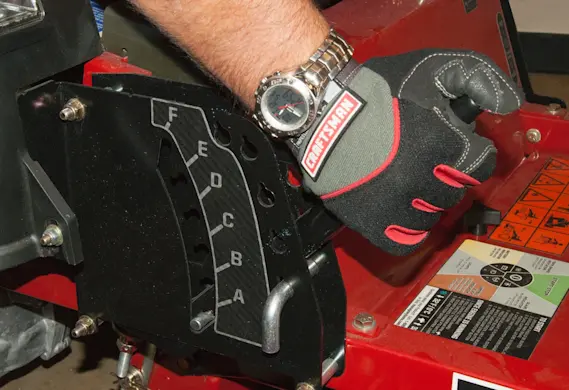
PHOTO: Lower the mower deck.
- 3. Remove the floorboard
Remove the mounting screw that secures the floorboard to the frame. Lift off the floorboard.
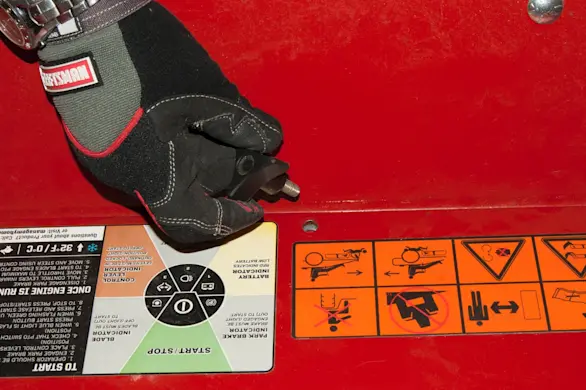
PHOTO: Remove the floorboard screw. 
PHOTO: Remove the floorboard.
- 4. Remove the pulley covers
Remove the mounting bolts from the pulley covers and remove the pulley covers.
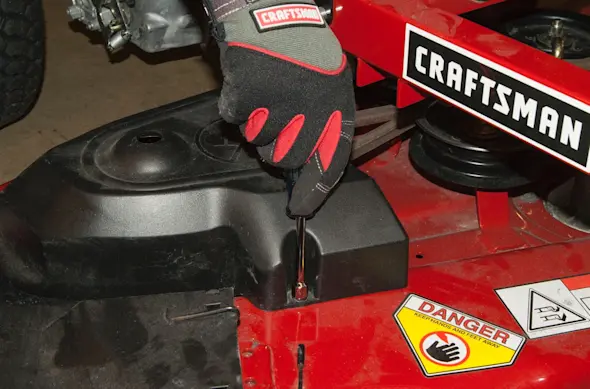
PHOTO: Remove the pulley cover screws. 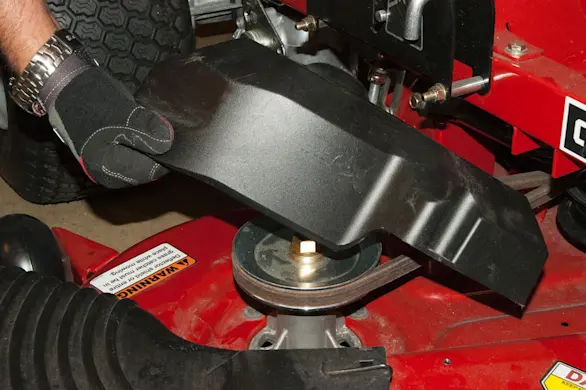
PHOTO: Remove the pulley covers.
- 5. Remove the blade belt
Loosen the belt guide nut on the top of the idler pulley so you have enough room to remove the blade belt.
Push in the idler arm to release tension on the blade belt and roll the belt off the left pulley.
Release the belt from the other blade pulleys.
Release the blade belt from the electric clutch pulley and remove the blade belt.
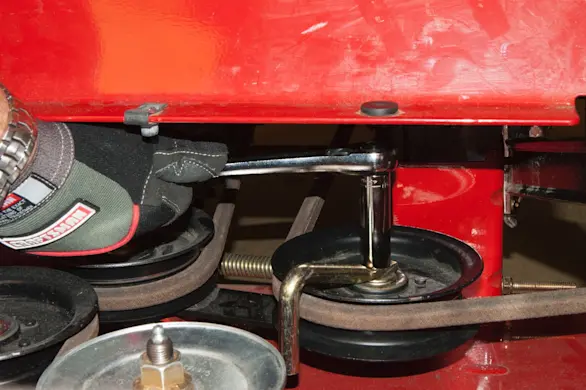
PHOTO: Loosen the belt guide nut. 
PHOTO: Release the belt from the blade pulleys. 
PHOTO: Release the blade belt from the electric clutch. 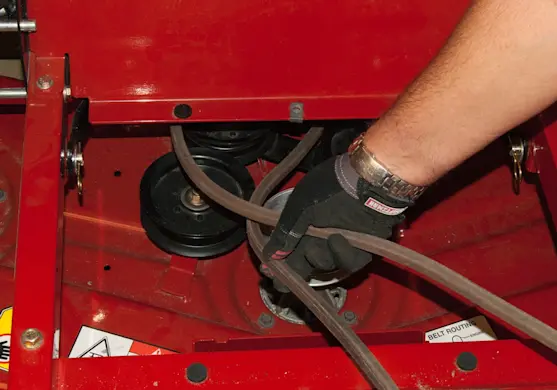
PHOTO: Remove the blade belt.
- 6. Install the new blade belt
Wrap the blade belt around the electric clutch pulley on the engine crankshaft.
Push the blade belt forward and up onto the deck.
Place the belt around the spring-loaded idler arm pulley.
Move the belt guide to its original position and tighten the mounting nut on the belt guide.
Route the belt over the center and right-side deck pulleys.
Push on the idler arm to release belt tension and wrap the belt around the left deck pulley.
Slowly release the idler arm.
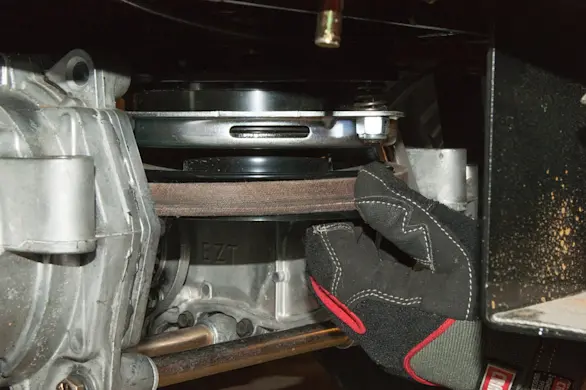
PHOTO: Install the new belt on the electric clutch. 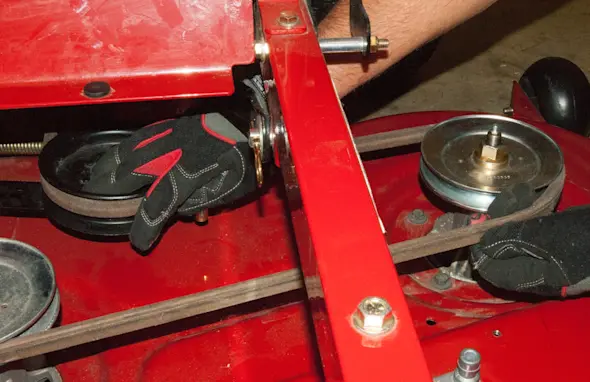
PHOTO: Roll the belt on the pulley.
- 7. Reinstall the pulley covers
Reinstall the pulley covers and tighten the mounting bolts.
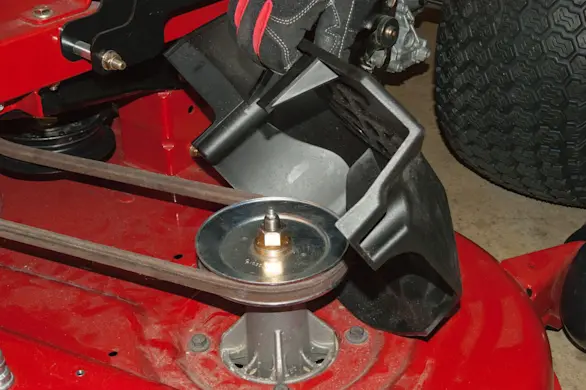
PHOTO: Reinstall the pulley cover.
- 8. Reinstall the floorboard
Reinstall the floorboard and secure it with the mounting bolt.
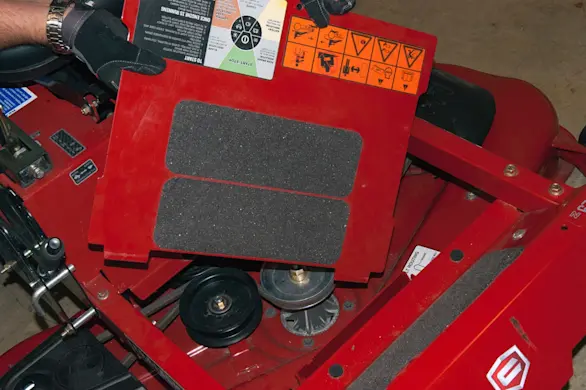
PHOTO: Reinstall the floorboard.
- 9. Reconnect the spark plugs
Reconnect the spark plug wires on the spark plugs.
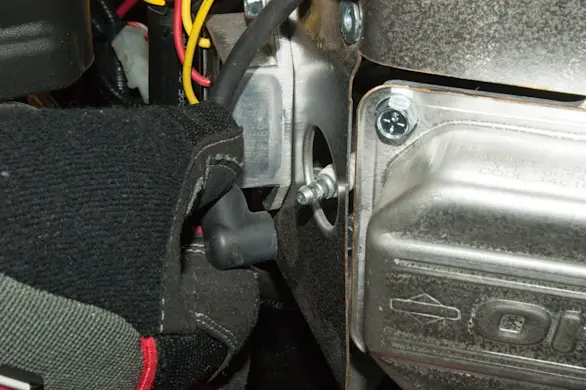
PHOTO: Reconnect the spark plugs.