- Kenmore refrigerator water filters
- Whirlpool refrigerator water filters
- Samsung refrigerator water filters
- GE refrigerator water filters
- LG refrigerator water filters
- Frigidaire refrigerator water filters
- KitchenAid refrigerator water filters
- Maytag refrigerator water filters
- Kenmore Elite refrigerator water filters
- Estate refrigerator water filters
- GE Profile refrigerator water filters
- Amana refrigerator water filters
- Bosch refrigerator water filters
- Dacor refrigerator water filters
- Electrolux refrigerator water filters
Top DIY repair help
View All Repair Categories
Appliances
Lawn & Garden
Power Tools
Home Improvement
Sports & Leisure
Heating & Cooling
Quick Links
How to replace the oven broil element on an electric range
less than a minute readAug 02Lyle Weischwill
Repair time and Difficulty
15 minutes or less
Tools Required
- Nut driver set
- Pliers
- Work glvoes
This oven repair guide explains how to replace the oven broil element in an electric range. In some cases, you might see visible damage on the element, but the element can seem intact and still not heat. Replace the broil element with a manufacturer-approved replacement part if the broiler doesn't heat or if the broil element is damaged.
This repair procedure works for replacing the broil element in most ranges, including Kenmore, Whirlpool, Frigidaire, GE, KitchenAid, Amana, Bosch, LG and Samsung.
Instructions
- 1. Turn off power to the range
Unplug the range or shut off the circuit breakers for the range.
Warning: If you shut off the house circuit breakers to disconnect power to the range, verify that power is off by checking that the digital display is dead. Electric ranges use 2 breakers for the range that are often connected together on the breaker panel. If the 2 breakers for your range aren’t connected, make sure you turn both breakers off. Leaving a breaker on can send power to the broil element even though the digital display is dead.Tip: Shutting off the circuit breakers for the range works best for this repair because you don’t have to pull the range out of the cabinet. If you pull out the range to unplug it, use cardboard under the range to protect the floor from scratches.
- 2. Remove the broil element
Open the oven door and remove the oven racks.
Remove the broil element mounting screws.
Remove the broil element support mounting screws and remove the supports.
Carefully pull the broil element forward to expose the wires connected to the back of the element.
Disconnect the wires, taking care not to let the wires slip through the holes at the back of the oven. If the wires slip through the holes, you’ll need to pull the oven out of the cabinet and remove the back cabinet panel to retrieve them.
Remove the broil element. Use pliers to pull the wires off the broil element if necessary.
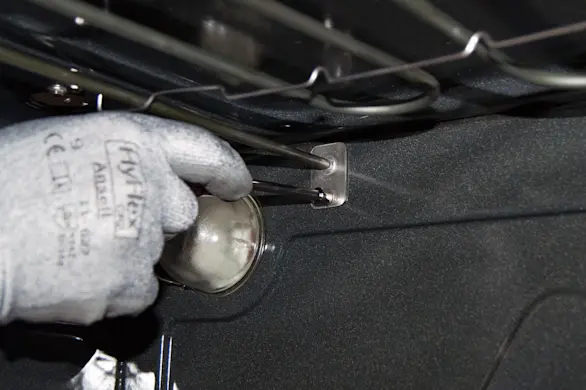
PHOTO: Remove the rear mounting screws. 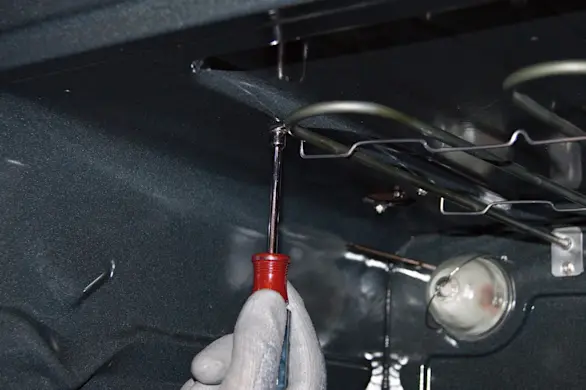
PHOTO: Remove the support bracket screws. 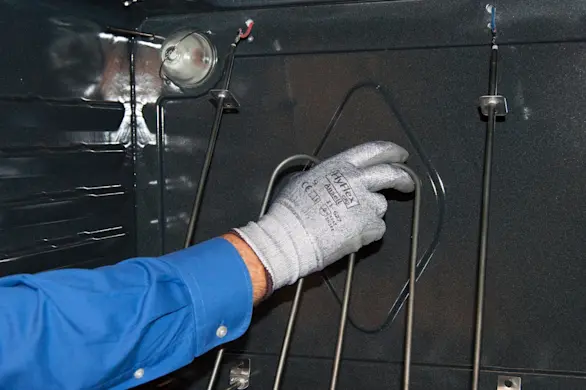
PHOTO: Pull the broil element forward. Tip: If you can't complete this repair because the door gets in your way, remove the door, following instructions in your owner's manual. You might need help lifting the door off the oven. Set the door on a pad.
- 3. Install the new broil element
Connect the wires to the broil element.
Push the ends of the broil element through the holes in the oven cavity and reinstall the mounting screws.
Reinstall the broil element supports and secure them with the mounting screws.
Reinstall the oven racks and close the oven door.
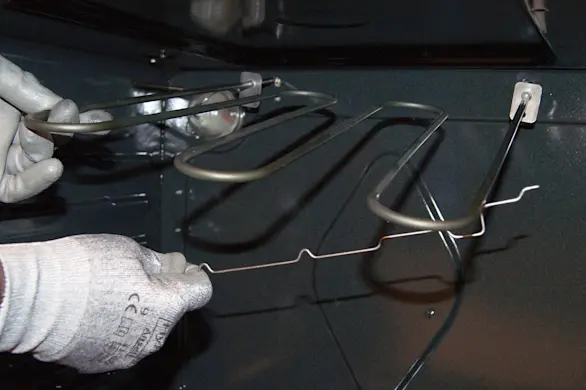
PHOTO: Install the new broil element.
- 4. Restore power to the range
Plug the range back into the electrical wall outlet or turn on the house circuit breakers for the range.
If you pulled out the range to unplug it, push the range into position and ensure that the rear leveling foot properly engages with the anti-tip bracket so the range doesn’t fall forward when you open the oven door and pull out a loaded oven rack.