- Kenmore refrigerator water filters
- Whirlpool refrigerator water filters
- Samsung refrigerator water filters
- GE refrigerator water filters
- LG refrigerator water filters
- Frigidaire refrigerator water filters
- KitchenAid refrigerator water filters
- Maytag refrigerator water filters
- Kenmore Elite refrigerator water filters
- Estate refrigerator water filters
- GE Profile refrigerator water filters
- Amana refrigerator water filters
- Bosch refrigerator water filters
- Dacor refrigerator water filters
- Electrolux refrigerator water filters
Top DIY repair help
View All Repair Categories
Appliances
Lawn & Garden
Power Tools
Home Improvement
Sports & Leisure
Heating & Cooling
Quick Links
How to replace a window air conditioner ambient thermistor
less than a minute readMay 20Lyle Weischwill
Repair time and Difficulty
45 minutes or less
Tools Required
- Phillips screwdriver
- Work gloves
This DIY repair guide explains how to replace the ambient thermistor in a window air conditioner. The ambient thermistor is a sensor that detects the room air temperature so the electronic control board can regulate the room temperature. If the thermistor isn't working, the air conditioner won't maintain the temperature you set. Replace a malfunctioning ambient thermistor with the manufacturer-approved window air conditioner part.
Use this procedure to replace the ambient thermistor in Kenmore, Frigidaire, Crosley, GE, Haier and LG window air conditioners.
Instructions
- 1. Disconnect electrical power
Unplug the power cord from the wall outlet.
- 2. Pull the air conditioner out of the window
Remove the screws that hold the accordion filler panels in the window frame.
Push the accordion filler panels inward to clear the window frame.
With someone’s help, support the air conditioner and raise the window sash.
Carefully lift the air conditioner out of the window and set it on a stable work surface.

PHOTO: Place the air conditioner on a stable work surface.
- 3. Remove the front grille panel and filter
Grasp the sides of the front grille panel at the top and pull the front grille panel out and off of the air conditioner.
Pull the filter out.
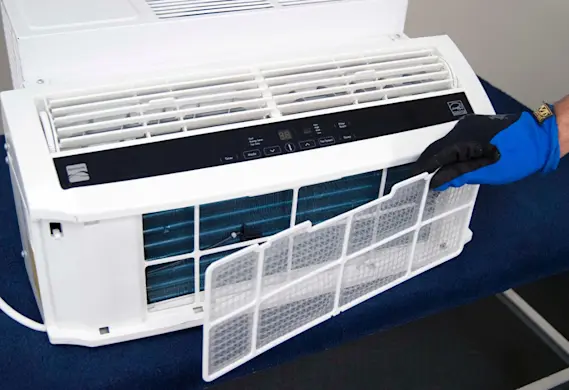
PHOTO: Remove the air filter. Tip: Take this opportunity to clean the air filter if necessary.
- 4. Remove the control panel
Remove the screws from the sides and bottom of the control panel.
Pull the control panel up and hold it above the air conditioner. Unplug the wire harness connection for the user interface control board.
Set the control panel aside.
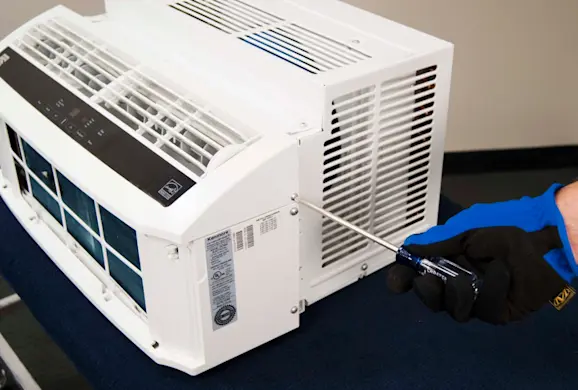
PHOTO: Remove the screws from the sides of the control panel. 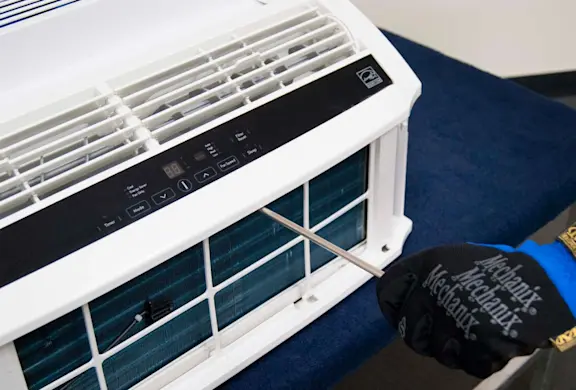
PHOTO: Remove the screws from under the control panel. 
PHOTO: Pull the control panel up and hold above the air conditioner.
- 5. Remove the front panel
Remove the screws from the sides of the front panel.
Pull the front panel off of the air conditioner and set it aside.

PHOTO: Remove the screws from the sides of the front panel. 
PHOTO: Pull the front panel off the air conditioner.
- 6. Remove the outer case
Remove the screws from the exterior of the outer case.
Remove the center stop for the accordion filler panels. Remove the hidden screw that is under that center stop.
Pull outward on the bottom of the outer case and remove the outer case from the air conditioner.

PHOTO: Remove the screws from both sides of the outer case. 
PHOTO: Remove the screws on top of the outer case. 
PHOTO: Remove the screws on the back of the outer case. 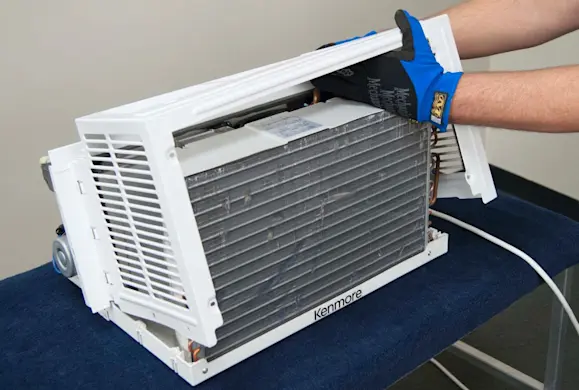
PHOTO: Remove the outer case.
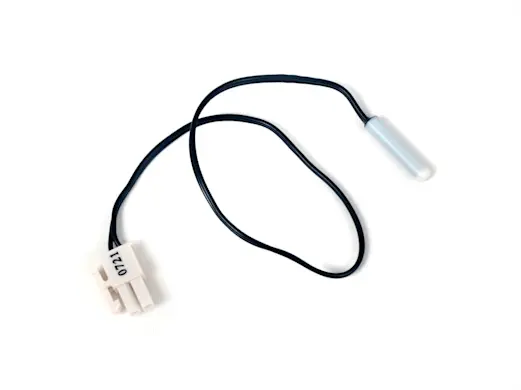
- 7. Remove the ambient thermistor
Remove the screws from the electronic control board case. Pull out the cover of the electronic control board case to expose the electronic control board.
Disconnect the black ambient thermistor wire from the T1 connector on the electronic control board.
Pull the ambient thermistor out of the mounting clip on the front of the evaporator.
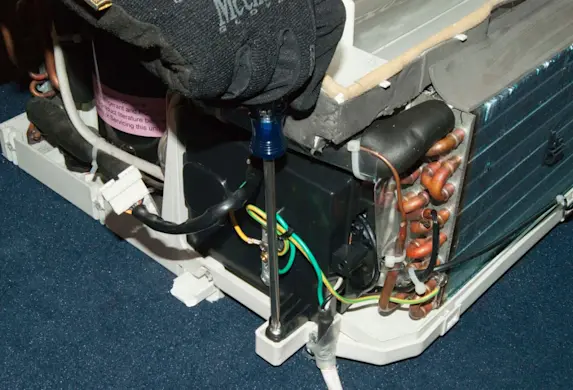
PHOTO: Remove the screws from the control board case. 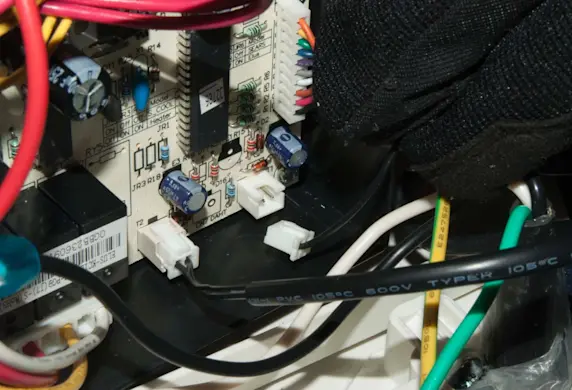
PHOTO: Disconnect the black ambient thermistor wire from T1 connector on the control board. 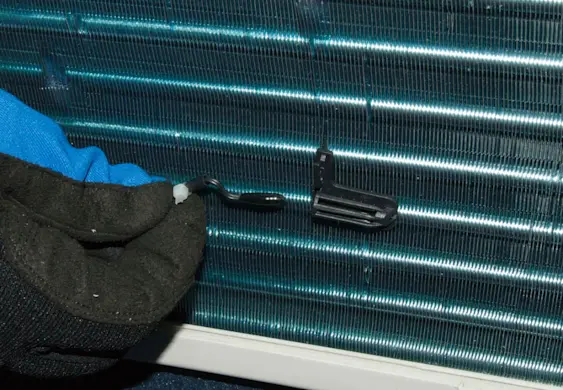
PHOTO: Pull the ambient thermistor out from the mounting clip.
- 8. Install the new ambient thermistor
Insert the new ambient thermistor in the mounting clip on the front of the evaporator.
Plug the wire harness for the ambient thermistor into the T1 connector on the electronic control board.
Position the cover of the electronic control board case in place and reinstall the screws.
Tip: Make sure that wires aren’t pinched when reinstalling the electronic control board cover.
- 9. Reinstall the outer case and front panel
Position the outer case properly on the air conditioner.
Reinstall the screws in the outer case including the hidden screw in the center.
Position the front panel on the air conditioner and reinstall the mounting screws on the sides of the front panel.
- 10. Reinstall the control panel
Position the control panel above the air conditioner and plug the user interface control wire harness back in.
Position the control panel on the front of the air conditioner and reinstall the mounting screws in the control panel.
- 11. Reinstall the front grille panel and filter
Insert the filter on the front of the air conditioner.
Position the front grille panel on the front of the air conditioner and snap the grille panel into place.
- 12. Restore the power
Plug the air conditioner into the electrical outlet.