- Kenmore refrigerator water filters
- Whirlpool refrigerator water filters
- Samsung refrigerator water filters
- GE refrigerator water filters
- LG refrigerator water filters
- Frigidaire refrigerator water filters
- KitchenAid refrigerator water filters
- Maytag refrigerator water filters
- Kenmore Elite refrigerator water filters
- Estate refrigerator water filters
- GE Profile refrigerator water filters
- Amana refrigerator water filters
- Bosch refrigerator water filters
- Dacor refrigerator water filters
- Electrolux refrigerator water filters
Top DIY repair help
View All Repair Categories
Appliances
Lawn & Garden
Power Tools
Home Improvement
Sports & Leisure
Heating & Cooling
Quick Links
How to replace a water heater temperature and pressure (T&P) relief valve
less than a minute readMay 20Lyle Weischwill
Repair time and Difficulty
15 minutes or less
Tools Required
- Work gloves
- Adjustable wrench
- Pipe thread sealing tape
This DIY repair guide explains how to replace the temperature and pressure (T&P) relief valve in a water heater. The T&P relief valve is a safety feature that opens to let hot water out of the water heater if the temperature or pressure inside the water heater tank gets too high. Replace the T&P relief valve with the manufacturer-approved water heater part if the valve is leaking or is damaged.
Use these steps to replace the T&P relief valve in Kenmore, Rheem, State, A. O. Smith, Whirlpool and Reliance water heaters.
Instructions
- 1. Shut off the electricity
Switch the two house circuit breakers dedicated for the water heater to OFF.
Wear work gloves to protect your hands.

PHOTO: Switch the water heater circuit breakers off.
- 2. Drain the water heater
Turn off the cold water supply to the water heater.
Attach a garden hose to the drain valve located at the bottom of the unit and run the garden hose outside.
Open a hot water faucet in the house or flip the relief valve open on the water heater.
Open the drain valve and allow the tank to drain approximately 10 gallons of water or below the level of the temperature/pressure relief valve (T&P). Then shut off the drain valve.

PHOTO: Turn off the cold water supply. 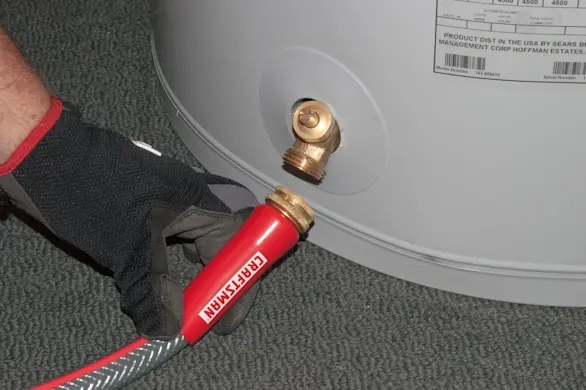
PHOTO: Attach the garden hose the water heater heater drain valve. 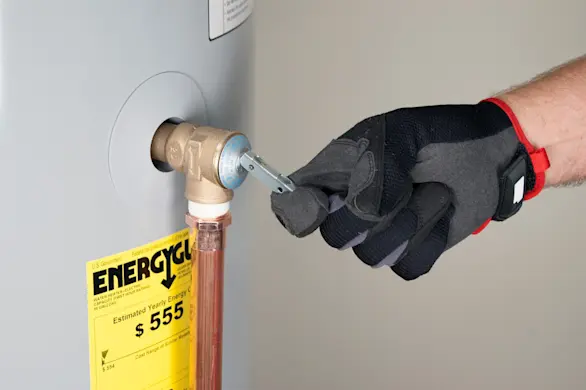
PHOTO: Flip the pressure relief valve to the open position. 
PHOTO: Open the drain valve. 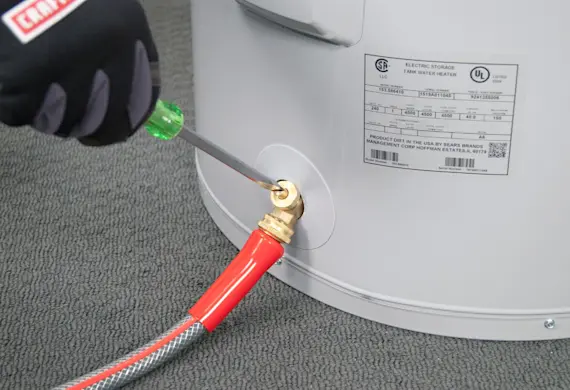
PHOTO: Close the drain valve.
- 3. Disconnect the drain pipe
Disconnect the pipe or tubing from the pressure relief valve.
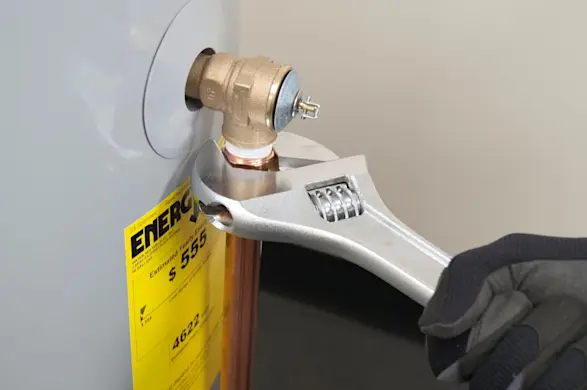
PHOTO: Disconnect the drain pipe.
- 4. Remove the temperature and pressure relief valve
Unthread the temperature/pressure relief valve and remove it from the tank.
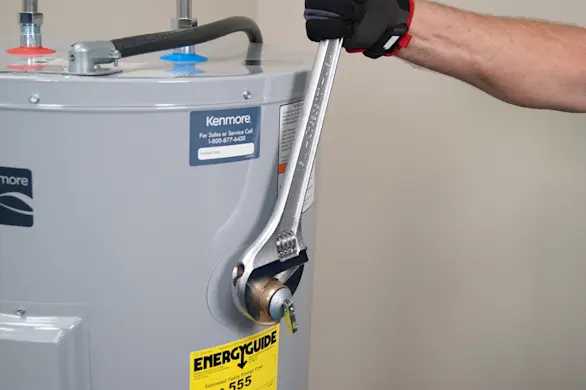
PHOTO: Remove the T&P relief valve.
- 5. Install the temperature and pressure relief valve
Wrap pipe thread-sealing tape around the male end of the T&P valve.
Thread the new T&P valve into the tank and tighten firmly.

PHOTO: Wrap thread sealing tape around the valve fitting threads. 
PHOTO: Install the new T&P relief valve.
- 6. Reconnect the drain pipe
Wrap pipe-sealing tape on the drain pipe and reconnect the pipe or tubing to the new pressure relief valve.
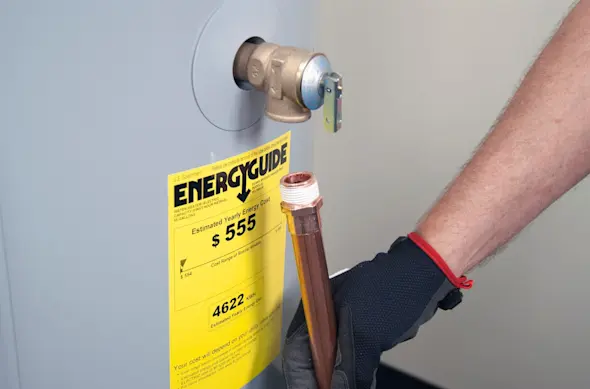
PHOTO: Install the drain pipe.
- 7. Fill the tank with water
Turn the cold water supply on to the water heater and allow the tank to fill with water.
Once you see water coming out of the hot water faucet, turn the faucet off.
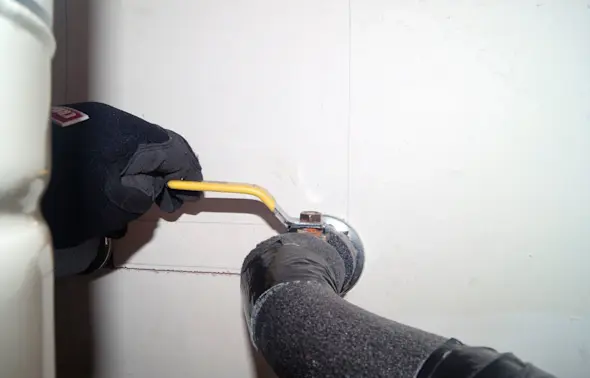
PHOTO: Turn on the cold water supply. Warning: Don't restore power to the water heater until the tank is full of water.Tip: Once the water heater is full of water, water will begin to flow from the hot water faucet that you left open when draining the tank.
- 8. Restore power
Flip the house circuit breakers to the ON position.

PHOTO: Flip the circuit breakers to the On position.