- Kenmore refrigerator water filters
- Whirlpool refrigerator water filters
- Samsung refrigerator water filters
- GE refrigerator water filters
- LG refrigerator water filters
- Frigidaire refrigerator water filters
- KitchenAid refrigerator water filters
- Maytag refrigerator water filters
- Kenmore Elite refrigerator water filters
- Estate refrigerator water filters
- GE Profile refrigerator water filters
- Amana refrigerator water filters
- Bosch refrigerator water filters
- Dacor refrigerator water filters
- Electrolux refrigerator water filters
Top DIY repair help
View All Repair Categories
Appliances
Lawn & Garden
Power Tools
Home Improvement
Sports & Leisure
Heating & Cooling
Quick Links
How to replace a snowblower fuel line
less than a minute readMay 20Lyle Weischwill
Repair time and Difficulty
15 minutes or less
Tools Required
- Work gloves
- Phillips screwdriver
- Slot screwdriver
- Needle-nose pliers
- Wrench set
- Socket and ratchet set
This step-by-step repair guide shows how to replace the fuel line on a snowblower. The fuel line carries fuel from the gas tank to the engine. If the fuel line is cracked or damaged, fuel won't flow to the carburetor to start the engine. Replace a damaged or cracked fuel line with the manufacturer-approved snowblower part.
Use these steps to replace the fuel line on Craftsman, MTD, Murray, Troybilt, Husqvarna, Toro, Murray, Ariens and Noma snowblowers.
Instructions
- 1. Drain the fuel tank and disconnect the spark plug wire
Drain the fuel from the tank or run the snowblower until the tank is empty.
Position the snowblower in a well-ventilated area.
Pull the spark plug wire up and off the plug.
- 2. Remove the electric starter switch
Remove the mounting screws and pull the starter switch off the bracket.
Let the starter switch hang by the electrical cord.

PHOTO: Remove the electric starter switch.
- 3. Remove the engine shroud
Remove the key.
Pull off the choke and throttle knobs.
Remove the acorn nuts that secure the carburetor to the engine.
Remove the muffler shroud mounting screws.
Work the engine shroud off the carburetor mounting studs, leaving the primer hose and breather hose connected.

PHOTO: Remove the key. 
PHOTO: Pull off the throttle knob. 
PHOTO: Remove the choke knob. 
PHOTO: Remove the acorn nuts. 
PHOTO: Remove the muffler shroud screws. 
PHOTO: Pull out the engine shroud.
- 4. Remove the fuel line
Release the fuel line clamp and pull the fuel line off the fuel filter.
Repeat the process to release the other end of the fuel line from the carburetor and remove the fuel line.
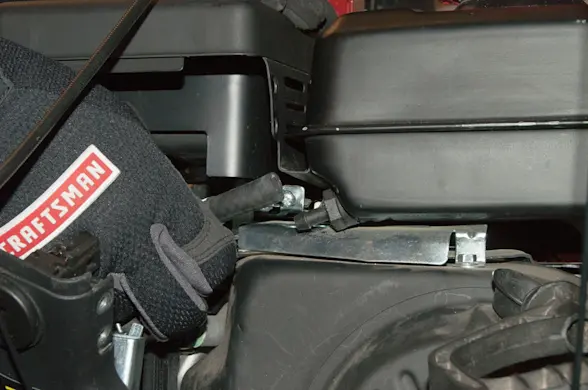
PHOTO: Pull the fuel line off the fuel filter. 
PHOTO: Release the fuel line clamp and pull the fuel line off the carburetor.
- 5. Install the new fuel line
Connect the new fuel line on the tank and secure it with the fuel line clamp.
Repeat the process to connect the other end of the new fuel line to the carburetor.

PHOTO: Connect the new fuel line on the tank and secure it with the clamp. 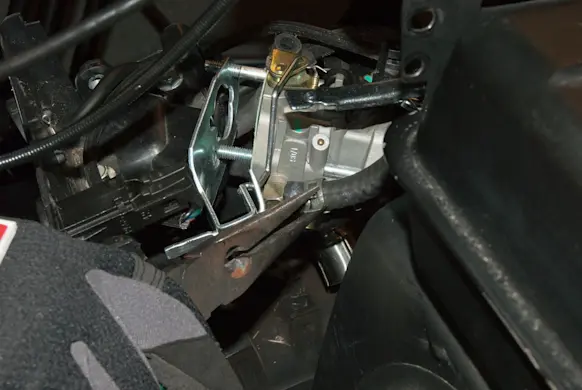
PHOTO: Connect the new fuel line to the carburetor and secure it with the clamp.
- 6. Reinstall the engine shroud
Pull off the muffler shroud before reinstalling the engine shroud.
Remove the belt cover mounting bolts and pull off the belt cover.
Remove the bolts from the red chute support bracket and pull the support bracket forward, releasing the control rod from the 4-way control rod receiver.
Remove the front muffler shroud mounting bolts.
Release the wire control cables from the retainer clip and pull off the muffler shroud.
Align the choke knob shaft and the 2 carburetor mounting posts with the openings on the engine shroud and work the engine shroud onto the engine. Make sure that the breather hose passes through the opening and lines up with the rocker cover breather hose fitting.
Slide the breather hose over the rocker cover fitting and secure the hose with the clamp.
Reinstall the 2 acorn nuts to secure the engine shroud to the engine.
Slide the wire control cables into the retainer clip and position the muffler shroud on the engine.
Reinstall the muffler shroud mounting bolts.
Push the control rod back into the 4-way control rod receiver and line up the support bracket with the mounting holes.
Reinstall the bolts in the red chute support bracket.
Reinstall the belt cover using the mounting bolts.
Reinstall the choke and throttle knobs.

PHOTO: Remove the belt cover bolts. 
PHOTO: Remove the belt cover. 
PHOTO: Remove the chute support bolts. 
PHOTO: Release the control rod. 
PHOTO: Remove the muffler shroud bolts. 
PHOTO: Release the control cable. 
PHOTO: Remove the muffler shroud. 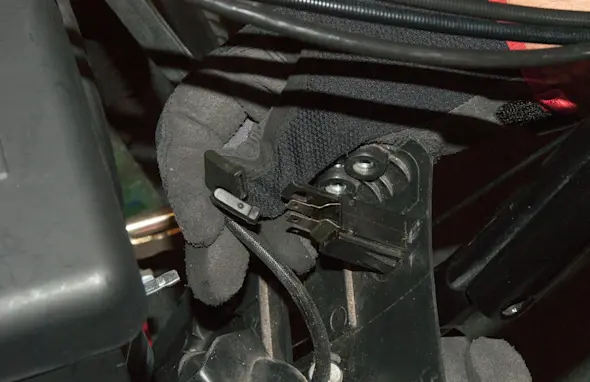
PHOTO: Reconnect the stop switch wires. 
PHOTO: Reinstall the muffler shroud. 
PHOTO: Reinstall the control rod. 
PHOTO: Reinstall the chute support bracket. 
PHOTO: Reinstall the belt cover. 
PHOTO: Reinstall the choke knob. 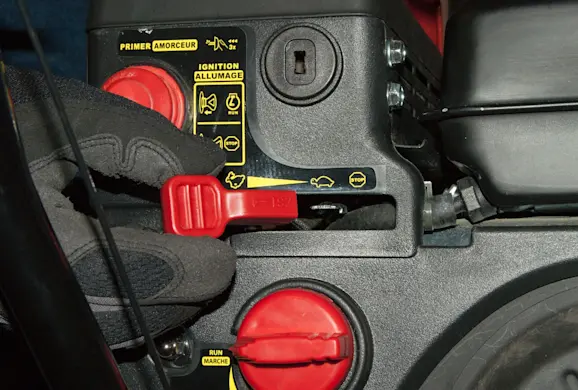
PHOTO: Reinstall the throttle knob. Tip: Removing the muffler shroud is necessary because the engine shroud fits under the bottom lip of the muffler shroud. You can remove the engine shroud without removing the muffler shroud but the muffler shroud must be removed for reassembly.
- 7. Reinstall the electric starter switch
Position the electric starter switch on the switch bracket and reinstall the mounting screws.

PHOTO: Reinstall the starter switch.
- 8. Reconnect the spark plug
Reconnect the spark plug wire.
- 9. Reinstall the key
Push the key into the slot.

PHOTO: Insert the key.