- Kenmore refrigerator water filters
- Whirlpool refrigerator water filters
- Samsung refrigerator water filters
- GE refrigerator water filters
- LG refrigerator water filters
- Frigidaire refrigerator water filters
- KitchenAid refrigerator water filters
- Maytag refrigerator water filters
- Kenmore Elite refrigerator water filters
- Estate refrigerator water filters
- GE Profile refrigerator water filters
- Amana refrigerator water filters
- Bosch refrigerator water filters
- Dacor refrigerator water filters
- Electrolux refrigerator water filters
Top DIY repair help
View All Repair Categories
Appliances
Lawn & Garden
Power Tools
Home Improvement
Sports & Leisure
Heating & Cooling
Quick Links
How to replace a riding lawn mower blade drive belt
less than a minute readAug 02Lyle Weischwill
Repair time and Difficulty
45 minutes or less
Tools Required
- Pliers
- Work gloves
This DIY riding mower repair guide gives step-by-step instructions for replacing a blade drive belt on a riding lawn mower. The blade drive belt connects the engine pulley to the mower deck pulleys and spins the cutting blades. A worn blade belt won't spin the blades fast enough to cut the grass. A broken blade belt won't spin the blades at all. Examine the blade drive belt and replace it with a manufacturer-approved replacement part if you find damage or excessive wear.
Use this procedure to replace the blade drive belt on Craftsman, MTD, Husqvarna, Murray, Toro, Troybilt, Poulan and Snapper riding lawn mowers and lawn tractors.
Instructions
- 1. Disconnect the spark plug
Park the tractor on a level surface and set the parking brake.
Turn the ignition switch off and remove the key.
Wear work gloves to protect your hands.
Lift the tractor hood and disconnect the spark plug wire.
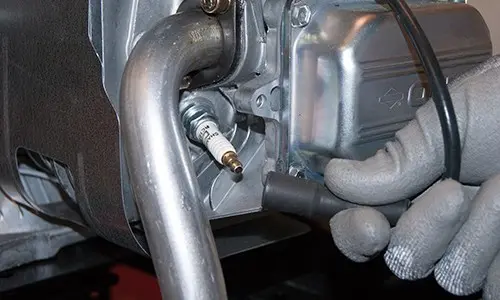
PHOTO: Disconnect the spark plug. Tip: Disconnect both spark plug wires if your tractor has 2 cylinders.
- 2. Pull off the mower deck
Lower the mower deck to its lowest position.
Disengage the cutting blades.
Roll the blade belt off the engine pulley and release the belt from the belt keepers.
Remove the front lift link support retaining pin and washer, and then detach the support from the deck.
Remove the left suspension arm retaining clip and washer. Then detach the arm from the tractor frame.
Remove the left rear deck bracket retaining clip and washer. Then release the bracket from the deck.
Repeat the process on the other side of the deck to disconnect the right suspension arm and right rear deck bracket.
Pull the deck out far enough to access the blade drive belt.
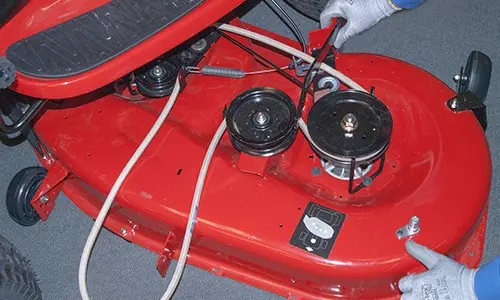
PHOTO: Pull out the mower deck. Warning: After you disconnect the rear lift links, the spring-loaded attachment lift lever exerts more tension on the lever so don't use the lever until you reinstall the mower deck.
- 3. Remove the old blade drive belt
If the belt is still intact, note the routing of the blade belt through the pulleys and belt keepers.
If the belt is broken, refer to the belt routing sticker on the deck or your owner's manual for guidance.
Release the belt from the idler pulleys, belt keepers and mandrel pulleys.
Pull the belt off the mower deck.
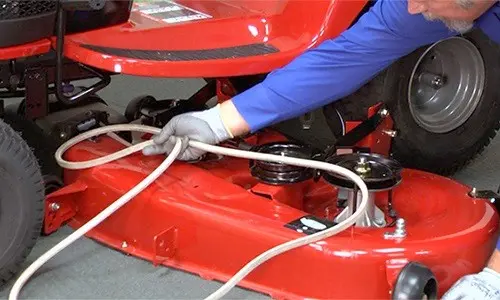
PHOTO: Remove the old blade drive belt. Tip: Take a photo of the belt routing to refer to when you install the new belt.
- 4. Install the new blade drive belt
Loop the new belt around both mandrel pulleys.
Route the belt through the idler pulleys and belt keepers.
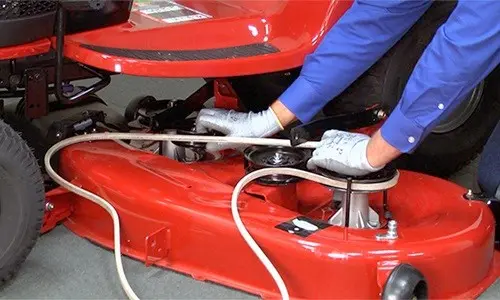
PHOTO: Install the new belt.
- 5. Reinstall the mower deck
Push the deck under the tractor frame.
Reconnect the front lift link support to the deck with the washer and retaining clip.
Reconnect the left suspension arm and deck bracket with the washers and retaining clips.
Repeat the process to reconnect the right suspension arm and deck bracket.
Route the blade belt through the belt keepers and roll the blade belt onto the engine pulley.
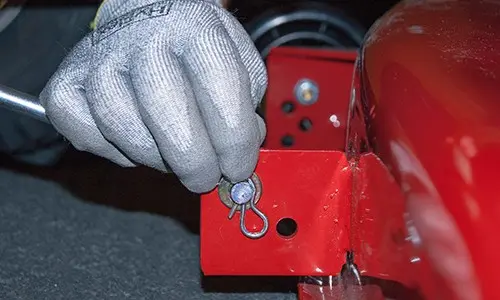
PHOTO: Reinstall the mower deck.
- 6. Reconnect the spark plug
Reconnect the spark plug wire and lower the tractor hood.
Tip: Reconnect both spark plug wires if your engine has 2 cylinders.