- Kenmore refrigerator water filters
- Whirlpool refrigerator water filters
- Samsung refrigerator water filters
- GE refrigerator water filters
- LG refrigerator water filters
- Frigidaire refrigerator water filters
- KitchenAid refrigerator water filters
- Maytag refrigerator water filters
- Kenmore Elite refrigerator water filters
- Estate refrigerator water filters
- GE Profile refrigerator water filters
- Amana refrigerator water filters
- Bosch refrigerator water filters
- Dacor refrigerator water filters
- Electrolux refrigerator water filters
Top DIY repair help
View All Repair Categories
Appliances
Lawn & Garden
Power Tools
Home Improvement
Sports & Leisure
Heating & Cooling
Quick Links
How to replace a dehumidifier user interface control board
less than a minute readMar 05Lyle Weischwill
Repair time and Difficulty
30 minutes or less
Tools Required
- Phillips screwdriver
- Work gloves
This DIY repair guide explains how to replace the user interface control board on a dehumidifier. The user interface control board lets you program the dehumidifier. If the user interface won't respond when you push the buttons, replace it with the manufacturer-approved dehumidifier part.
This basic procedure works for Kenmore, LG and DeLonghi dehumidifiers.
Instructions
- 1. Disconnect power
Unplug the power cord from the wall outlet.
- 2. Remove the collection bucket
Pull the water collection bucket out of the front of the dehumidifier case.

PHOTO: Remove the collection bucket.
- 3. Remove the air filter
Pull the air filter out of the bottom of the front grille.
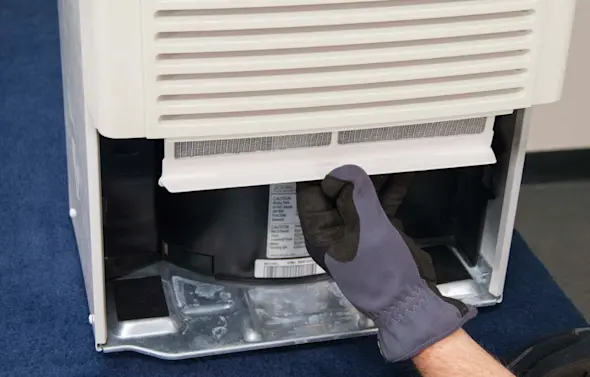
PHOTO: Remove the air filter. Tip: Clean the air filter if it is dirty.
- 4. Remove the front grille
Remove the 2 screws at the bottom of the front grille that secure it to the frame.
Lift the front grille off of the front of the grille. The user interface control board wires are still attached.
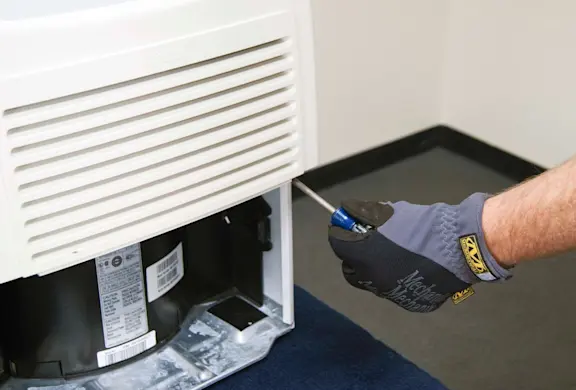
PHOTO: Remove the screws. 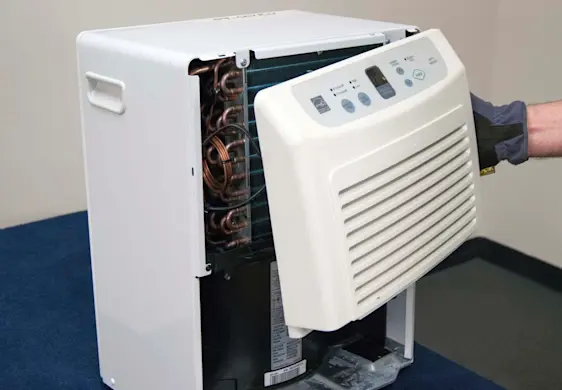
PHOTO: Pull the front grille up and off.
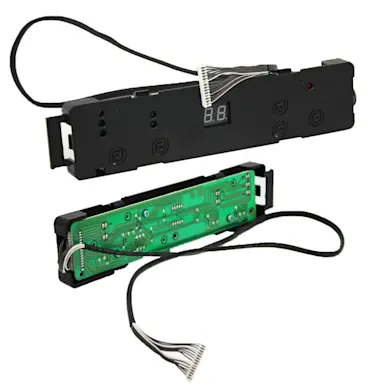
- 5. Remove the user interface control board
Remove the mounting screws that attach the user interface control board to the control panel.
Lift the user interface control board out of the front grille.
Unplug the user interface wire harness connection and discard the user interface control board.
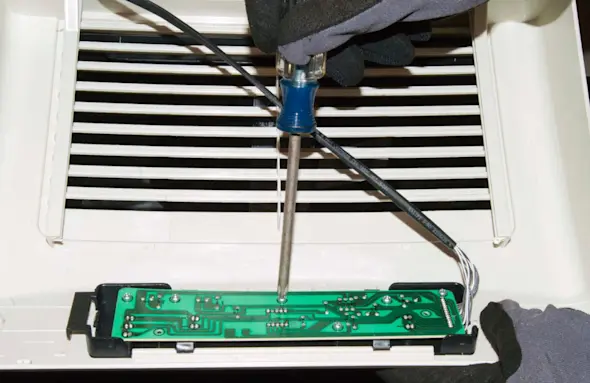
PHOTO: Remove the mounting screws. 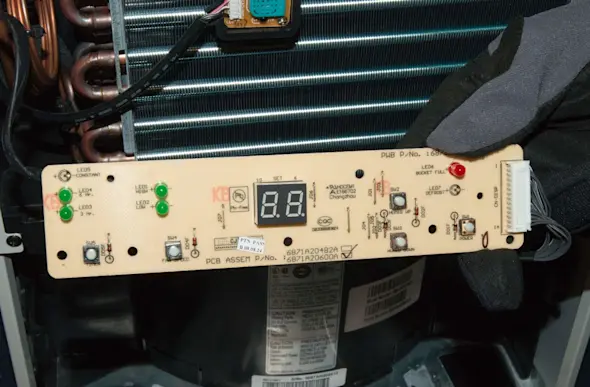
PHOTO: Lift the user interface control board out of the grille. 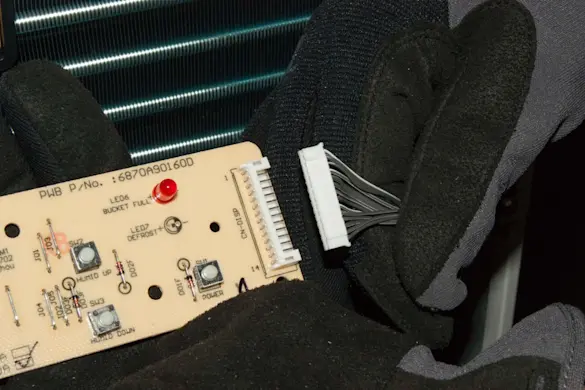
PHOTO: Unplug the wire harness.
- 6. Install the new user interface control board
Plug the wire harness into the new user interface control board.
Position the user interface control board in the control panel and secure it with the mounting screws.
- 7. Reinstall the front grille
Position the front grille on the dehumidifier and secure it with the mounting screws.
- 8. Replace the filter and collection bucket
Push the filter back into the front grille.
Reinstall the collection bucket in the front of the dehumidifier.
- 9. Restore power
Plug the dehumidifier back into the wall outlet.