- Kenmore refrigerator water filters
- Whirlpool refrigerator water filters
- Samsung refrigerator water filters
- GE refrigerator water filters
- LG refrigerator water filters
- Frigidaire refrigerator water filters
- KitchenAid refrigerator water filters
- Maytag refrigerator water filters
- Kenmore Elite refrigerator water filters
- Estate refrigerator water filters
- GE Profile refrigerator water filters
- Amana refrigerator water filters
- Bosch refrigerator water filters
- Dacor refrigerator water filters
- Electrolux refrigerator water filters
Top DIY repair help
View All Repair Categories
Appliances
Lawn & Garden
Power Tools
Home Improvement
Sports & Leisure
Heating & Cooling
Quick Links
How to convert a gas range to operate on LP gas
less than a minute readSep 09Lyle Weischwill
Repair time and Difficulty
15 minutes or less
Tools Required
- Wrench set
- Socket wrench set
- Slot screwdriver
- Metric nut driver set
- Work gloves
This DIY repair guide gives step-by-step instructions on how to convert a natural gas range to operate on liquid propane (LP) gas. Gas ranges typically come equipped to operate on natural gas. Install the LP conversion kit if you want to use LP gas. This guide is for reference only; carefully follow the instructions included with the manufacturer-approved LP kit to convert your range.
This guide shows how to convert some Kenmore, Frigidaire and Electrolux ranges to operate on LP gas.
Instructions
- 1. Shut off electricity and gas
At the breaker panel or fuse box, shut off power to the range. Turn the gas shut-off valve to the off position.
- 2. Remove the grates, burner caps and burner heads
Remove all the cooktop grates and then lift the gas burner caps off the burner heads.
Using a 3/16-inch socket, remove the nuts that secure the gas burner heads in place.
Remove the burner heads from the cooktop.

PHOTO: Remove the grates. 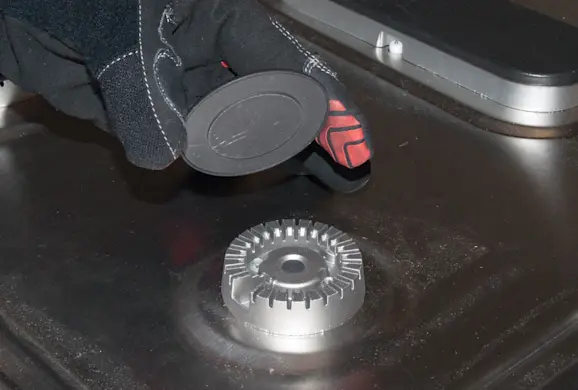
PHOTO: Remove the burner caps. 
PHOTO: Remove the burner heads. Tip: Mark the burner caps and heads with a note indicating their location (Left Front, Right Front, Left Rear, Right Rear).
- 3. Remove the natural gas orifices
Using a 7-mm nut driver, remove the orifices from the burner orifice holders.
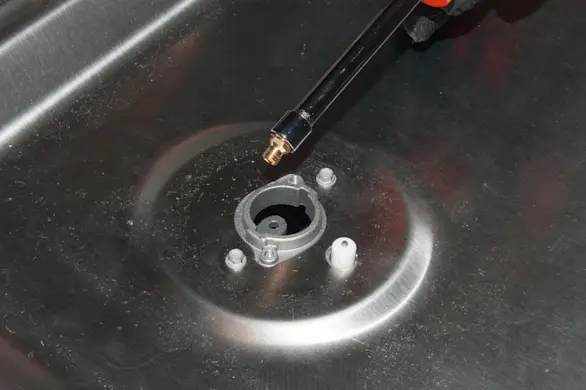
PHOTO: Remove the orifices.
- 4. Install the LP orifices
Determine which LP orifices go to the range burners. Screw the LP orifices firmly onto the burner orifice holders.
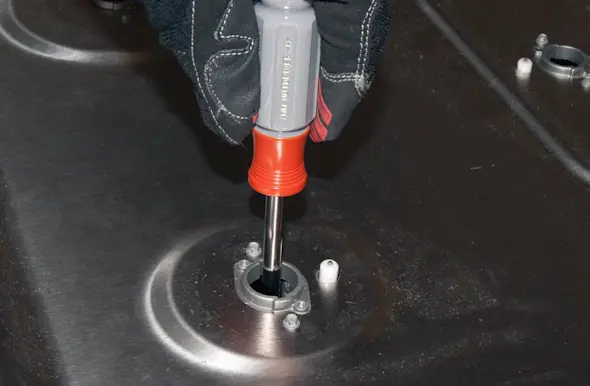
PHOTO: Install the LP orifices.
- 5. Reinstall the burner heads, burner caps and grates
Position the burner heads in the correct locations.
Reinstall the burner head screws, tightening them firmly.
Cover the burner heads with the correct burner caps.
Reinstall the grates on the cooktop.
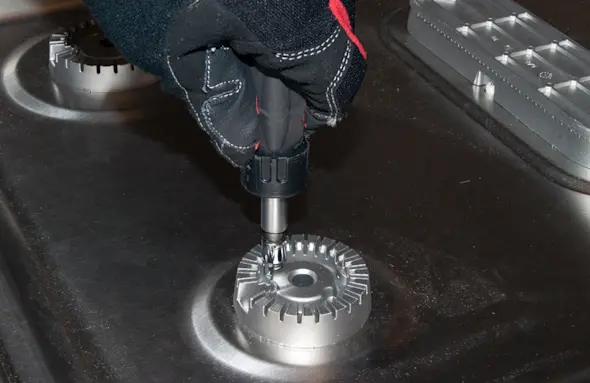
PHOTO: Reinstall the burner heads. 
PHOTO: Reinstall the burner caps. 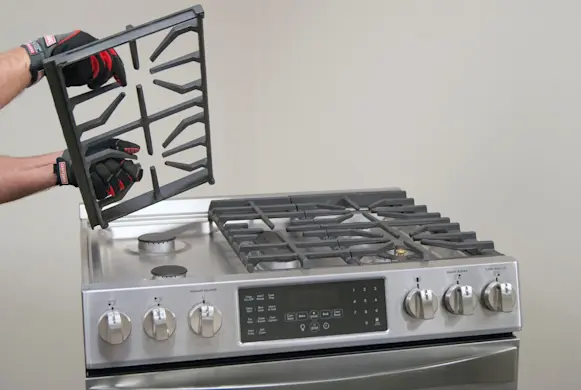
PHOTO: Reinstall the grates.
- 6. Remove the warmer drawer
Open the warmer drawer fully.
Pull up on the left release lever and pull the warmer drawer out slightly.
Push down on the right release lever and pull the warmer drawer out of the range.
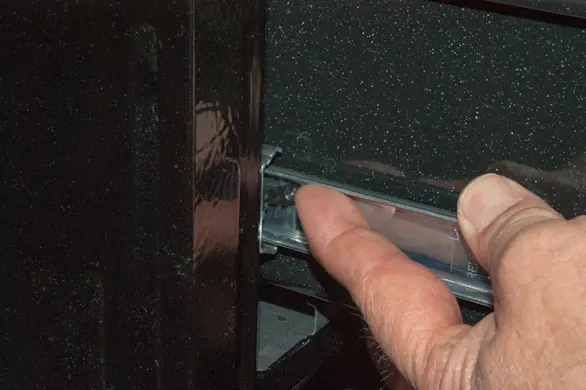
PHOTO: Push the left release lever up. 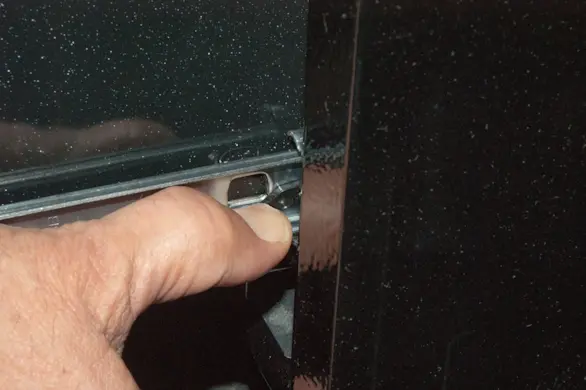
PHOTO: Push the right release lever down.
- 7. Convert the pressure regulator
Using a wrench, unscrew and remove the hex nut cap on the pressure regulator.
Remove the plastic conversion plug.
Flip the conversion plug over and reinsert it into the pressure regulator.
Reinstall the hex nut cap.
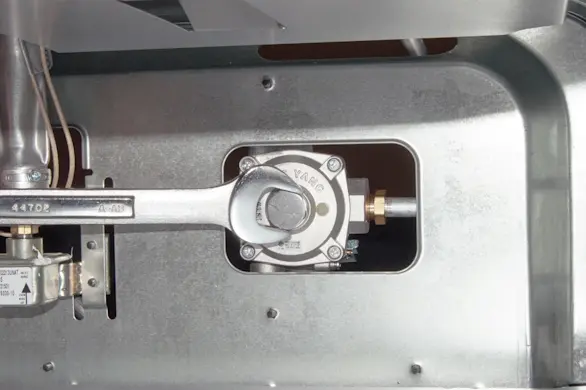
PHOTO: Remove the hex nut cap. 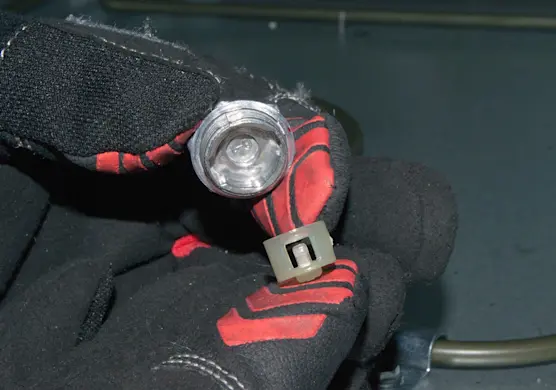
PHOTO: Remove the plastic conversion plug.
- 8. Convert the oven broil burner
Position a wrench on the gas tube to hold it stationary.
Using a second wrench, tighten the broil burner orifice spud 1- 1/2 turns to bottom out snug against the burner tube. Do not over-tighten.
Loosen the air shutter lock screw and open the air shutter fully.
Tighten the air shutter lock screw.
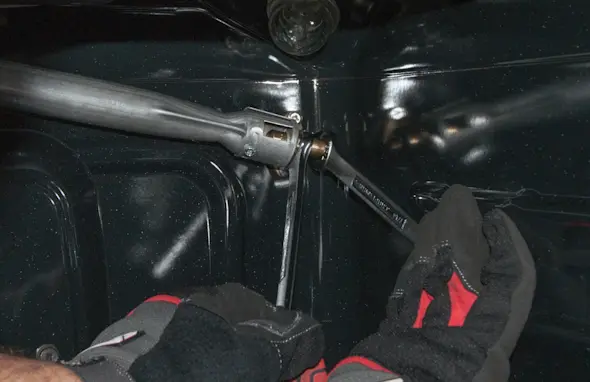
PHOTO: Tighten the broil burner orifice. 
PHOTO: Loosen the air shutter screw. 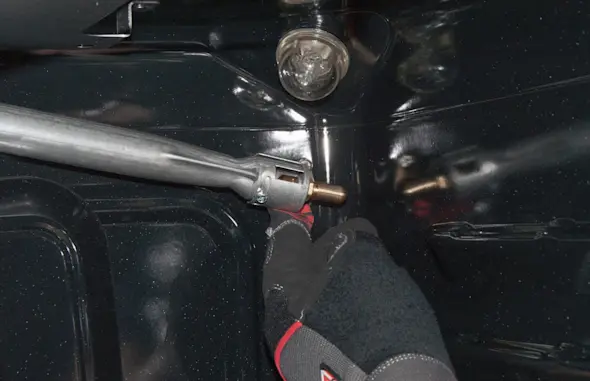
PHOTO: Open the air shutter. 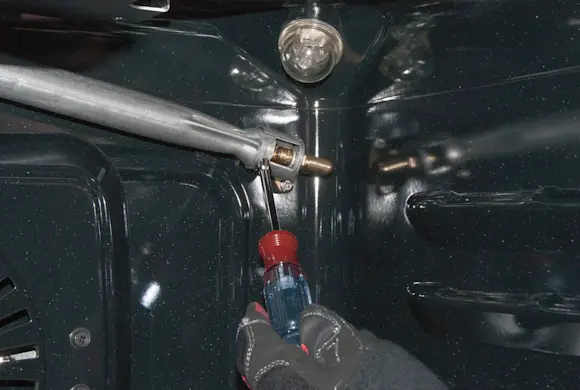
PHOTO: Tighten the air shutter screw.
- 9. Convert the bake burner
Tighten the bake burner orifice spud 1- 1/2 turns to bottom out snug against the safety gas valve. Do not over-tighten.
Loosen the air shutter lock screw and open the air shutter fully.
Tighten the air shutter lock screw.
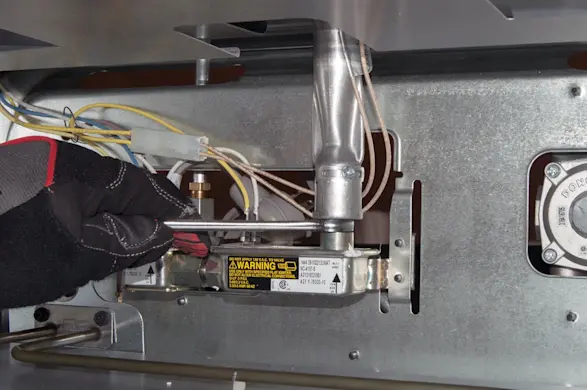
PHOTO: Tighten the bake burner orifice. 
PHOTO: Loosen the air shutter screw. 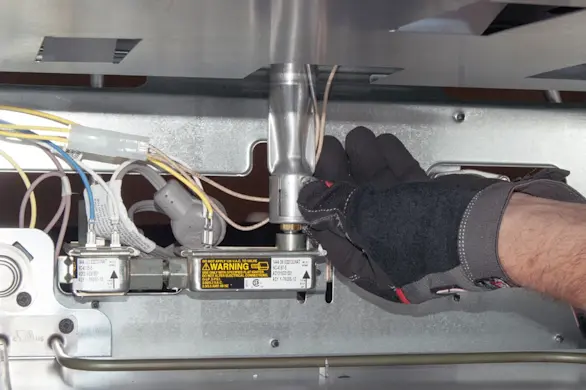
PHOTO: Open the air shutter. 
PHOTO: Tighten the air shutter screw.
- 10. Reinstall the warmer drawer
Position the warmer drawer on the rails and push it shut.
- 11. Reconnect gas and power
Switch on the electrical circuit breakers and the open the gas supply valve.
- 12. Check the burners
Check all surface burners for a proper flame.
Test the oven burners and adjust the air shutters to achieve the proper flames.
Tip: If the oven flame is lifting away from the burner, reduce the air shutter opening.