- Kenmore refrigerator water filters
- Whirlpool refrigerator water filters
- Samsung refrigerator water filters
- GE refrigerator water filters
- LG refrigerator water filters
- Frigidaire refrigerator water filters
- KitchenAid refrigerator water filters
- Maytag refrigerator water filters
- Kenmore Elite refrigerator water filters
- Estate refrigerator water filters
- GE Profile refrigerator water filters
- Amana refrigerator water filters
- Bosch refrigerator water filters
- Dacor refrigerator water filters
- Electrolux refrigerator water filters
Top DIY repair help
View All Repair Categories
Appliances
Lawn & Garden
Power Tools
Home Improvement
Sports & Leisure
Heating & Cooling
Refrigerator Cleaning and Maintenance Checklist
less than a minute readApr 05Lyle Weischwill
Regular maintenance helps your refrigerator run more smoothly, so it uses less energy. Completing tasks like cleaning the condenser coils helps the refrigeration system cool the refrigerator and freezer compartments efficiently—putting less wear and tear on the compressor and fans.
Keeping the door gaskets in good shape helps prevent warm air from leaking into the fridge. Cleaning spills inside the refrigerator and replacing the air filter helps prevent odors.
Complete these routine maintenance tasks to keep your refrigerator in top shape.
☐ Clean the condenser coils
Dust-covered refrigerator coils prevent the refrigerator from running efficiently and cooling properly. Follow the instructions in your owner's manual for cleaning the condenser coils.
Follow the expert tips from Sears Technician Tom Charland for cleaning fridge condenser coils shown in this refrigerator maintenance video:
Tom indicates that most condenser coils are located under the front of a refrigerator on the bottom. You can typically access the coils by removing the grill from the front of the refrigerator. Use a refrigeration coil brush to clean the coils.
Slide the coil brush underneath the refrigerator from front to rear or left to right. Don’t be too vigorous when cleaning coils with the brush to avoid damaging the condenser. Follow the example shown in the video for cleaning the coils. Also, be careful that you don't slide the brush too far to the rear because there's a condenser fan back there that you could contact and damage while cleaning the coils.
You’ll likely pull out a lot of dust and lint from the bottom of the refrigerator when cleaning that area with the coil brush. Use a vacuum cleaner to remove the debris from under and around the fridge. Clean dust off the bottom front toe grill and reinstall it on the refrigerator. Inspect your refrigerator at least twice a year to see if coils need cleaning. Clean the coils when you find them dirty so your fridge operates efficiently.
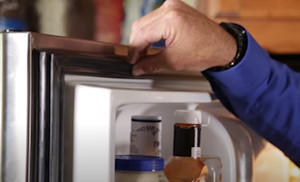
☐ Inspect and maintain the door seal gaskets
Leaky door seal gaskets contribute to high temperatures in the refrigerator and freezer compartments. Warm, moist air leaking into the fridge through bad door seals causes excessive frost build-up on the evaporator which inhibits cooling.
Visually inspect the door gaskets. You should see smooth surfaces on the gaskets with no tears or cracks. Replace any damaged door gasket. Here are links to DIY repair videos for replacing the common types of refrigerator door gaskets:
How to replace a side-by-side refrigerator foamed-in door gasket
How to replace a side-by-side refrigerator press-in door gasket
Clean spills and sticky residue from the edges of the cabinet around the opening to the refrigerator and freezer sections. Sticky residue can catch and tear the door seal gasket.
Tom provides an excellent tip in the above video for lubricating refrigerator door gaskets so they stay flexible and don’t stick to the cabinet and tear when opening the door.
Coat the flat surface of the door gasket with petroleum jelly.
Inspect the door seal gaskets twice a year at the same time that you check the condenser coils.
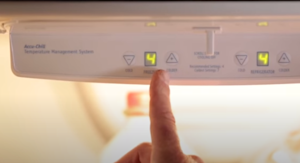
☐ Check and adjust temperature settings
When performing cleaning and maintenance on your refrigerator, look at the temperature settings. Recommended or default temperature settings may not be the best for your fridge.
Adjust the temperature settings as described by Tom Charland in the above video.
Tom recommends that you set the freezer temperature to a point where you can scoop firm ice cream out of its container. If you find it hard to dig a spoon or scoop into ice cream, then the freezer temperature is likely set too cold. If ice cream is soft and mushy, then you’ll probably need to adjust the freezer setting to a colder temperature.
If ice cream isn’t the consistency that you want it, adjust freezer temperature one degree at a time to avoid over-adjustment. Wait 48 hours after the incremental adjustment to give the fridge time to equalize temperatures consistently and for the ice cream to react to the new temperature setting.
Check the ice cream scoop-ability and continue to slowly adjust freezer temperature until ice cream condition is to your liking.
Once you get the ice cream condition right, you then know that the freezer setting is adjusted so the refrigerator cooling system only runs as long as necessary to keep items in the freezer frozen without wasting energy.
After setting the freezer temperature right, adjust the refrigerator section temperature setting to keep beverages at the temperature that you prefer. Use the same incremental setting adjustment with the 48-hour waiting period before checking beverages as you find the perfect setting for the fridge section temperature.
Using this method of adjusting control settings allows you to find the right temperatures inside the fridge to meet your needs while also avoiding excess energy use because the refrigerator will only run long enough to maintain those temperatures inside the fridge and freezer compartments.
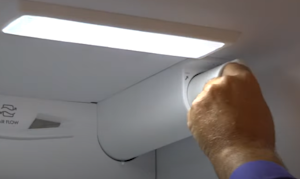
☐ Replace the water filter and air filter
Many refrigerators have a water filter that you’ll need to change every 6 to 12 months. Some refrigerators have a built-in air filter that you’ll also need to change regularly to help keep the fridge odor-free.
Many refrigerators that use a water filter have a filter replacement reminder light on the control. Replace the water filter as indicated by the reminder light.
If your fridge doesn’t have a reminder light, replace the water filter every 6 to 12 months as directed in its owner’s manual.
Use our convenient Refrigerator Water Filter Finder to find the right replacement filter for your fridge.
Replacing the air filter at the same time that you replace the water filter will help keep your refrigerator smelling fresh.
If your refrigerator doesn’t have an air filter, you can add a universal air filter as shown in this video:
☐ Clean the inside of your fridge
Clean spills on shelves and in drawers inside the refrigerator to prevent odor from building up inside your refrigerator. Wipe any splashes and spill from the liner walls inside the fridge.
A thorough cleaning of the inside of your refrigerator will keep smells away and help keep your stored foods safe.
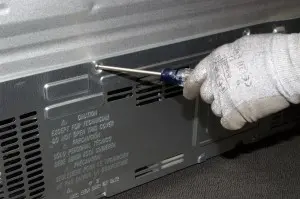
☐ Clean the defrost drain pan
The defrost drain pan is located next to the compressor at the bottom of the refrigerator in the machine compartment. This drain pan collects the condensate water that drips off the evaporator fins during the automatic defrost cycle.
The defrost drain pan can sometimes form mildew or collect insects (or rodents in some cases).
Follow these steps to clean the defrost drain pan in your refrigerator:
Unplug the fridge or shut off the house circuit breaker for the refrigerator to disconnect electrical power.
Pull the refrigerator out from the wall to access the machine compartment cover on the back of the fridge.
Remove the machine compartment cover.
Wipe out the defrost drain pan using a bleach and water solution. Wear protective gloves when handling the bleach solution.
Reinstall the machine compartment cover.
Restore power to the refrigerator and move it back into place.
Clean the defrost drain pan yearly or when you smell odors coming from the bottom of the refrigerator.
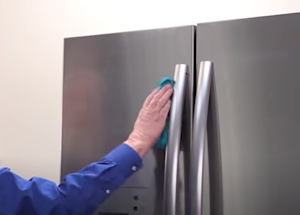
☐ Clean the outside of the fridge
If your refrigerator has an ice and water dispenser, clean that area first. Remove the drip tray and wipe down all areas inside the dispenser housing using a cleaning cloth moistened with a solution of mild detergent and water.
Next, wipe down the entire outside cabinet of the fridge.
Remove detergent residue from the dispenser and outside cabinet of the fridge by wiping them down with a cloth moistened with plain water.
Dry all areas with a clean towel or cloth.
Use stainless steel cleaner to polish the doors if you have a stainless model of fridge. Here’s a video that shows how to clean stainless steel appliances:

☐ Schedule Clean & Maintain Service by a Sears Technician
Set up the Clean & Maintain Service yearly to have a Sears Tech professionally check and maintain your refrigerator. During the service call, the technician will:
Check and adjust the thermostat, temperature controls and air damper as needed.
Check refrigerator and freezer door seals.
Inspect the defrost drain for blockage and leaks.
Check for proper ice dispenser operation.
Inspect the electrical system.
Clean the condenser coils.
Clean the refrigerator’s exterior.
Check the water filter and advise of filter options if a new filter is needed.
Check the automatic defrost cycle.
Check defrost evaporator fan operation.
Check cabinet level and adjust as needed.
Inspect the ice bin for fresh ice and empty if needed.
Check the water dispenser for proper water flow.
Clean the defrost drain pan.
Clean the refrigerator and freezer door gaskets.
Having a Sears Technician professionally clean and maintain your refrigerator will knock out most of the previous tasks on the above checklist.
Getting a Sears Tech to clean and maintain your refrigerator annually will help prevent unexpected breakdowns and will also help your refrigerator last longer.
Trust Sears Home Services and Sears PartsDirect to help you keep your refrigerator and all of your home appliances in top shape.