How to clean stainless steel appliances video
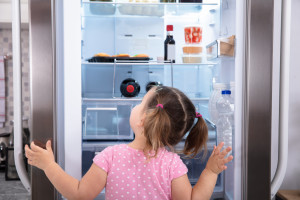

Stainless steel appliances are enjoying a long, popular reign, and are a big plus among potential homebuyers. Yet anyone who lives with them knows that they show fingerprints and even the tiniest food spatters.
The Sears PartsDirect video below has tips for cleaning and maintaining stainless steel appliances to help you keep the shine that makes them so attractive.
To keep the inside of your appliances running as good as the outside looks, check out all of our DIY Repair Help for repair guides, troubleshooting tips, error code charts and more.
Hi. Wayne here from Sears PartsDirect. Today I’m going to show you a few easy steps to clean and maintain stainless steel surfaces on your appliances.
Stainless steel appliances are popular because they help create a bright look in your kitchen—when you keep the stainless surfaces clean. Keeping stainless clean can be challenging because real stainless steel easily collects smudges and fingerprints. Faux stainless steel surfaces resist fingerprints but aren’t impervious to spills and smudges.
We have some simple tips that make it easier for you to keep your stainless appliances looking great. By following these tips, you can spend less time cleaning and more time using the appliances.
Before you begin, gather these cleaning supplies:
Non-abrasive cleaning cloths
Mild dishwashing liquid or a mild detergent without bleach (bleach can harm stainless steel surfaces)
A bucket or other container
Stainless steel cleaner
Thorough cleaning with sudsy water
Start by washing your stainless appliances thoroughly with a mild detergent and water.
Squirt a little dishwashing liquid into about a gallon of warm water. Wet a non-abrasive cloth with the sudsy water and wipe the stainless steel surfaces, starting at the top of the appliance down.
True stainless and some faux stainless surfaces have a horizontal grain in the metal. On surfaces with a grain, always wipe with the grain so you don’t push residue and grime deeper into the grain. This often means wiping back and forth as you work your way from top to bottom.
Next, to rinse the soapy solution off the stainless surfaces, wet a non-abrasive cloth with plain water and again wipe with the grain from top to bottom.
Finally, dry the stainless surfaces with a dry, non-abrasive cloth—wiping with the grain and working from the top of the appliance to the bottom.
Use stainless steel cleaner
Cleaning stainless steel surfaces with soapy water typically won’t eliminate all smudges and marks. To restore the stainless steel to its original luster, clean and polish the stainless surfaces with stainless cleaner.
Many new stainless appliances—like this refrigerator—come with a stainless steel cleaner sample. You can order more stainless steel cleaner from our Sears PartsDirect website.
Apply a small amount of the cleaner to a non-abrasive cloth and wipe the cleaner across the stainless surfaces, working with the grain. Then, polish with a dry, non-abrasive cloth, removing any dirt, smudges, fingerprints and cleaner residue.
If your appliance has a faux stainless surface, check the owner’s manual for cleaning instructions, because stainless steel cleaner can harm some faux stainless surfaces.
Also test the stainless steel cleaner on an inconspicuous area to see if it harms the surface’s finish, before using it on the entire appliance.
Maintain the finish
Okay, here’s the easy part that we promised—keeping the stainless steel clean using the stainless cleaner.
Continue to use the stainless steel cleaner every few days (or as needed) to wipe off smudges, spills and fingerprints. As long as you do this regularly, you’ll likely only need to clean the stainless with soapy water about once a year.
And guess what less time cleaning means? You got it—more time to chill.
Well, we hope this video helps you out today. Check out our other videos on the Sears PartsDirect YouTube Channel and subscribe to get notifications when we post new videos.
Most common symptoms to help you fix your refrigerators
Choose a symptom to see related refrigerator repairs.
Main causes: control board or cold control failure, broken compressor start relay, compressor motor failure, defrost tim…
Main causes: jammed ice cubes, broken ice maker assembly, dirty water filter, kinked water line, bad water valve, freeze…
Main causes: water valve leaking, frozen or broken defrost drain tube, overflowing drain pan, cracked water system tubin…
Main causes: damaged door seal, faulty defrost sensor or bi-metal thermostat, broken defrost heater, bad defrost timer o…
Main causes: blocked vents, defrost system problems, evaporator fan failure, dirty condenser coils, bad sensors, condens…
Main causes: blocked air vents, compressor problems, condenser or evaporator fan not working, control system failure, se…
Main causes: leaky door gasket, defrost system failure, evaporator fan not running, dirty condenser coils, condenser fan…
Things to do: clean condenser coils, replace the water filter, clean the interior, adjust doors to prevent air leaks, cl…
Most common repair guides to help fix your refrigerators
These step-by-step repair guides will help you safely fix what’s broken on your refrigerator.
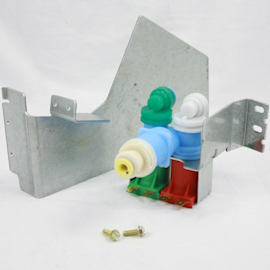
How to replace a refrigerator water valve
Replace the water valve that feeds water to the ice maker and water dispenser if it no longer controls the flow of water…

How to clean refrigerator condenser coils
Help your refrigerator run more efficiently by cleaning the condenser coils. It's easy and takes just a few minutes.…
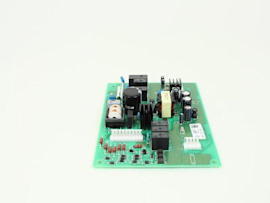
How to replace a refrigerator temperature control board
If the temperature in your refrigerator doesn't match the temperature you set, the problem could be the temperature cont…
Effective articles & videos to help repair your refrigerators
Use the advice and tips in these articles and videos to get the most out of your refrigerator.
No matter what style Maytag refrigerator you have, we can walk you through replacing the water filter.…

Learn about all the convenient features on our Sears PartsDirect website that make your parts purchases easier.…
Get tips and advice on replacing the water filter in your LG refrigerator.…
