- Kenmore refrigerator water filters
- Whirlpool refrigerator water filters
- Samsung refrigerator water filters
- GE refrigerator water filters
- LG refrigerator water filters
- Frigidaire refrigerator water filters
- KitchenAid refrigerator water filters
- Maytag refrigerator water filters
- Kenmore Elite refrigerator water filters
- Estate refrigerator water filters
- GE Profile refrigerator water filters
- Amana refrigerator water filters
- Bosch refrigerator water filters
- Dacor refrigerator water filters
- Electrolux refrigerator water filters
Top DIY repair help
View All Repair Categories
Appliances
Lawn & Garden
Power Tools
Home Improvement
Sports & Leisure
Heating & Cooling
How to replace a refrigerator light switch
less than a minute readOct 31Kim Hillegass
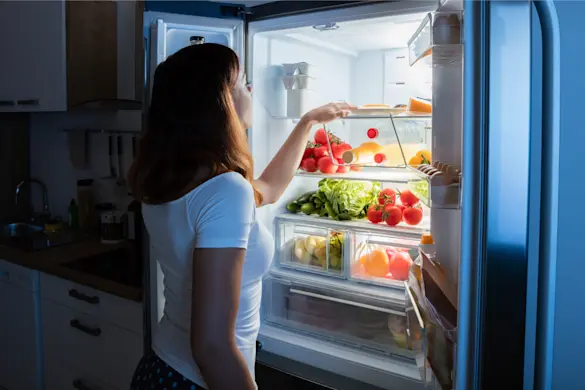
If your refrigerator light doesn’t come on when you open the door or worse, it stays on and overheats your milk, a faulty light switch is likely to blame. Replacing it is a relatively easy repair that only takes a few minutes.
Before you begin, it helps to know where the switch is located, how to disconnect it safely, and what differences to expect among refrigerator styles and brands. With a few basic tools and the right replacement part, you can have your light working again in no time.
How the refrigerator light switch works
The light switch controls the interior light inside the fresh food compartment, and on some models, the freezer as well. When the door closes, it presses the switch plunger, the circuit opens, and the light goes off. Opening the door releases the plunger, and the light turns on.
You’ll usually find the switch mounted in the refrigerator’s cabinet liner near the top or side edge of the compartment. Some models, like French door or side-by-side designs, have multiple switches for different sections.
Signs the light switch might need replacing
When the refrigerator light isn’t behaving as it should, the switch is often the culprit. You might notice the light doesn’t come on when you open the door, or it stays on even after the door closes. One way to tell if the light’s staying on is to look for unusual warmth inside the compartment or light leaking through the door gasket.
Here are a few signs that point to a bad switch:
Light doesn’t come on. If the bulb and socket are good or you’ve already replaced the bulb and it still doesn’t work, the switch may not be completing the circuit.
Light stays on. A stuck plunger can keep the light powered constantly, causing food to feel warm or soft near the top shelf.
Light flickers. Intermittent operation usually means the switch contacts are worn or dirty.
If you’re unsure, unplug the refrigerator and use a multimeter to test the switch for continuity. Pressing the plunger should open the circuit. If you get continuity while pressing the plunger, the switch contacts are stuck closed. If there's no continuity when the plunger isn't pressed, the switch contacts are bad. In either instance, you should replace the switch.
Before you begin
Before replacing the light switch, make sure you have the correct part and the basic tools to install it. Because switch shapes and connector types can vary by model, always use your model number to confirm the part number before ordering a replacement. You’ll usually find the model number label inside the fresh food compartment or along the wall behind a crisper drawer.
Once you’ve confirmed the right part, gather what you’ll need:
Flat-blade screwdriver or plastic putty knife
Needle-nose pliers
New light switch for your refrigerator model
If you’re unsure which switch fits your refrigerator, consult the service manual or view the exploded diagram for your model. You can enter your model number in the search bar or browse refrigerator repair parts to find the correct component for your appliance.
Steps to replace the light switch
1. Unplug the refrigerator
Unplug the power cord or turn off the circuit breaker to prevent electrical shock. If the refrigerator will be unplugged for more than a few minutes, move any food that might spoil into a cooler or another refrigerator.
2. Remove the old switch
Use a small screwdriver or plastic putty knife to gently pry the switch out of its mounting hole. Most switches are held in place by snap tabs or friction, but some may be secured behind a trim panel or light housing.
3. Disconnect the wires
Before removing any wires, take a quick photo of the connections so you can reference it when installing the new switch. Then, pull the wire connectors off the switch terminals. If your model uses a plug harness, press the release tab before separating the connector.
4. Connect the new switch
Attach the wires to the matching terminals on the new light switch, using your photo as a guide if needed. Make sure each connector is snug and fully seated.
5. Reinstall the switch
Push the new switch back into its opening until it clicks or sits flush. If your refrigerator uses mounting screws, reinstall them before replacing any trim or housing.
6. Plug in and test
Reconnect power and open the refrigerator door. The interior light should turn on immediately and turn off when you press the switch plunger.
What can vary by refrigerator model
While most refrigerator light switches work in a similar way, a few design differences can change how you access or replace the part. Knowing what to expect before you start can save time and prevent damage to trim or wiring.
Shape and size: Some refrigerators use a rectangular plunger or rocker-style switch, while others use a round snap-fit design. French door and side-by-side models sometimes use more than one switch for separate compartments.
Mounting method: Many switches snap into place from the front, but a few models secure the switch from behind a liner panel or trim piece. In those cases, you may need to remove a small section of the interior panel to reach the part.
Access point: Built-in and high-end models, such as GE Café or Sub-Zero, may require taking off a control housing, light cover, or top trim piece before you can remove the switch.
Because these differences affect how you reach and reinstall the switch, it’s always best to consult your refrigerator’s service manual or review the parts diagram for your model. Familiarizing yourself with the diagram helps you see how the switch is positioned and which panels or connectors you’ll need to remove first.
Keep your refrigerator in top shape
Replacing the light switch is a quick repair that helps keep your refrigerator running safely and efficiently. While you’re at it, take a moment to inspect the door seals, clean the interior surfaces, and make sure all lights are working properly.
You can make future repairs easier by creating a free account with Sears PartsDirect. It gives you a place to store your refrigerator’s model number and quickly access compatible refrigerator parts whenever you need them.
For more help diagnosing or maintaining your appliance, visit our DIY refrigerator repair help section, where you’ll find troubleshooting tips and repair guides for common refrigerator problems.