- Kenmore refrigerator water filters
- Whirlpool refrigerator water filters
- Samsung refrigerator water filters
- GE refrigerator water filters
- LG refrigerator water filters
- Frigidaire refrigerator water filters
- KitchenAid refrigerator water filters
- Maytag refrigerator water filters
- Kenmore Elite refrigerator water filters
- Estate refrigerator water filters
- GE Profile refrigerator water filters
- Amana refrigerator water filters
- Bosch refrigerator water filters
- Dacor refrigerator water filters
- Electrolux refrigerator water filters
Top DIY repair help
View All Repair Categories
Appliances
Lawn & Garden
Power Tools
Home Improvement
Sports & Leisure
Heating & Cooling
Quick Links
How to replace the tines on a rear-tine tiller
less than a minute readMay 20Lyle Weischwill
Repair time and Difficulty
30 minutes or less
Tools Required
- Pliers
- General-purpose grease
- Work gloves

Damaged, dull or bent tiller tines don’t dig into the soil well and won’t cultivate uniformly. This step-by-step tiller repair guide gives instructions on how to replace the tines on a rear-tine tiller, using the manufacturer-approved tiller part.
Use this repair guide to replace the tines on Craftsman, Husqvarna, Cub Cadet, Poulan, Snapper and MTD rear-tine tillers.
Instructions
- 1. Disconnect the spark plug wire
Pull the spark plug wire straight up and off the plug.
- 2. Remove tine shield end cover
Remove the wing nuts that secure the side shield to the end cover and remove the side shield.
Remove the wing nut at the top of the tine shield end cover.
Pull the tine shield end cover off.
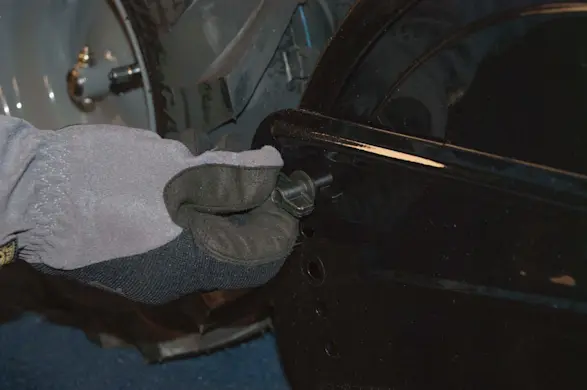
PHOTO: Remove the side shield wing nuts. 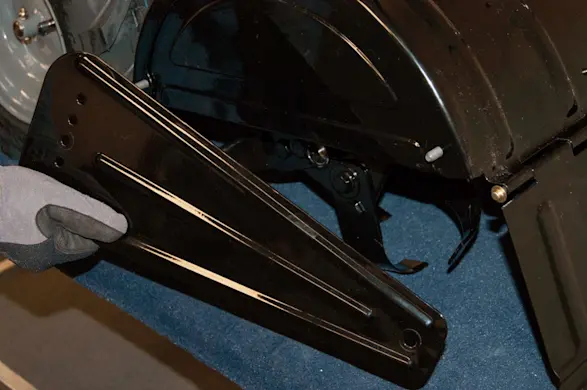
PHOTO: Remove the side shield. 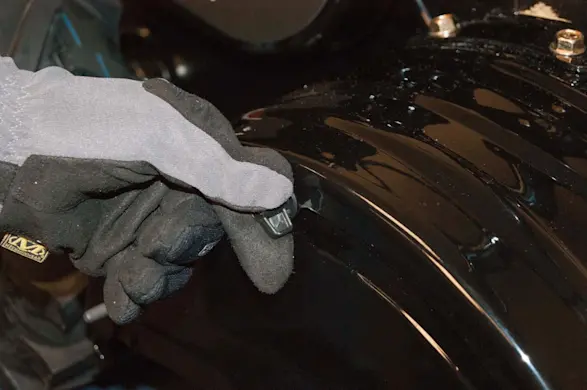
PHOTO: Remove the wing nut at the top of the tine shield end cover. 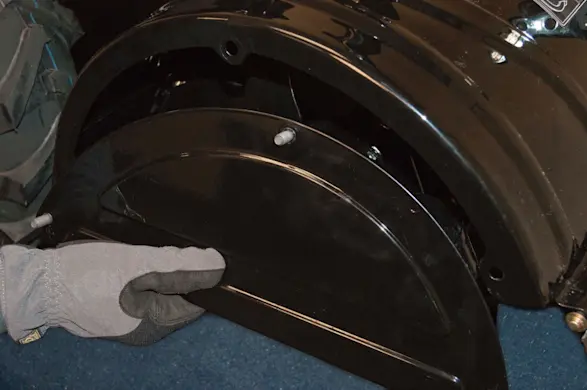
PHOTO: Pull the tine shield end cover off.
- 3. Remove the tines
Remove the cotter pin from the clevis pin and slide the clevis pin out.
Pull the tines straight off the end of the tine shaft.
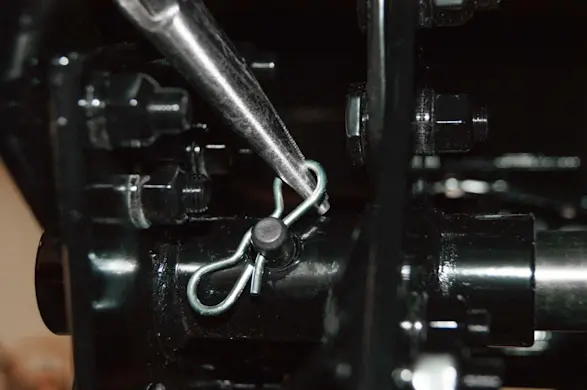
PHOTO: Remove the cotter pin from the clevis pin. 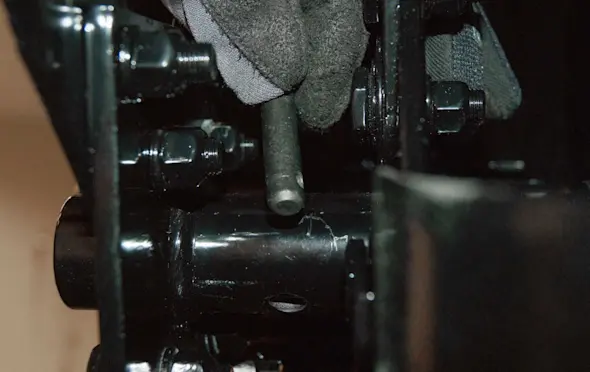
PHOTO: Slide the clevis pin out. 
PHOTO: Slide the tines off the end of the tine shaft. Tip: Repeat the tine removal procedure on the opposite side of the tiller if replacing both sets of tines.
- 4. Clean and lubricate the tine shaft
Use sandpaper to remove rust and deposits from the tine shaft and then wipe the shaft with a cloth to remove sandpaper residue.
Apply a thin coat of general-purpose grease to the tine shaft.
- 5. Install the new tines
Slide the new tines onto the tine shaft.
Line up the mounting holes in the tines with the holes in the tine shaft.
Reinstall the clevis pin and secure it with the cotter pin.
- 6. Reinstall the tine shield end cover
Position the tine shield end cover on the tine shield and secure it with the top wing nut.
Position the side shield on the end cover and secure the side shield using the wing nuts.
- 7. Reconnect the spark plug
Reconnect the spark plug wire to the spark plug.