- Kenmore refrigerator water filters
- Whirlpool refrigerator water filters
- Samsung refrigerator water filters
- GE refrigerator water filters
- LG refrigerator water filters
- Frigidaire refrigerator water filters
- KitchenAid refrigerator water filters
- Maytag refrigerator water filters
- Kenmore Elite refrigerator water filters
- Estate refrigerator water filters
- GE Profile refrigerator water filters
- Amana refrigerator water filters
- Bosch refrigerator water filters
- Dacor refrigerator water filters
- Electrolux refrigerator water filters
Top DIY repair help
View All Repair Categories
Appliances
Lawn & Garden
Power Tools
Home Improvement
Sports & Leisure
Heating & Cooling
Quick Links
How to replace a dishwasher water inlet valve
less than a minute readMar 11Lyle Weischwill
Repair time and Difficulty
30 minutes or less
Tools Required
- Nut driver set
- Slot screwdriver
- Channel lock pliers
- Standard pliers
- Plumber's tape (sometimes referred to as Teflon tape)
- Work gloves
- Towel
This DIY repair guide gives step-by-step instructions for replacing the dishwasher water inlet valve. The dishwasher water inlet valve controls the flow of water into the dishwasher. If no water flows into the dishwasher, or if the water inlet valve won’t stop water from flowing into the dishwasher, replace the water inlet valve with a manufacturer-approved dishwasher part.
Use the steps shown to replace the water inlet valve in Kenmore, Whirlpool, Frigidaire, KitchenAid, GE, JennAir, Maytag, Amana, LG and Samsung dishwashers.
Instructions
- 1. Shut off electrical power and water supply to the dishwasher
Unplug the dishwasher or shut off the house circuit breaker for the dishwasher.
To verify that power is disconnected, make sure the control panel doesn’t light up when you press a control button or the power button.
Find the water supply valve for the dishwasher under the sink (or in the basement). Close the valve to shut off the water supply going to the dishwasher.
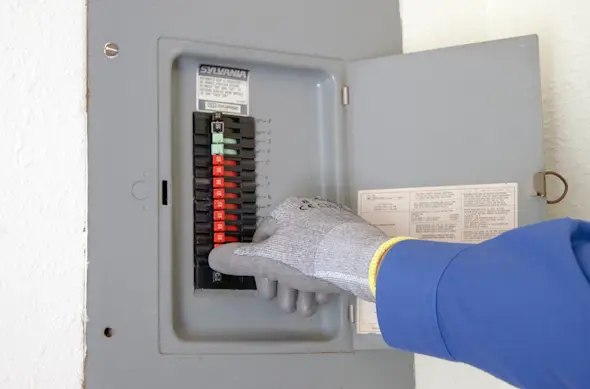
PHOTO: Shut off the house circuit breaker.
- 2. Remove the outer door panel and control panel
With the dishwasher door open, remove the Torx screws from the inner door panel. Support the outer door panel with one hand as you remove the final 2 screws so the outer door panel doesn't fall.
Separate the outer door panel and control panel slightly from the inner door panel, and rest the outer panel on the floor while you disconnect the user interface control wire harness from the control panel.
Pull off the outer door panel and control panel.
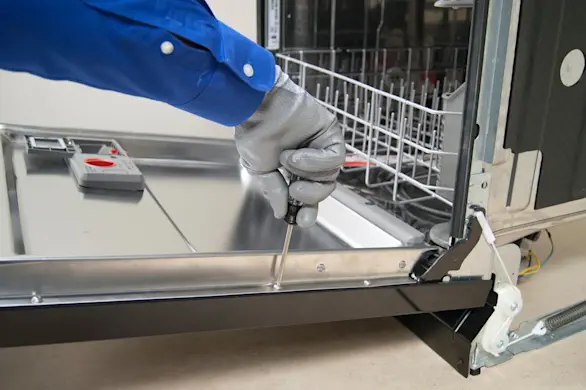
PHOTO: Remove the outer dishwasher door panel.
- 3. Remove the bottom front access panel and toe panel
Using a nut driver, remove the screws that hold the bottom front access panel and toe panel in place.
Pull the access panel and the toe panel forward and remove them.
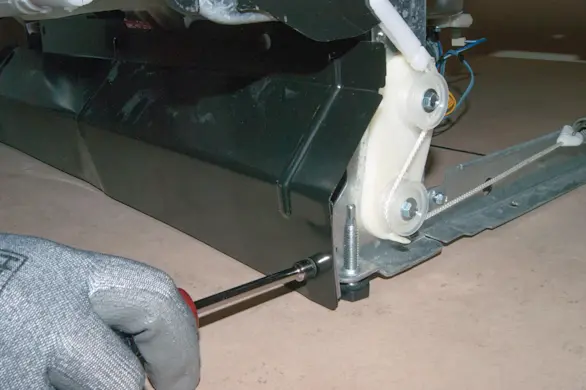
PHOTO: Remove the toe panel.
- 4. Disconnect the water supply line
Place a towel under the water inlet valve.
Remove the dishwasher water supply line from the inlet valve assembly using the channel-lock pliers.
Wipe up any spilled water.
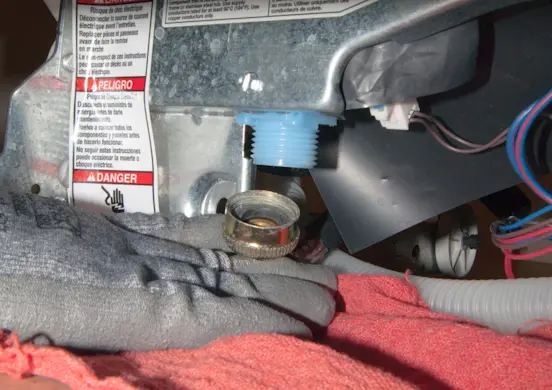
PHOTO: Disconnect the water supply line from the inlet valve.
- 5. Remove the water inlet valve
Remove the water inlet valve mounting screw and pull the water inlet valve out of the mounting bracket.
Pull the water inlet valve slightly forward to access the wire harness and water inlet tube connections.
Release the locking tab and disconnect the water inlet valve wire harness.
Release the wire clamp on the water inlet tube and pull the inlet tube off the water inlet valve.
Remove the water inlet valve.
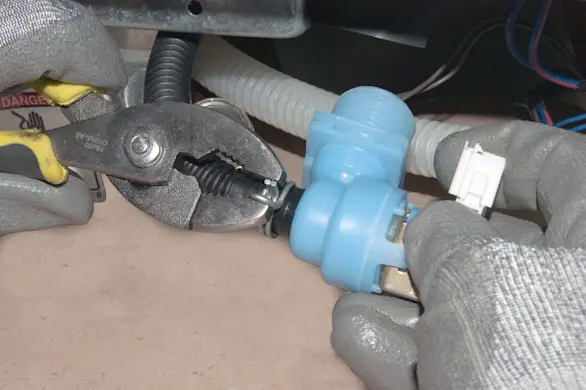
PHOTO: Remove the dishwasher water inlet valve.
- 6. Install the new water inlet valve
Connect the water inlet tube to the new water inlet valve and secure the inlet tube with the wire clamp.
Plug in the wire harness.
Place the water inlet valve in the bracket and secure it with the mounting screw.
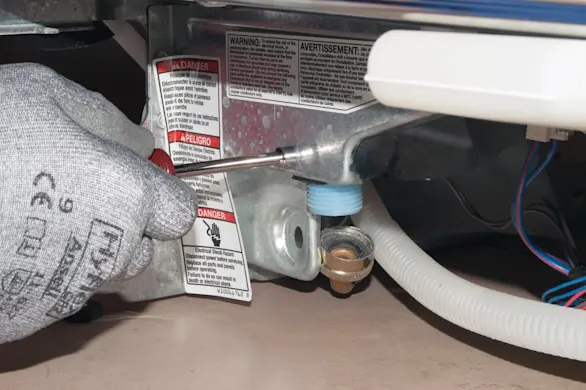
PHOTO: Install the new water inlet valve.
- 7. Connect the water supply line
Connect the water supply line to the water valve and tighten it securely using channel-lock pliers.
Open the water supply valve and check the water supply line connection for leaks. Tighten the water supply line connection to stop leaks.
Open the water supply valve and check the water supply line connection for leaks. Tighten the water supply line connection to stop leaks.
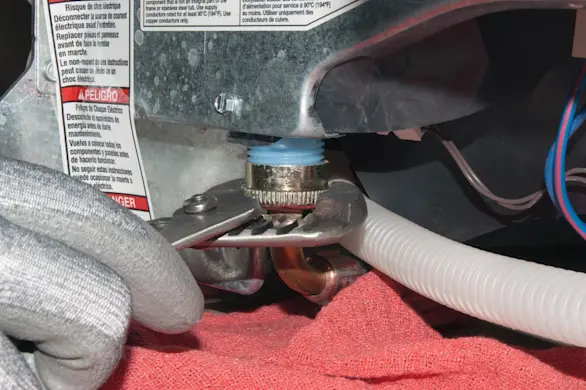
PHOTO: Reconnect the water supply line to the inlet valve.
- 8. Reinstall the bottom front access panel and toe panel
Position the toe panel on the dishwasher and then position the access panel in front of the toe panel. Insert the mounting screws and tighten the screws firmly.
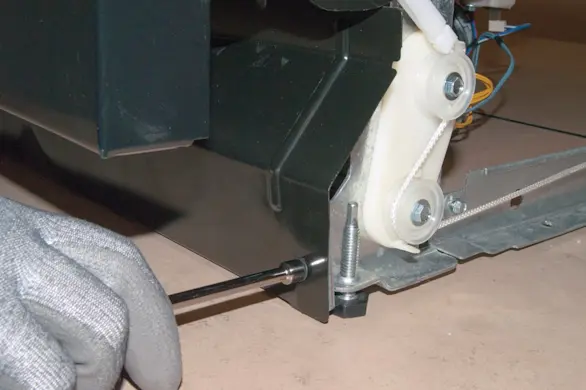
PHOTO: Reinstall the toe panel.
- 9. Reinstall the outer door panel and control panel
Position the outer door panel and control panel close enough to the inner door so you can reconnect the user interface control wire harness.
Reconnect the user interface control wire harness and attach the outer door panel and control panel to the inner door panel.
Reinstall the mounting screws.
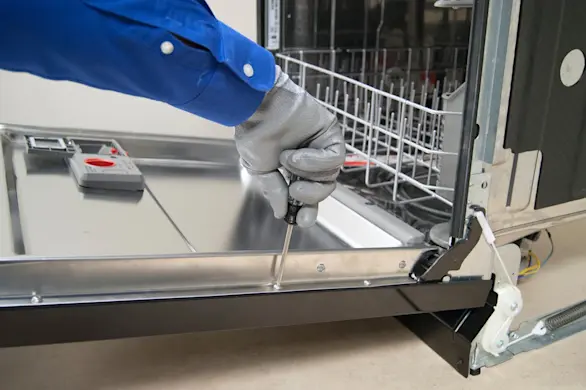
PHOTO: Reinstall the outer door panel. Tip: Use the longer screws to secure the control panel.
- 10. Restore electrical power
Reset the house circuit breaker or plug in the dishwasher to restore electrical power.