- Kenmore refrigerator water filters
- Whirlpool refrigerator water filters
- Samsung refrigerator water filters
- GE refrigerator water filters
- LG refrigerator water filters
- Frigidaire refrigerator water filters
- KitchenAid refrigerator water filters
- Maytag refrigerator water filters
- Kenmore Elite refrigerator water filters
- Estate refrigerator water filters
- GE Profile refrigerator water filters
- Amana refrigerator water filters
- Bosch refrigerator water filters
- Dacor refrigerator water filters
- Electrolux refrigerator water filters
Top DIY repair help
View All Repair Categories
Appliances
Lawn & Garden
Power Tools
Home Improvement
Sports & Leisure
Heating & Cooling
Quick Links
How to replace a cutting blade on a zero-turn riding mower
less than a minute readFeb 18Lyle Weischwill
Repair time and Difficulty
15 minutes or less
Tools Required
- Torque wrench
- Socket wrench set
- 4X4 block of wood
This step-by-step repair guide explains how to replace a cutting blade on a zero-turn riding mower. Worn or damaged blades won’t cut the grass well, giving an uneven cut and tattering the tips of the grass. Inspect your mower blades regularly and, if needed, replace a damaged cutting blade with a manufacturer-approved riding mower part, using the steps in this guide.
Use this basic procedure to replace cutting blades in Craftsman, Husqvarna, Toro, MTD, and Cub Cadet zero-turn riding mowers.
Instructions
- 1. Disconnect the spark plugs
Disconnect the spark plug wires.

PHOTO: Disconnect the spark plugs.
- 2. Release the blade belt
Lower the mower deck to the lowest cutting position.
Remove the left pulley cover on the mower deck.
Push the blade belt idler pulley in and roll the blade drive belt off the left blade pulley.
Reach under the rear of the mower frame and remove the blade drive belt from the electric clutch.
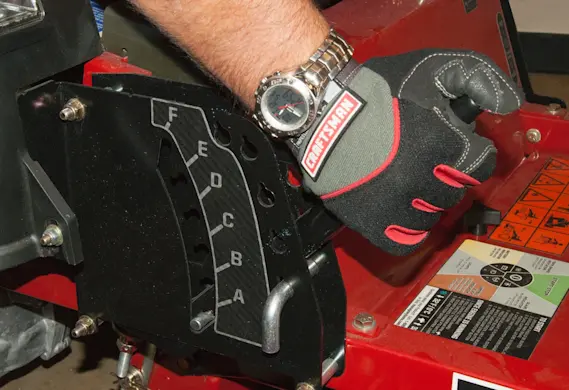
PHOTO: Lower the mower deck. 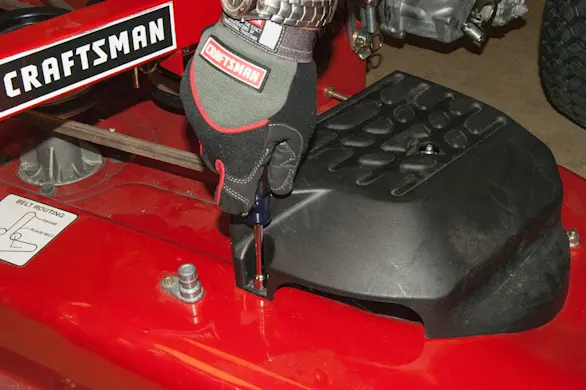
PHOTO: Remove the pulley cover. 
PHOTO: Roll the blade belt off of the pulley. 
PHOTO: Release the blade belt from the electric clutch.
- 3. Remove the mower deck
Disconnect the mower deck mounting pins and release the hanging brackets from the mower deck.
Push the mower deck slightly forward and release it from the front bracket.
Pull the mower deck out from under the mower frame.
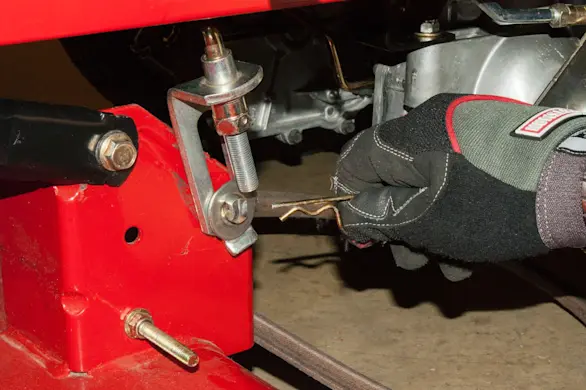
PHOTO: Remove the deck mounting pin. 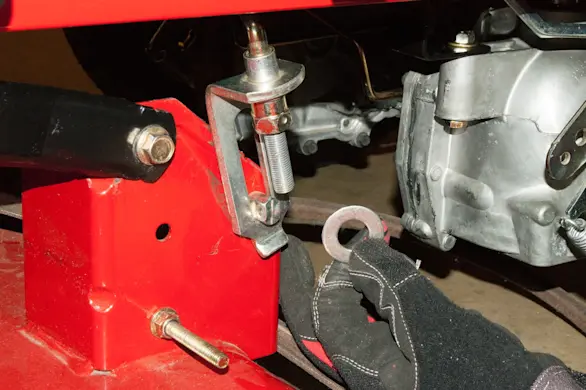
PHOTO: Remove the washer. 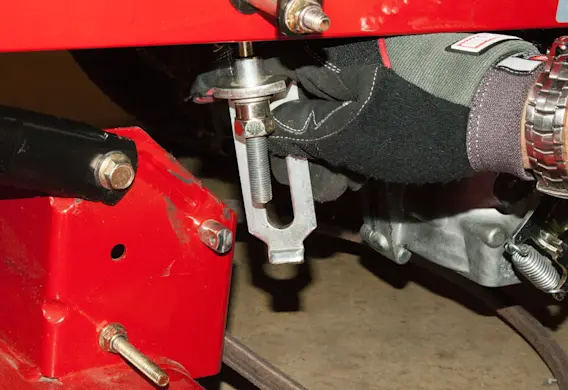
PHOTO: Release the hanging bracket from the mower deck. 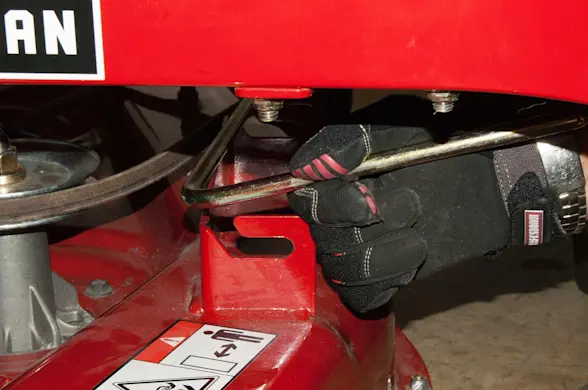
PHOTO: Release the front bracket. 
PHOTO: Pull the mower deck out.
- 4. Remove the cutting blade
Flip the mower deck upside down to access the mower blade.
Wedge a block of wood between the cutting blade and the deck to keep the blade from turning.
Remove the cutting blade mounting bolt and pull the cutting blade off.
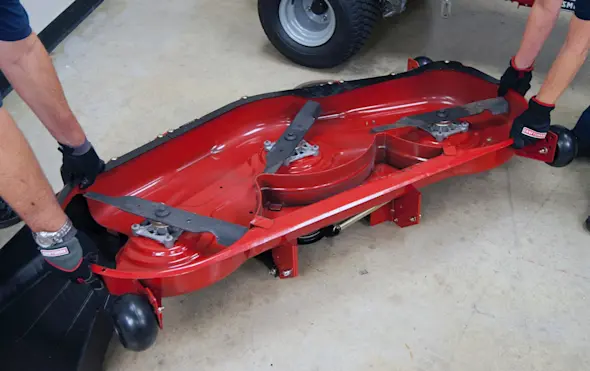
PHOTO: Flip the mower deck over. 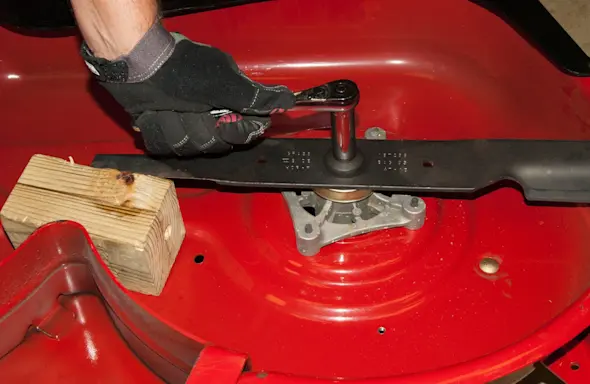
PHOTO: Remove the blade mounting bolt. 
PHOTO: Remove the blade. Warning: The cutting blades are sharp. Wear work gloves to protect your hands.Tip: Turn the blade mounting bolt counterclockwise to remove it.
- 5. Install the new cutting blade
Position the new cutting blade on the shaft and install the mounting bolt.
Tighten the bolt to 50 ft-lbs with a torque wrench.
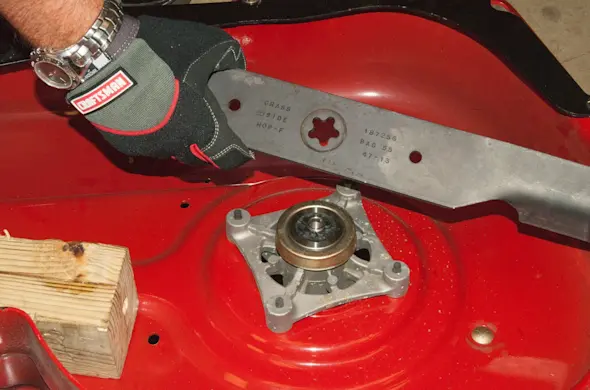
PHOTO: Install the new blade. 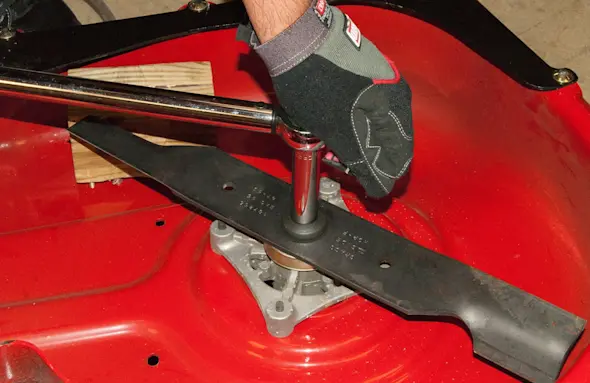
PHOTO: Tighten the blade bolt. Tip: If blade is marked with directions such as “This side up,” position the blade as marked.
- 6. Reinstall the mower deck
Flip the mower deck right side up.
Push the mower deck under the mower frame.
Reinstall the mower deck on the front bracket.
Reinstall the mower deck hanging brackets and secure them with the mounting pins.
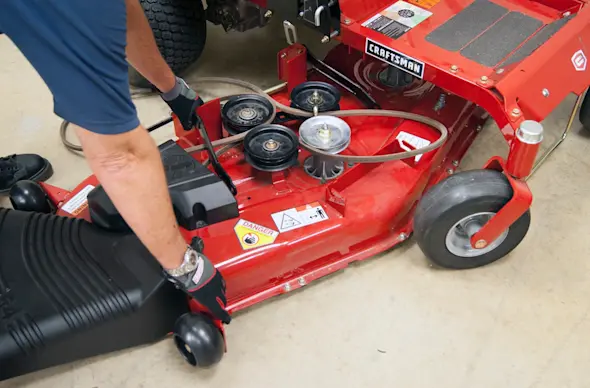
PHOTO: Push the mower deck in. 
PHOTO: Reconnect the front bracket. 
PHOTO: Reinstall the deck hanging brackets.
- 7. Reattach the blade belt
Reinstall the blade drive belt onto the electric clutch.
Push in the blade belt idler pulley and roll the blade belt back onto the left blade pulley.
Reinstall the pulley cover.
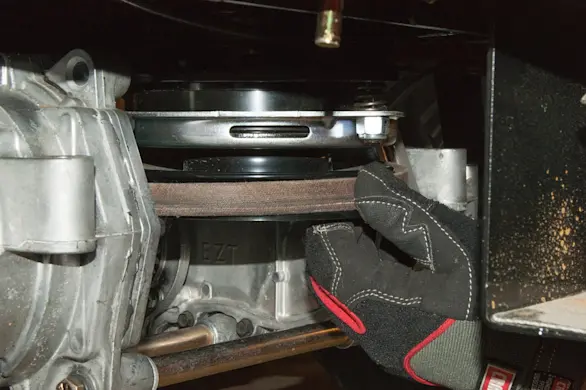
PHOTO: Reinstall the belt on the electric clutch. 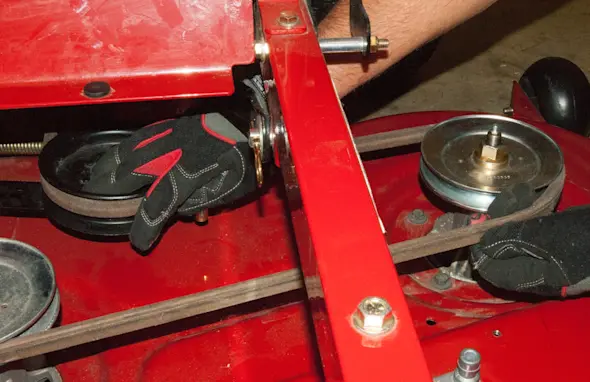
PHOTO: Roll the belt on the pulley. 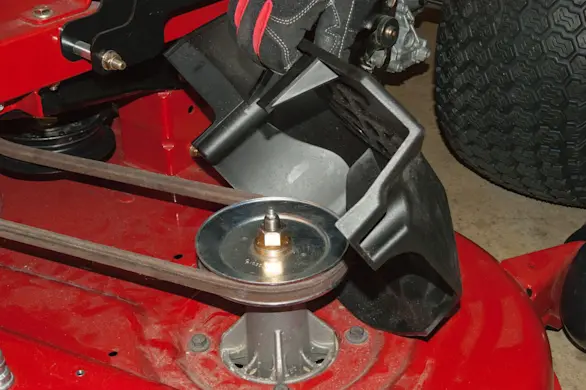
PHOTO: Reinstall the pulley cover. Tip: Make sure that the blade belt is routed correctly when reinstalling the mower deck.
- 8. Reconnect spark plugs
Reconnect the wires on the spark plugs.
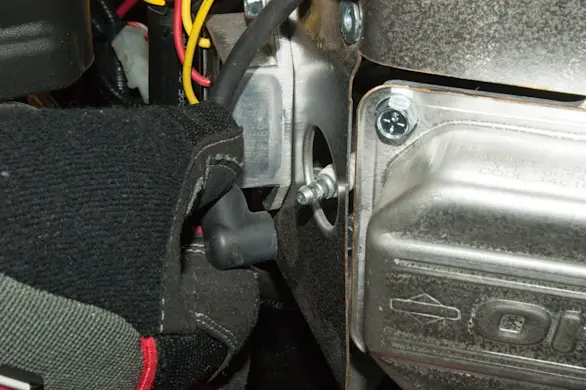
PHOTO: Reconnect the spark plugs.