- Kenmore refrigerator water filters
- Whirlpool refrigerator water filters
- Samsung refrigerator water filters
- GE refrigerator water filters
- LG refrigerator water filters
- Frigidaire refrigerator water filters
- KitchenAid refrigerator water filters
- Maytag refrigerator water filters
- Kenmore Elite refrigerator water filters
- Estate refrigerator water filters
- GE Profile refrigerator water filters
- Amana refrigerator water filters
- Bosch refrigerator water filters
- Dacor refrigerator water filters
- Electrolux refrigerator water filters
Top DIY repair help
View All Repair Categories
Appliances
Lawn & Garden
Power Tools
Home Improvement
Sports & Leisure
Heating & Cooling
Quick Links
How to install a pressure washer O-ring kit
less than a minute readMay 20Lyle Weischwill
Repair time and Difficulty
45 minutes or less
Tools Required
- Metric wrench set
- Silicone lubricant
- Thread-locking adhesive
- Torque wrench (optional)
- Work gloves
Over time, the O-rings that seal the fittings on a pressure washer pump wear down, allowing leaks at the fittings. This step-by-step pressure washer repair guide explains how to replace the O-rings in a leaking pressure washer pump, using a manufacturer-approved replacement O-ring kit.
Use these steps to install the O-ring kit in Craftsman, Generac, Briggs & Stratton, Snapper, Husqvarna and Troybilt pressure washers.
Instructions
- 1. Disconnect the spark plug
Disconnect the spark plug wire from the spark plug.
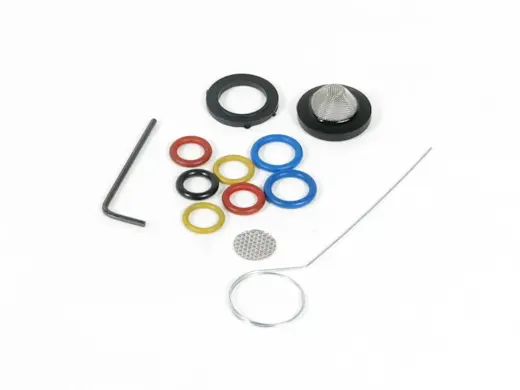
- 2. Sort the O-rings
Sort the O-rings in the kit by size.
Tip: You may not need all of the O-rings included in the kit.
- 3. Remove the high-pressure outlet fitting
Using the proper size wrench, turn the high-pressure outlet fitting counter-clockwise to remove it from the pump.
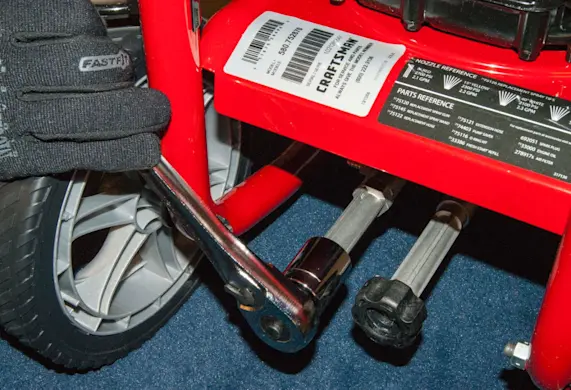
PHOTO: Remove the high-pressure outlet fitting.
- 4. Install the O-ring on the outlet fitting
Pull the old O-ring off of the high-pressure outlet fitting.
Clean any residue from the old O-ring off of the threads of the high-pressure outlet fitting.
Insert the new O-ring on the high-pressure outlet fitting.
Lubricate the new O-ring with a small amount of silicone lubricant.
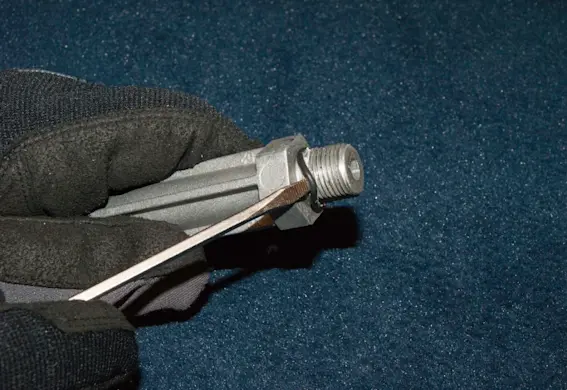
PHOTO: Remove the O-ring. 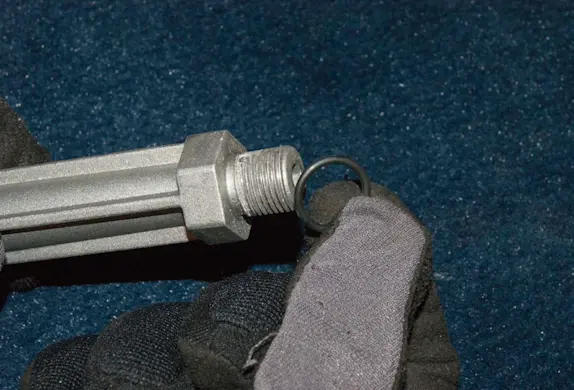
PHOTO: Install the new O-ring.
- 5. Reinstall the high-pressure outlet fitting
Apply a small amount of thread-locking adhesive to the threads of the high-pressure outlet fitting.
Reinstall the high-pressure outlet fitting onto the pump and thread it into place.
Tighten the high-pressure outlet fitting securely using a wrench.
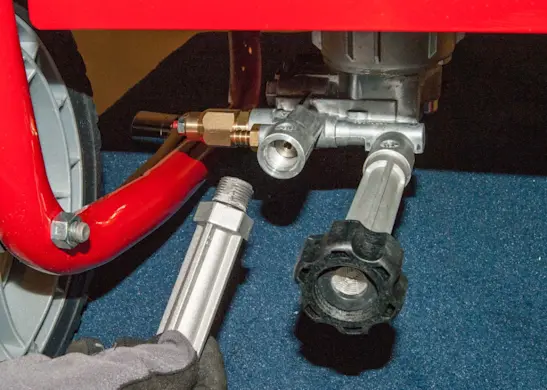
PHOTO: Reinstall the high-pressure outlet fitting.
- 6. Remove the unloader valve
Using the proper size wrench, turn the unloader valve counter-clockwise to remove it from the pump.

PHOTO: Loosen the unloader valve. 
PHOTO: Remove the unloader valve.
- 7. Install the new O-ring on the unloader valve
Pull the old O-rings off of the unloader valve.
Clean any residue from the old O-rings off of the unloader valve.
Insert the new O-rings on the unloader valve.
Lubricate the new O-rings with a small amount of silicone lubricant.
- 8. Reinstall the unloader valve
Thread the unloader valve into the pump and tighten it with the wrench.
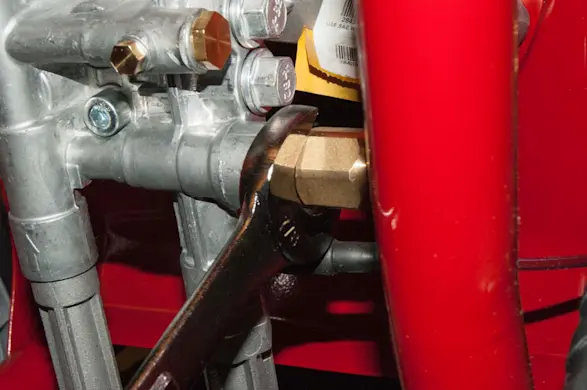
PHOTO: Reinstall the unloader valve. Tip: If you have a torque wrench, tighten the unloader valve 10-12 ft.-lbs.
- 9. Remove the chemical injection valve
If there’s detergent in the detergent reservoir, clamp the chemical injection hose near the chemical injection valve.
Pull the chemical injection hose off of the valve.
Using the proper size wrench, turn the chemical injection valve counter-clockwise to remove it from the pump.

PHOTO: Clamp off the chemical injection hose. 
PHOTO: Pull the chemical injection hose off of the valve. 
PHOTO: Remove the chemical injection valve.
- 10. Install the new O-ring on the chemical injection valve
Pull the old O-ring off of the chemical injection valve.
Clean any residue from the old O-ring off of the chemical injection valve.
Insert the new O-ring on the chemical injection valve.
Lubricate the new O-ring with a small amount of silicone lubricant.
- 11. Reinstall the chemical injection valve
Thread the new chemical injection valve onto the pump and tighten. Reconnect the chemical injection hose.
Release the clamp from the chemical injection hose, if used.

PHOTO: Reinstall the chemical injection valve. 
PHOTO: Reconnect the chemical injection hose. Tip: If you have a torque wrench, tighten the chemical injection kit 10-12 ft.-lbs.
- 12. Remove the check valve caps
Use the proper size wrench to remove the check valve caps from the side of the pump. Turn the check valve caps counter-clockwise to remove.

PHOTO: Remove the manifold check valve caps.
- 13. Install the O-rings on the check valve caps
Pull the old O-rings off of the check valve caps.
Clean any residue from the old O-rings off of the check valve caps.
Insert the new O-rings on the check valve caps.
Lubricate the new O-rings with a small amount of silicone lubricant.
- 14. Reinstall the check valve caps
Place a small amount of thread locking adhesive on the check valve cap threads.
Reinstall the check valve caps and tighten them securely.
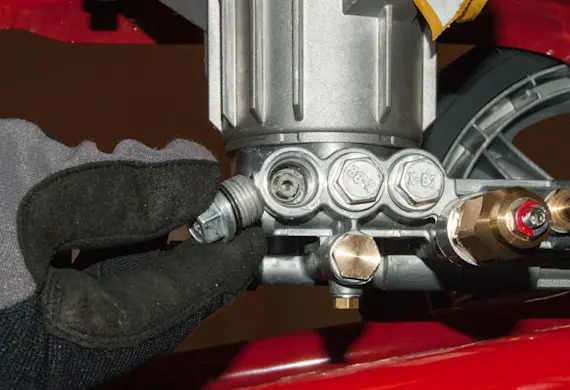
PHOTO: Reinstall the manifold check valve caps. Tip: If you have a torque wrench, tighten the valve caps 18-20 ft.-lbs.
- 15. Reconnect the spark plug wire
Reconnect the spark plug wire to the engine and test the operation and check for any leaks.
- 16. Test the pressure washer
Start the pressure washer and check for leaks.