Troubleshooting a riding lawn mower blown fuse video
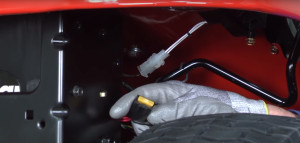

Replacing a blown fuse on your riding lawn mower is easy, but finding the cause can be more difficult. Unless you locate and repair the short, you’ll just keep blowing fuses. This video shows you how to test your ignition switch and the engine, chassis, and dash wire harnesses to narrow down the suspects so you can repair the problem and get back to mowing.
For additional repair help, including common symptoms and troubleshooting tips, step-by-step riding lawn mower and tractor repair guides, and articles, check out our repair help section. In addition, find the riding mower parts you need to fix your mower.
Parts needed
Hi, Wayne here from Sears PartsDirect. Today we're going to troubleshoot a blown fuse in your riding lawn mower.
Most often, the cause of a blown fuse in a riding lawn mower is a short circuit, which happens when a damaged wire or failed component lets electrical current flow to the metal frame of the mower through an unintended path. This excessive current travels through the wiring easily until the fuse blows and shuts off the unintended current flow, preventing wiring damage and fires.
To prevent the unintended current flow—and prevent the fuse from blowing as soon as we replace it—we'll need to find the broken wire or component causing the short. Finding the location of the short can be challenging, but these tips should make it easier.
Our troubleshooting focuses on this common Craftsman model. Although the wiring for your riding mower may be different, you should be able to use the same tactics to find a short.
Supplies you might need
A wiring diagram for your riding lawn mower to help you track the circuits that you're testing and a parts diagram so you can find the wire harness connections referred to in this video. The owner's manual often contains both diagrams. Some parts diagrams on SearsPartsDirect.com also include a wiring diagram—you can look for them by doing a model number search on the website.
Have a couple of extra fuses handy for this troubleshooting because you’ll need them for checking some sections of wiring.
You also need a multimeter to measure voltage.
Work gloves.
How to find a short
If you haven't already removed it, take the blown fuse out of the fuse holder.
During this troubleshooting, we'll measure voltage through the fuse holder using a multimeter to find the short. In the final troubleshooting step, we'll use a new fuse to see whether the run circuit has a short.
The troubleshooting process allows us to isolate branches of circuits in the riding lawn mower's wiring using the ignition switch and disconnecting wires to find the short. When we measure voltage through the fuse holder or blow the fuse after isolating a branch of a circuit, we've detected a short in that branch.
Test the circuit through the ignition switch
The first section of wiring and components to check is the wiring through the ignition switch.
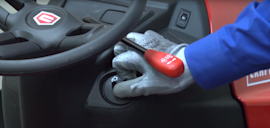
1. Turn off the ignition key to isolate this section.
2. Set your multimeter to measure DC voltage and insert one meter probe in one side of the fuse holder and the other probe in the opposite side of the fuse holder.
3. Check the voltage reading.
If the multimeter measures no voltage, skip to the section for checking the circuit when you turn the key to the run position.
If the multimeter measures voltage, the short is in the red wire between the fuse holder and the ignition switch or in the ignition switch itself.
4. To see if the ignition switch is the problem, unplug the switch and check voltage again.
If the multimeter measures no voltage with the ignition switch unplugged, the short is in the ignition switch. Replace the ignition switch using the steps in this video.
If the multimeter still measures voltage after you unplug the ignition switch, the short is in the red wire circuit between the fuse holder and the ignition switch plug. Find and repair damage to the red wire.
Check the run circuit
If you didn't measure voltage through the fuse holder with the key turned off, pull the meter probes out of the fuse holder. Insert a new fuse into the holder and turn the key to the run position. Turn the key off and pull out the fuse to see if it blew.
If the fuse blows. When you turn the key to the run position, an internal ignition switch contact sends current from the B terminal on the ignition switch to the A1 terminal to energize the blue wire. So if the fuse blew with the ignition key in the run position, the short is in the ignition switch, the blue wire or a wire harness connected to the blue wire.
If the fuse doesn’t blow. If the new fuse didn't blow, an intermittent short caused the original blown fuse.
An intermittent short can be difficult to find. Try wiggling each wire harness in the tractor back and forth and then repeat the test using the fuse. If you wiggle a harness and the fuse blows, then that harness contains a shorted wire. Find and repair the damaged wire in the harness.
If you can’t find the intermittent short, replace the fuse. If the fuse blows again, repeat this entire blown fuse troubleshooting process from the beginning.
Check the ignition switch
As I said, if the fuse blew when you checked the run circuit, the problem could be the ignition switch, the blue wire or a wire harness connected to the blue wire. Let’s check the ignition switch first. Defective internal ignition switch contacts can cause a short circuit when you turn the key to the run position.
Unplug the wire harness from the back of the ignition switch. Release the locking tabs and pull the ignition switch out of the dash.
The contact spades on the back of the ignition switch have labels, making it easy to check the internal contacts by measuring resistance between spades.
With the key in the run position, the multimeter should measure near 0 ohms of resistance between B and A1 because the battery sends power to the blue wire when the key is in the run position. The multimeter should measure infinite resistance between B and all other spades.
With the multimeter set to measure resistance, touch one meter probe to B and the other meter probe to each of the other spades. If the multimeter measures resistance between B and any spade except A1, replace the ignition switch because its internal contacts might have failed and caused the fuse to blow.
If the ignition switch is okay, reinstall it in the dash and reconnect the wire harness.
Test the wire harnesses
The final steps in finding the cause of the blown fuse are to test the blue wires in the wire harnesses. This tractor has wire harnesses for the dash, chassis and engine. Check the dash wire harness first.
The dash wire harness. Unplug the engine and chassis wire harness from the dash wire harness. This step isolates the dash wire harness.
Insert a new fuse in the fuse holder and briefly turn the key to the run position. Turn the key off and check the fuse.
If the fuse blows, then the short is in the blue wire of the dash wire harness. Find and repair the broken wire or replace the dash wire harness.
The engine wire harness. If the fuse didn't blow when you tested the dash wire harness, connect the engine wire harness and repeat the test.
If the fuse blows, the short is in the engine wire harness. Find and repair the broken wire or replace the engine wire harness.

To find the part number of the engine wire harness, look it up using the engine model number, not the lawn tractor’s model number—engine parts are listed separately from the rest of lawn tractor parts.
Here's the diagram of the engine wire harness for the engine in this riding lawn mower, circled in red.
The chassis wire harness. If the fuse didn't blow with the engine wire harness connected, then the short is in the chassis wire harness. Find and repair the broken wire or replace the chassis wire harness.
Have you had your fill of checking wires yet? As we said at the start of this video, finding a short circuit can be challenging. Hopefully you have found and fixed the short in your mower's electrical system so it doesn’t keep blowing fuses.
Remember to use the wiring diagram for your type of riding lawn mower to find the short if your mower's wiring differs from this model.
I hope this video helped you out today. You can find links to any parts we talked about in the video description. Check out our other troubleshooting and repair videos on the Sears PartsDirect YouTube channel. Subscribe and we’ll let you know when we post new videos.
Most common symptoms to help you fix your riding mowers & tractors
Choose a symptom to see related riding mower and lawn tractor repairs.
Main causes: worn or broken blade belt, broken belt idler pulley, blade clutch cable failure, bad PTO switch, damaged ma…
Main causes: faulty battery, bad alternator…
Main causes: punctured tire or inner tube, leaky valve stem, damaged wheel rim…
Main causes: dead battery, stale fuel, bad starter solenoid, ignition system problem, bad ignition interlock switch, clo…
Main causes: damaged tie rods, bent or worn wheel spindle, worn front axle, damaged sector gear assembly…
Main causes: shift lever needs adjustment, neutral control needs adjustment…
Main causes: clogged carburetor, damaged flywheel key, dirty spark plug, stale fuel, improper valve lash, engine needs a…
Main causes: worn or broken ground drive belt, bad seat switch, transaxle freewheel control engaged, transaxle failure, …
Main causes: unlevel mower deck, dull or damaged cutting blades, worn mandrel pulleys, bent mower deck, engine needs tun…
Most common repair guides to help fix your riding mowers & tractors
These step-by-step repair guides will help you safely fix what’s broken on your riding mower or lawn tractor.
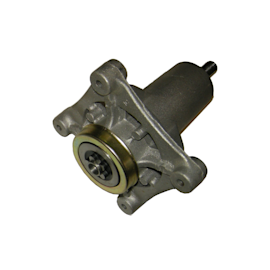
How to replace a mandrel assembly on a riding lawn mower
Replace the mandrel assembly if the blade shaft vibrates or doesn't spin.…
How to replace the flywheel key on a riding lawn mower
If the engine won't restart after hitting a stump or rock, the problem could be a sheared flywheel key. Follow these ste…
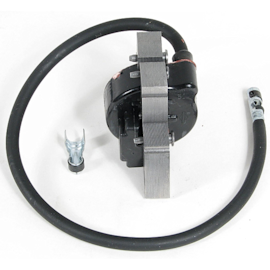
How to replace a riding lawn mower ignition coil
If you're not getting spark from a good spark plug, the problem could be the ignition coil. Follow these step-by-step in…
Effective articles & videos to help repair your riding mowers & tractors
Use the advice and tips in these articles and videos to get the most out of your riding mower or lawn tractor.

Learn about all the convenient features on our Sears PartsDirect website that make your parts purchases easier.…

Get answers to frequently asked questions about Sears and Sears PartsDirect.…
Check the starter solenoid, starter motor, wiring, battery and engine.…