Hoover
Tools & Attachment

Model # C2093 Official Hoover vacuum cleaner

Here are the diagrams and repair parts for Official Hoover C2093 vacuum cleaner, as well as links to manuals and error code tables, if available.

There are a couple of ways to find the part or diagram you need:

  • Click a diagram to see the parts shown on that diagram.
  • In the search box below, enter all or part of the part number or the part’s name.

Not all parts are shown on the diagrams—those parts are labeled NI, for “not illustrated”.

We encourage you to save the model to your profile, so it’s easy to access parts and manuals for your appliance whenever you log in.

For DIY troubleshooting advice and repair guides, visit our repair help section.

Model diagram and schematic

SEARCH WITHIN THIS MODEL

?

This is the number corresponding to the part on the diagram / schematic

Search
ALL PARTS
Showing 10 of 31 parts  |

Vacuum Door 42227039
#3

Motor assembly, mainbody diagram

Vacuum door

Part #42227039

The manufacturer no longer makes this part, and there's no substitute part

Diffuser D 162059AG
#15

Motor assembly, mainbody diagram

Diffuser d

Part #162059AG

The manufacturer no longer makes this part, and there's no substitute part

Strap Hook 33153002
#23

Motor assembly, mainbody diagram

Strap hook

Part #33153002

The manufacturer no longer makes this part, and there's no substitute part

Screw 21479573
#28

Motor assembly, mainbody diagram

Screw

Part #21479573

The manufacturer no longer makes this part, and there's no substitute part
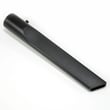
Vacuum Crevice Tool 38617017
#14

Cleaningtools diagram

Vacuum crevice tool

Part #38617017

The manufacturer no longer makes this part, and there's no substitute part

Vacuum Screw 21447043
#26

Motor assembly, mainbody diagram

Vacuum screw

Part #21447043

The manufacturer no longer makes this part, and there's no substitute part

Shield 37922002
#9

Motor assembly, mainbody diagram

Shield

Part #37922002

The manufacturer no longer makes this part, and there's no substitute part
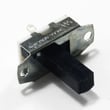
Vacuum Switch 28177006
#10

Motor assembly, mainbody diagram

Vacuum switch

Part #28177006

The manufacturer no longer makes this part, and there's no substitute part

Sleeve Hose 32156010
#3

Cleaningtools diagram

Sleeve hose

Part #32156010

The manufacturer no longer makes this part, and there's no substitute part
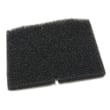
Vacuum Diffuser 34366001
#14

Motor assembly, mainbody diagram

Vacuum diffuser

Part #34366001

The manufacturer no longer makes this part, and there's no substitute part

Symptoms for gas walk-behind mowers

Choose a symptom to see related walk-behind mower repairs.

Main causes: engine needs tune up, dirty or clogged carburetor, damaged flywheel key…

Main causes: uneven wheel height settings, damaged wheel, dull or damaged cutting blade…

Main causes: damaged cutting blade, loose cutting blade, damaged flywheel key, engine needs tune up…

Main causes: stale gas, engine needs tune up, bad spark plug, dead battery, bad recoil starter, faulty safety switch, ba…

Main causes: dirty carburetor, bad spark plug, clogged air filter, engine choke problems, clogged gas cap vent…

Main causes: drive control cable failure, worn or broken drive belt, bad transmission, broken drive wheel…

Repair guides for gas walk-behind mowers

These step-by-step repair guides will help you safely fix what’s broken on your walk-behind lawn mower.

How to replace a lawn mower spark plug

How to replace a lawn mower spark plug

Take a few minutes to replace the spark plug during your lawn mower's annual tune-up or if the spark plug is burnt or cr…

Repair difficulty
Time required
 15 minutes or less
How to replace a lawn mower blade

How to replace a lawn mower blade

Check your lawn mower blade regularly and replaced it if it's bent or damaged. …

Repair difficulty
Time required
 15 minutes or less
How to replace a lawn mower flywheel key on a flathead engine

How to replace a lawn mower flywheel key on a flathead engine

When you hit a hard object with your mower, the flywheel can shear to protect more expensive components. Learn how to re…

Repair difficulty
Time required
 45 minutes or less

Effective articles & videos to help repair your walk-behind mowers

Use the advice and tips in these articles and videos to get the most out of your walk-behind lawn mower.

Tapping into a new feature in the Search Bar on Sears PartsDirect

Tapping into a new feature in the Search Bar on Sears PartsDirect

Learn about a new feature added to the Search Bar on Sears PartsDirect…

Introducing new technical repair content that we’re developing for the Sears Technical Institute

Introducing new technical repair content that we’re developing for the Sears Technical Institute

Learn about Sears Technical Institute and the advanced technical content being developed for aspiring appliance techs.…

Top questions about Sears and Sears PartsDirect

Top questions about Sears and Sears PartsDirect

Get answers to frequently asked questions about Sears and Sears PartsDirect.…