How to replace a snowblower friction disc
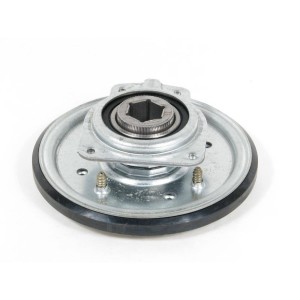
This step-by-step repair guide shows how to replace the snowblower friction disc (also called the friction wheel). The friction disc helps propel the snowblower forward. When the snowblower friction disc is in contact with the spinning drive wheel, the friction disc rotates and turns the axle. If the friction disc is worn or damaged, the snowblower moves slowly or erratically. Replace a worn out or broken snowblower friction disc with a manufacturer-approved snowblower part.
This repair procedure works for Craftsman, MTD, Troybilt, Noma, Murray, Ariens, Husqvarna and Snapper snowblowers.
Instructions
- 01.
Disconnect the spark plug wire
Pull the spark plug wire straight up and off the plug.
- 02.
Remove the frame cover
Tip the snow blower forward so it rests on the auger housing. Remove screws that secure the frame panel located between the wheels. Detach the panel to access the drive system components.

PHOTO: Tip the snowblower on its nose.
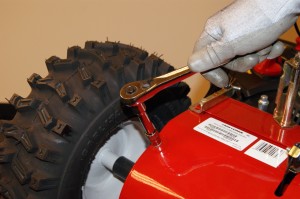
PHOTO: Remove the frame panel.
- 03.
Remove both wheels.
Remove the bolts that secure each wheel to the axle. Pull off both wheels.
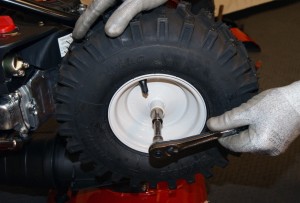
PHOTO: Remove the wheels.
- 04.
Remove the hex shaft mounting nut
Hold the hex shaft stationary with a 13/16-inch open-end or adjustable wrench. Remove the mounting nut using a ratchet and 1/2-inch socket or wrench.
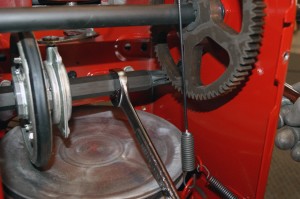
PHOTO: Hold the hex shaft stationary.
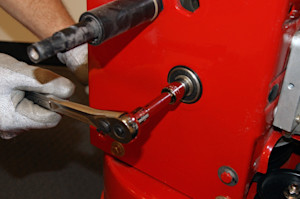
PHOTO: Remove the shaft mounting nut.
- 05.
Remove the friction disc
Lightly tap the left end of the hex shaft to push the bearing out of the right side of the frame. Remove the bearing. Carefully pull the hex shaft down and to the left. Pull the friction disc off the shaft.
- 06.
Clean the shaft
Remove any rust from the shaft and clean it thoroughly. Apply anti-seize compound to the shaft.
- 07.
Install the new friction disc
Slide the new friction disc onto the hex shaft. Position the friction disc properly and push the hex shaft back into the bearing on the right side of the frame. Reinstall the hex nut and tighten.
- 08.
Reinstall the wheels.
Push the wheels onto the axle. Reinstall the washer and mounting nut on each wheel. Tighten the mounting nuts securely on the axle.
- 09.
Reinstall the frame panel
Position the frame panel and line up the mounting holes. Insert the mounting screws and tighten firmly. Pivot the snow blower upright so it rests on its tires.
- 10.
Test the snow blower
Reconnect the spark plug wire. Fill the tank with gas and test the snow blower.
Symptoms for gas snowblowers
Choose a symptom to see related snowblower repairs.
Main causes: punctured tire, damaged rim…
Main causes: dirty carburetor, stale fuel…
Main causes: dirty carburetor, clogged fuel filter, dirty spark plug, incorrect valve lash, leaky engine gaskets…
Main causes: stale gas, clogged carburetor, clogged or broken fuel line, dirty spark plug, bad rewind starter, incorrect…
Main causes: snow build-up in chute, chute drive mechanism failure, bad chute control assembly…
Main causes: loose drive clutch cable, damaged drive clutch cable, worn friction disc, scraper blade scraping the ground…
Main causes: clogged chute, damaged auger blades, broken shear pins, worn auger belt, damaged gear case, engine problems…
Main causes: broken shear pins, worn or loose auger drive belt, auger drive cable failure, damaged auger, bad gear case…
Things to do: replace the spark plug, change the oil, rebuild the carburetor, adjust valve lash, adjust or replace the b…
Repair guides for gas snowblowers
These step-by-step repair guides will help you safely fix what’s broken on your snowblower.

How to replace a snowblower fuel filter
Replace the fuel filter on your snowblower if it's clogged or damaged.…
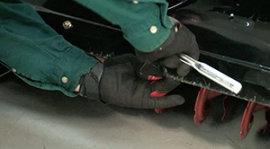
How to replace a snowblower shave plate
Follow the 7 easy steps in this repair guide/video to replace a worn out shave plate on your snowblower.…
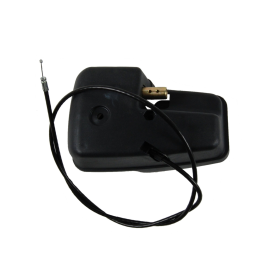
How to replace a snowblower chute control gearbox assembly
Replace the chute control gearbox on your snowblower if it's stripped or damaged.…
Effective articles & videos to help repair your snowblowers
Use the advice and tips in these articles and videos to get the most out of your snowblower.
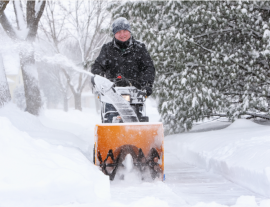
Learn the steps to take to adjust and maintain your snowblower so it lasts longer.…

Learn about Sears Technical Institute and the advanced technical content being developed for aspiring appliance techs.…

Get answers to frequently asked questions about Sears and Sears PartsDirect.…