How to make your snowblower last longer
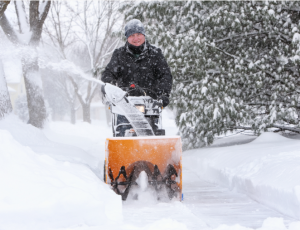

Simple maintenance steps and adjustments can help your snowblower or snow thrower last for many trouble-free years. Taking good care of the engine and other functional parts of the snowblower will prevent excessive wear and premature failure.
Follow the advice of our Sears Service Technicians to keep your snowblower in top shape and lasting longer.
How to maintain your snowblower engine
Give your snowblower engine a thorough tune-up each fall before the snow season. Follow these steps to tune up the engine so it’s ready for winter.
1. Drain old gasoline from the fuel tank
If you’ve got any gasoline left in the fuel tank from last year, drain it out. Unless you’ve used fuel stabilizer, gasoline will go bad in about 6 months.
Use extreme caution when handling gasoline. Work in a well-ventilated area free of open flames or sparks.
Disconnect the fuel line and drain gasoline into a container and safely dispose of the gasoline.
Don’t refill the tank with gas yet. Complete the additional engine and snowblower maintenance tasks below before refilling the gas tank to avoid fuel spills.
2. Replace the fuel filter
The fuel filter attaches to the fuel tank and screens out dirt and rust particles from gasoline. If the fuel filter is clogged, gas can't flow to the carburetor, and the snowblower might not start. Replacing the fuel filter yearly will help keep your carburetor clean and the engine running smoothly.
Here’s a video that shows how to replace the fuel filter in a common snowblower:
3. Check the fuel line
While replacing the fuel filter, examine the fuel line. Make sure there are no cracks in the fuel line and that it’s still flexible and soft. If the fuel line is cracked or damaged, fuel won't flow to the carburetor to start the engine.
Replace the fuel line if it’s cracked or broken. Our Replacing the Fuel Line on a Snowblower DIY YouTube video shows how to replace the fuel line on a common type of Craftsman snowblower.
4. Replace the spark plug(s)
Because snow blowers and snow throwers typically don’t have air filters, you’ll need to replace the spark plug (or spark plugs) at the beginning of every snow season so the engine starts easily and runs smoothly.
Our DIY YouTube video How to Check and Install a Snowblower Spark Plug shows you how to replace the spark plug. Be sure to set the spark plug gap properly as shown in the video so fuel ignites properly in the cylinder.
5. Drain the oil
Motor oil cools the engine parts and helps cool the cylinder in your snowblower’s engine. You’ll need to replace the engine oil at the beginning of the snow season to keep the engine running smoothly and prevent excessive wear of engine components.
Our How to Change the Oil in a Snowblower Video shows you how to drain the oil from a common MTD engine.
Don’t refill the engine with oil yet. Just drain the oil and then complete the additional maintenance tasks shown below before refilling the engine with oil and adding gasoline to the fuel tank.
Adding oil to the engine and gasoline to the fuel tank as the last steps in snowblower maintenance will help avoid fluid spills and engine problems.
How to lubricate and maintain your snowblower
Now that you’ve completed engine maintenance, you’ll need to lubricate, adjust and perform maintenance on the rest of the snow blower. Keeping auger parts and controls properly adjusted and lubricated will help these parts last longer and work better.
Lubricate the auger shaft and bearings
You’ll need to lubricate the auger shaft and bearings to prevent the auger shaft from seizing up in the dead of winter.
Follow these steps to lubricate the auger shaft and bearings:
Remove all the shear pins on the auger shaft.
Spray a light coat of silicone lubricant on the shaft and around the augers, spacers and flange bearings.
Inspect the shear pins for wear and damage. Replace any worn or damaged shear pins.
Reinstall the shear pins and secure them with their cotter pins.
Maintain the wheels and tires
Carefully tilt the snowblower on its nose (with the fuel tank still empty).
Follow these steps to get the snowblower tires and wheels ready for winter:
Use a socket wrench to remove the first wheel. Clean and coat the axle with multi-purpose automotive grease to keep it from rusting up. Reinstall the wheel.
Repeat the process on the other wheel.
Use a pressure gauge to check air pressure in each tire. Inflate the tires to the specification provided on the tire sidewall.
Adjust the skid shoes
Once you have the tires properly inflated, inspect both of the skid shoes. The skid shoes protect the shave plate from damage.
The entire bottom surface of each skid shoe should be touching the ground. If not, then you’ll need to adjust or replace the skid shoes.
Follow the steps shown in this video to adjust the skid shoes:
How To Adjust Snowblower Skid Shoes Video
If the skid shoes are worn down too far to adjust properly, replace them. Our How to Replace Snowblower Skid Shoes Video shows you how.
Clean and lubricate the controls
Wipe dust and dirt off of the auger control and drive control pivots. Spray both of those pivots with silicone lubricant.
Clean and lubricate the auger cable bracket at the bottom of the snowblower.
Lubricate the drive hex shaft
Next, you’ll need to clean and lubricate the drive hex shaft. View our How to Lubricate the Drive Hex Shaft Video to see details on completing that maintenance task.
Lubricate the auger housing and snow chute using SNOW-JET
To keep snow moving smoothly through the auger housing and snow chute, spray those areas with SNOW-JET non-stick polymer.
SNOW-JET eliminates snow buildup in the chute and auger housing so you don't have to stop to clear snow from the snowblower, saving time and fuel. SNOW-JET also reduces friction, so snow blows further.
Refill oil and gas then check snowblower operation
Fill the engine with oil according to the directions in your owner’s manual. Fill the fuel tank with gasoline and check snowblower control operation.
Take your snowblower outside and test out both control handles under normal operation. If either handle doesn’t work smoothly, you’ll need to adjust its cable.
If the auger spins with the auger control disengaged, adjust the auger cable as shown in our How to Adjust a Snowblower Auger Control Video.
If the snowblower creeps forward with the drive handle disengaged, watch our How to Adjust the Drive Control Video to learn how to adjust the drive control.
Repeat all of these maintenance and adjustment steps yearly to keep your snowblower or snow thrower in top shape and lasting longer.
Symptoms for gas snowblowers
Choose a symptom to see related snowblower repairs.
Main causes: punctured tire, damaged rim…
Main causes: dirty carburetor, stale fuel…
Main causes: dirty carburetor, clogged fuel filter, dirty spark plug, incorrect valve lash, leaky engine gaskets…
Main causes: stale gas, clogged carburetor, clogged or broken fuel line, dirty spark plug, bad rewind starter, incorrect…
Main causes: snow build-up in chute, chute drive mechanism failure, bad chute control assembly…
Main causes: loose drive clutch cable, damaged drive clutch cable, worn friction disc, scraper blade scraping the ground…
Main causes: clogged chute, damaged auger blades, broken shear pins, worn auger belt, damaged gear case, engine problems…
Main causes: broken shear pins, worn or loose auger drive belt, auger drive cable failure, damaged auger, bad gear case…
Things to do: replace the spark plug, change the oil, rebuild the carburetor, adjust valve lash, adjust or replace the b…
Repair guides for gas snowblowers
These step-by-step repair guides will help you safely fix what’s broken on your snowblower.

How to replace a snowblower fuel filter
Replace the fuel filter on your snowblower if it's clogged or damaged.…
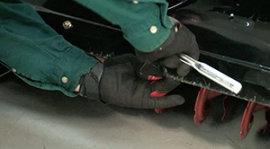
How to replace a snowblower shave plate
Follow the 7 easy steps in this repair guide/video to replace a worn out shave plate on your snowblower.…
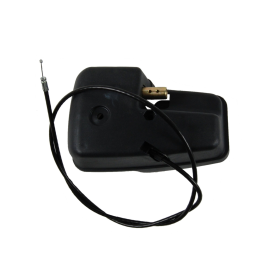
How to replace a snowblower chute control gearbox assembly
Replace the chute control gearbox on your snowblower if it's stripped or damaged.…
Articles and videos for gas snowblowers
Use the advice and tips in these articles and videos to get the most out of your snowblower.
Learn the steps to take to adjust and maintain your snowblower so it lasts longer.…
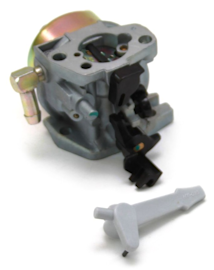
This chart will help you find the right carburetor for your Craftsman snowblower, tiller or log splitter.…
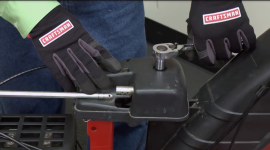
Learn how to replace the chute control assembly and gearbox if the chute on your snowblower won't turn.…