- Kenmore refrigerator water filters
- Whirlpool refrigerator water filters
- Samsung refrigerator water filters
- GE refrigerator water filters
- LG refrigerator water filters
- Frigidaire refrigerator water filters
- KitchenAid refrigerator water filters
- Maytag refrigerator water filters
- Kenmore Elite refrigerator water filters
- Estate refrigerator water filters
- GE Profile refrigerator water filters
- Amana refrigerator water filters
- Bosch refrigerator water filters
- Dacor refrigerator water filters
- Electrolux refrigerator water filters
Top DIY repair help
View All Repair Categories
Appliances
Lawn & Garden
Power Tools
Home Improvement
Sports & Leisure
Heating & Cooling
Quick Links
How to replace the lid switch/lock assembly on a top-load washer
less than a minute readMay 20Lyle Weischwill
Repair time and Difficulty
45 minutes or less
Tools Required
- 1/4" nut driver
- Putty knife
- Phillips screwdriver
- Slot screwdriver
- Work gloves
This washer repair guide gives step-by-step instructions for replacing the lid switch/lock assembly on a top-load washer. The assembly has a switch that detects whether the washer lid is open—if the lid is open, the washer won't start. The assembly also has a lock that keeps the lid safely locked during the cycle. If the lid switch or the lock doesn't work correctly, and the lid lock light flashes, the washer might need a replacement lid switch or lid lock. Because other problems have the same symptoms, we recommend having a local washer repair expert diagnose the cause. If the lid switch/lock assembly is faulty, replace the assembly with a manufacturer-approved washer part.
This repair guide covers vertical modular washers in the Kenmore 110-series. It also covers vertical modular washers in the Whirlpool Cabrio series and Maytag Centennial series. Vertical modular washers use a super-high-speed spin cycle that extracts water from the load; the lid stays locked to protect you from the fast-spinning parts.
We also have instructions for replacing the door lock on a front-load washer.
Instructions
- 1. Shut off the electricity and water
Unplug the power cord from the wall outlet.
Turn off the water supply valves for the washer.
Wear work gloves to protect your hands.
Have someone help you move the washer away from the wall.
- 2. Lift the top panel
Tape the lid shut so it doesn’t flop open and damage the control console or hit your arms as you work.
Pull the washer forward to access the back of the control console. Remove the top screws on the 2 hinge brackets on the back of the washer.
Remove the screw from the wire cover and pull it off of the washer.
Slide the top panel forward about half an inch and then raise the front of the top panel up about a quarter of an inch.
With the panel still raised slightly, push the panel back about a quarter of an inch to release it from the brackets.
Lift the top panel and prop it against the wall behind the washer.

PHOTO: Tape the lid shut. 
PHOTO: Remove the top screws from the hinges. 
PHOTO: Remove the screw from the wire cover. 
PHOTO: Remove the wire cover from the washer. 
PHOTO: Move the top panel slightly forward and up. 
PHOTO: Push the top panel back to release it from the backets. 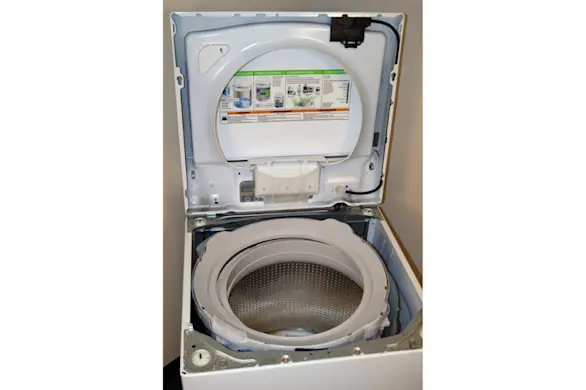
Prop the top panel against the back wall.
- 3. Release the lid switch/lock assembly from the top panel
Using a 1/4-inch nut driver, remove the 2 mounting screws that secure the lid switch/lock assembly to the top panel. Release the lid switch/lock assembly from the top panel.
The lid switch/lock assembly is still attached to the wire harness. Let it hang from the wire harness for now.
Use a slot screwdriver to release the wire harness from the clips on the side of the top panel.
Pry out the white plastic wire harness clip at the back of the front panel.
The wire harness is still connected to the electronic control board inside the console.
Release the white plastic clip from the top panel—don't remove the white plastic clip or pull the wire harness out yet.

PHOTO: Remove the lid switch/lock assembly mounting screws. 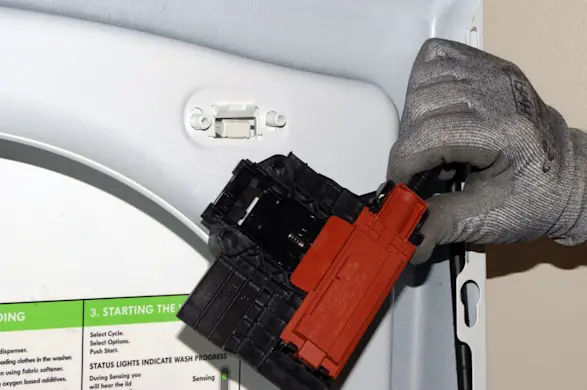
PHOTO: Release the lid switch/lock assembly from the top panel. 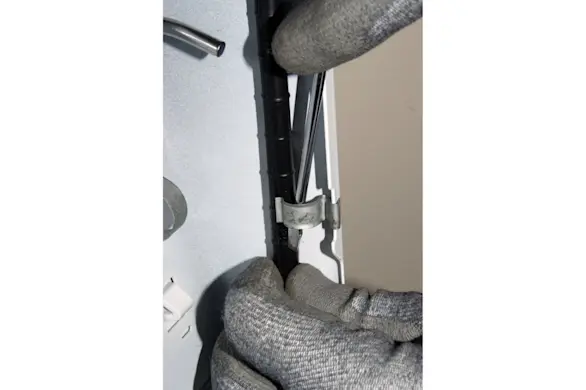
PHOTO: Release the wire harness from the clips on the side of the top panel. 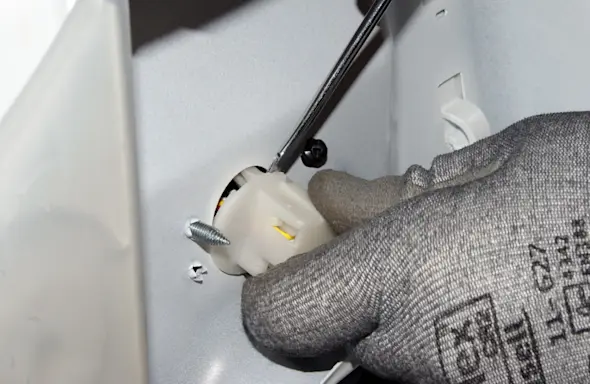
PHOTO: Release but don't remove the white plastic clip from the top panel.
- 4. Open the control console
Carefully lower the top panel and rest it on the top of the washer.
Pull the washer forward to access the back panel of the console.
Remove the 2 screws from the top of the back panel of the console.
Push back on the control panel while sliding a putty knife under the right corner of the control panel to release the mounting clip.
Repeat on the left side to release the console.
Lay the console on the top of the washer.
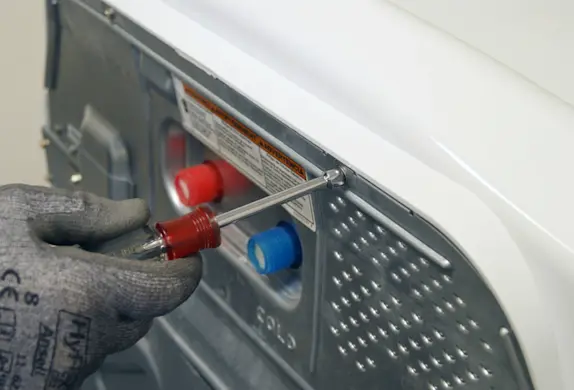
PHOTO: Remove the screws from the console back panel. 
PHOTO: Push back on the console and release the clips. 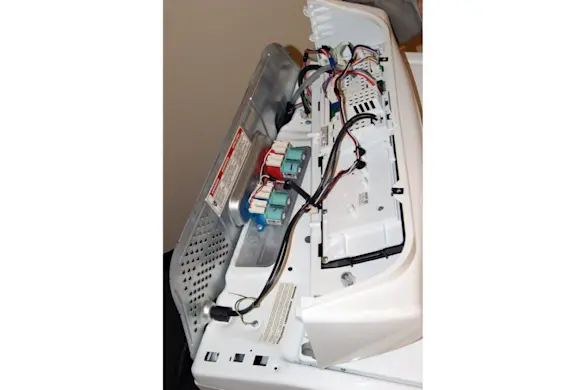
PHOTO: Lay the console on top of the washer.
- 5. Remove the lid switch/lock assembly
Locate the wire harness connection for the lid switch/lock assembly on the back of the control board (The lid switch/lock harness has yellow, blue, white and red wires on the washer used in this repair guide).
Release the locking tab and pull the lid switch/lock assembly wire harness plug out of the receptacle on the electronic control board.
Thread the lid switch/lock assembly wire harness through the hole in the back of the top panel where you released the white plastic clip.
Release the tape on the lid and open the washer lid.
Pull the lid switch/lock assembly out of the washer.
Tape the lid shut again.
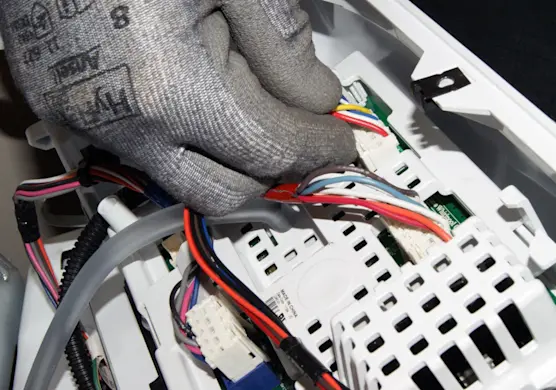
PHOTO: Release the harness connection locking tab. 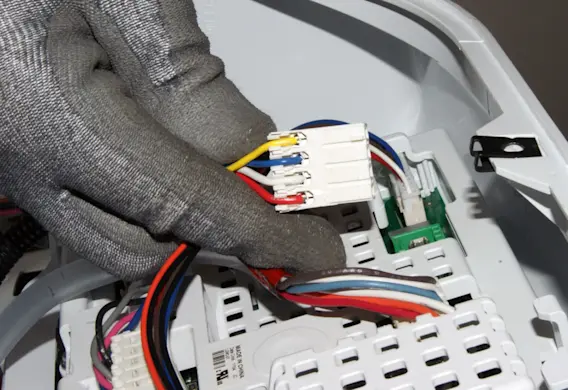
PHOTO: Disconnect the lid switch/lock wire harness from the electronic control board. 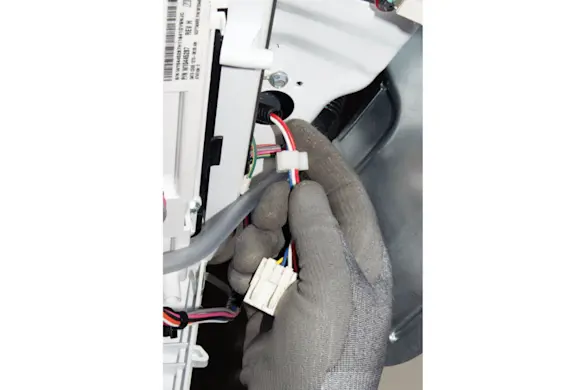
PHOTO: Thread the wire harness the the hold in the back of the top panel. 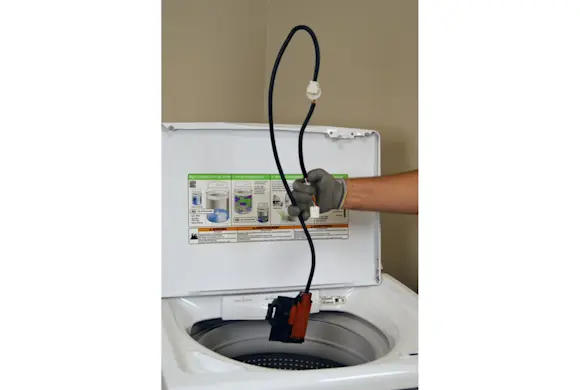
PHOTO: Pull the lid switch/lock assembly out of the washer.
- 6. Install the new lid switch/lock assembly
Snap the console back into the mounting clips.
Move the washer near the back wall.
Lift the top panel and prop it securely against the back wall behind the washer.
Push the end of the wire harness into the hole at the back of the top panel.
Push the white plastic wire harness clip into the hole and snap it into place.
Route the wire harness into the side of the top panel and secure the wire harness in the clips on the side of the top panel.
Position the lid switch/lock assembly on the top panel and secure it with the mounting screws.
Carefully lower the top panel.
Engage the brackets by pulling the panel forward about a quarter of an inch until the panel drops and the brackets engage. Push the panel back about a quarter of an inch to lock it flush with the frame.
Release the clips and open the console to access the electronic control board.
Plug the wire harness into the correct connector on the electronic control board. Make sure that the locking tab snaps into place.
- 7. Reinstall the console
Position the console on top of the top panel and snap the mounting clips into place to secure the console on the top panel.
Reinstall the screws at the top of the back panel on the console and tighten the screws firmly.
- 8. Reinstall the back panel screws
Insert the screws back into the top of the hinges on the back of the control console. Tighten those screws firmly.
Place the tabs on the right side of the wire cover in the slots and then line up the holes on the left side and insert the mounting screw. Tighten the mounting screw to secure the wire cover in place.
- 9. Restore the water and power
Turn on the water supply valves. Plug the washer into the electrical outlet.
Return the washer to its original location.