- Kenmore refrigerator water filters
- Whirlpool refrigerator water filters
- Samsung refrigerator water filters
- GE refrigerator water filters
- LG refrigerator water filters
- Frigidaire refrigerator water filters
- KitchenAid refrigerator water filters
- Maytag refrigerator water filters
- Kenmore Elite refrigerator water filters
- Estate refrigerator water filters
- GE Profile refrigerator water filters
- Amana refrigerator water filters
- Bosch refrigerator water filters
- Dacor refrigerator water filters
- Electrolux refrigerator water filters
Top DIY repair help
View All Repair Categories
Appliances
Lawn & Garden
Power Tools
Home Improvement
Sports & Leisure
Heating & Cooling
Quick Links
How to replace the electronic control board on a top-load washer
less than a minute readMay 20Lyle Weischwill
Repair time and Difficulty
30 minutes or less
Tools Required
- Nut driver
- Slot screwdriver
- Putty knife
- Work gloves
This step-by-step washer repair guide explains how to replace the electronic control board in the console of a top-load washer. The electronic control board is the "brains" of the washer that starts and stops the washer's components, such as the drive motor and the drain pump. If the control board's display doesn't light up, or if the washer doesn't fill, spin, or drain, the electronic control board could be the problem. Because a problem with the control board can be hard to diagnose, we recommend having a local washer repair expert determine the cause. If the electronic control board is faulty, replace it with a manufacturer-approved washer part.
Use this procedure to replace the electronic control board on Kenmore, Whirlpool, Maytag and Amana top-load washers. You also can use the same basic steps to the replace the control board in some LG, Samsung and GE top-load washers.
Instructions
- 1. Shut off the electricity
Unplug the power cord from the wall outlet.
Wear work gloves to protect your hands.
Have someone help you move the washer away from the wall.
- 2. Remove the control knob
Pull the control knob off of the front of the control panel.

PHOTO: Remove the control knob from the control panel.
- 3. Open the control console
Remove the 2 screws from the top of the back panel of the console.
Push back on the control panel while sliding a putty knife under the right corner of the control panel to release the mounting clip.
Repeat on the left side to release the console. Set the console on top of the washer.
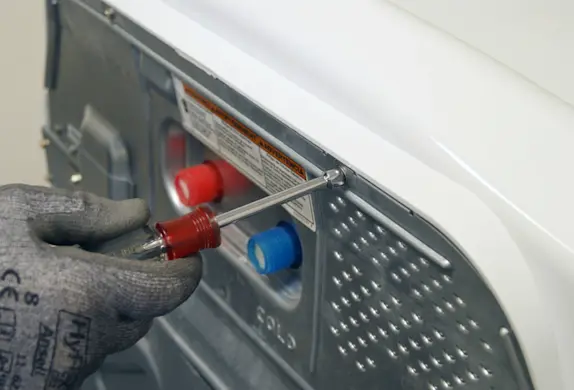
PHOTO: Remove the screws from the console back panel. 
PHOTO: Push back on the console and release the clips. 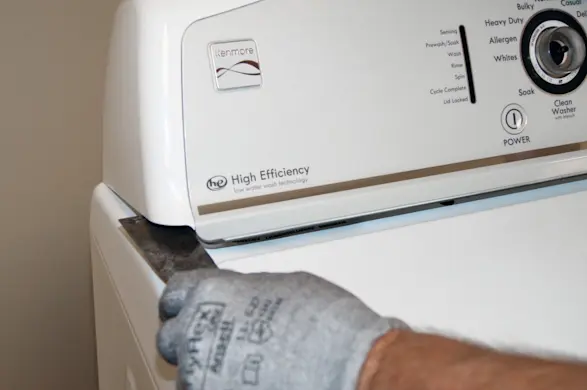
PHOTO: Release the console mounting clip. 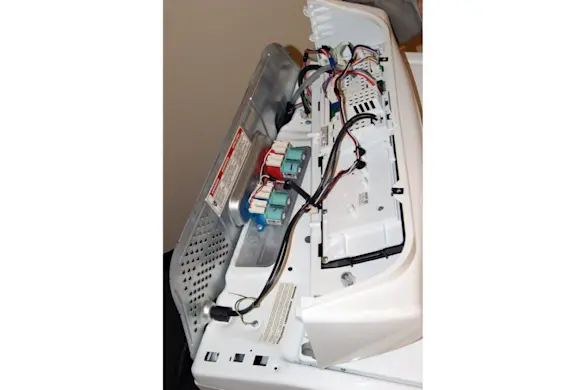
PHOTO: Lay the console on top of the washer.
- 4. Remove the electronic control board
Take a digital photograph or otherwise document the location of wires connected to the back of the electronic control board.
Release any locking tabs on the wire harness connection plugs and then pull each wire plug out of the connections on the back of the control board.
Disconnect the air hose from the back of the control board.
Remove the mounting screw from the electronic control board.
Release the locking tabs and pull the electronic control board out of the console.

PHOTO: Document the location of the wires connected to the electronic control board. 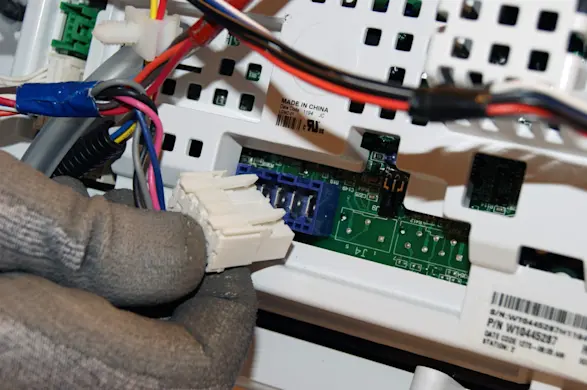
PHOTO: Disconnect the wires from the control board. 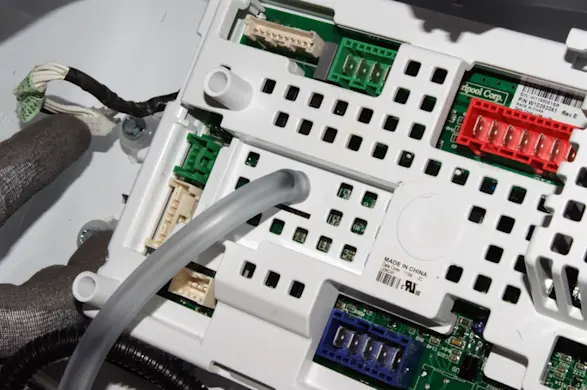
PHOTO: Disconnect the air hose from the back of the control board. 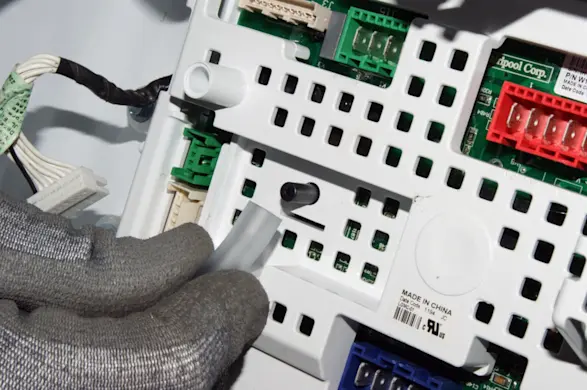
PHOTO: Remove the air hose. 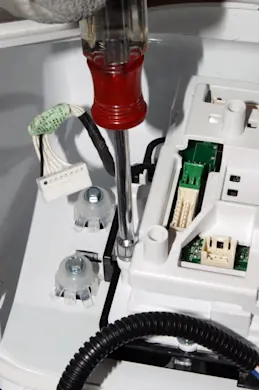
PHOTO: Remove the control board mounting screw. 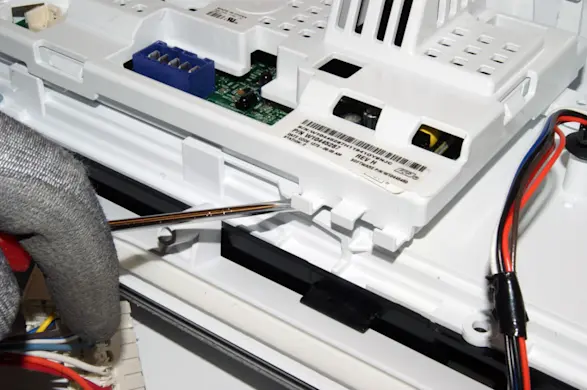
PHOTO: Release the control board locking tabs. 
PHOTO: Remove the electronic control board. Tip: The other end of the air hose attaches to the bottom of the washer tub. The hose enables the control board to detect the water level.
- 5. Install the new control board
Position the new control board in place and snap it into the locking tabs.
Insert the mounting screw in the control board housing and tighten it firmly.
Reconnect the air hose down to the back of the control board.
Using your photograph or other documentation as a guide, connect all the wires to the back of the new control board.
Push the wire harness plugs into the connections on the control board until the locking tabs snap into place.
- 6. Reinstall the console
Position the console on top of the top panel and snap the mounting clips into place to secure the console on the top panel.
Reinstall the screws at the top of the back panel on the console. Tighten the screws firmly.
Reinstall the control knob.
- 7. Restore the electrical power
Plug the washer into the electrical outlet.
Return the washer to its original location.
- 8. Calibrate the washer
With the washer shut off, the basket empty (no water or clothes) and the lid closed, enter the diagnostic mode:
Turn the control dial 1 complete rotation (360 degrees) counterclockwise.
Quickly (within about 6 seconds) turn the control dial 3 clicks clockwise, one click counterclockwise, and one more click clockwise.
All the green status lights blink when you successfully activate the diagnostic mode.
If the status lights don’t blink, turn the control dial one complete rotation counter-clockwise to reset the control and then try again, this time turning the knob faster.
In the diagnostic mode, select the Calibration Cycle by turning the control dial 4 clicks clockwise. When the Rinse light turns on, press Start to begin the Calibration Cycle, which runs for 2 to 3 minutes. When the Calibration Cycle ends, the lid unlocks and the washer shuts off.