- Kenmore refrigerator water filters
- Whirlpool refrigerator water filters
- Samsung refrigerator water filters
- GE refrigerator water filters
- LG refrigerator water filters
- Frigidaire refrigerator water filters
- KitchenAid refrigerator water filters
- Maytag refrigerator water filters
- Kenmore Elite refrigerator water filters
- Estate refrigerator water filters
- GE Profile refrigerator water filters
- Amana refrigerator water filters
- Bosch refrigerator water filters
- Dacor refrigerator water filters
- Electrolux refrigerator water filters
Top DIY repair help
View All Repair Categories
Appliances
Lawn & Garden
Power Tools
Home Improvement
Sports & Leisure
Heating & Cooling
Quick Links
How to replace a vacuum power head cogged drive belt
less than a minute readFeb 18Lyle Weischwill
Repair time and Difficulty
15 minutes or less
Tools Required
- Phillips screwdriver
- Flat-blade screwdriver
- Work gloves
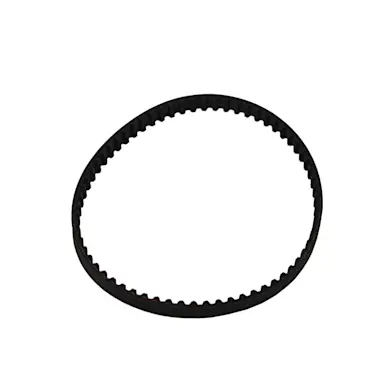
This DIY repair guide explains how to replace a beater bar cogged drive belt on a canister vacuum's power head, such as the Kenmore PowerMate. The cogged belt meshes with a socket on the beater bar, turning the beater bar when the power head drive motor starts. If the cogged belt is worn or breaks, the beater bar won't turn. Replace a worn or broken cogged drive belt using the manufacturer-approved vacuum part. This repair procedure also works for common Whirlpool, Panasonic and Miele canister vacuums that use cogged belts. If the drive belt is ribbed instead of cogged, see our repair guide How to Replace a Vacuum Power Head Ribbed Drive Belt.
Instructions
- 1. Remove the wand assembly
Press the release button on the side of the wand and pull the wand assembly straight up and out of the power brush assembly.
- 2. Remove the light
Press the sides of the light cover to release the clips. Remove the cover. Unscrew and remove the light bulb.
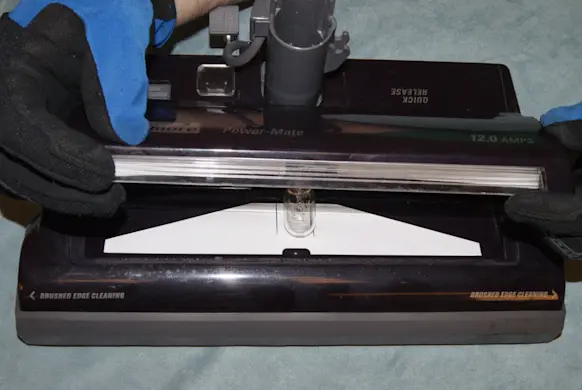
PHOTO: Remove the light cover. 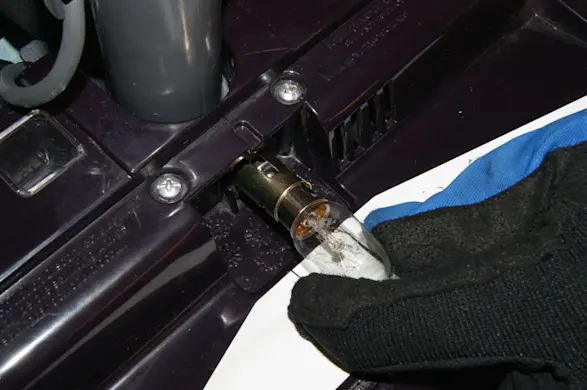
PHOTO: Remove the light.
- 3. Remove the power brush cover
Use a Phillips screwdriver to remove the 2 screws above the light socket.
Turn the power brush assembly upside down and locate the locking clips in the side of the power brush attachment. Insert a flat-tip screwdriver into each clip to release the cover.
Pull the cover off the power brush assembly.
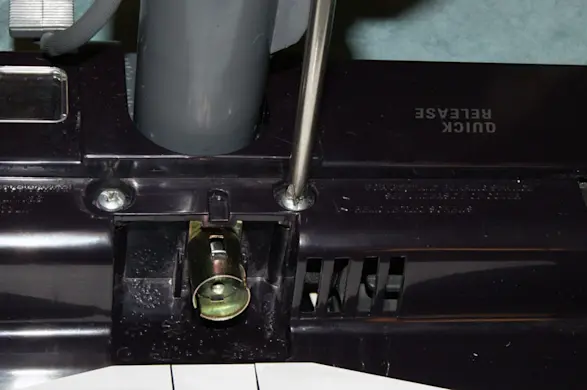
PHOTO: Remove the brush cover screws. 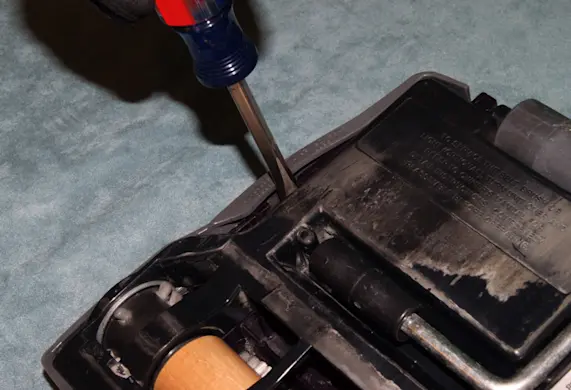
PHOTO: Release the locking tab. 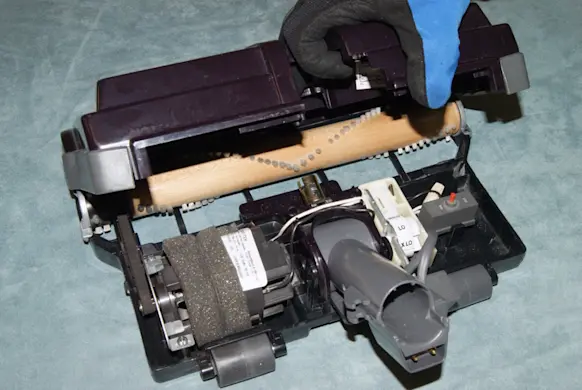
PHOTO: Remove the brush cover.
- 4. Remove the drive belt
Lift the brush roll out of the base and remove the belt.
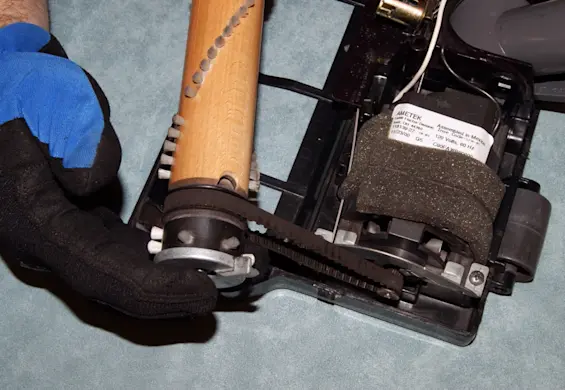
PHOTO: Remove the belt.
- 5. Install the new drive belt
Install the new belt on the motor pulley and brush roll. Push the brush roll back into the base.
- 6. Reinstall the cover
Snap the cover into place, making sure the locking clips completely engage. Replace the screws above the light socket on the top of the power brush assembly.
- 7. Reinstall the bulb
Insert the the light bulb and rotate it clockwise to lock it into place. Snap the light cover into the power brush cover.
- 8. Reinstall the wand assembly
Push the wand assembly into the receptacle and lock it into place.