- Kenmore refrigerator water filters
- Whirlpool refrigerator water filters
- Samsung refrigerator water filters
- GE refrigerator water filters
- LG refrigerator water filters
- Frigidaire refrigerator water filters
- KitchenAid refrigerator water filters
- Maytag refrigerator water filters
- Kenmore Elite refrigerator water filters
- Estate refrigerator water filters
- GE Profile refrigerator water filters
- Amana refrigerator water filters
- Bosch refrigerator water filters
- Dacor refrigerator water filters
- Electrolux refrigerator water filters
Top DIY repair help
View All Repair Categories
Appliances
Lawn & Garden
Power Tools
Home Improvement
Sports & Leisure
Heating & Cooling
Quick Links
How to replace a freestanding ice maker cutter grid
less than a minute readMar 17Lyle Weischwill
Repair time and Difficulty
15 minutes or less
Tools Required
- 1/4-inch nut driver
- Work gloves
- Clean wash cloth or shop towel
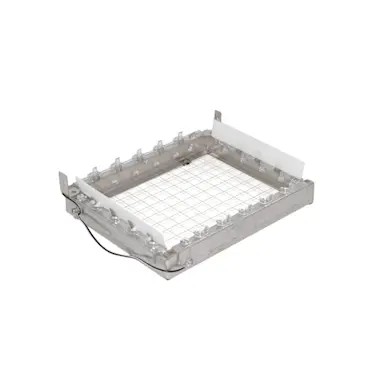
This DIY repair guide explains how to replace the cutter grid in a freestanding ice maker. The cutter grid has thin, heated wires that slice the slab of ice on the evaporator plate into ice cubes that fall into the bin. When the cutter grid breaks, the ice slabs can stack up, and ice production stops. Replace the broken cutter grid with the manufacturer-approved freestanding ice maker part.
These steps show how to replace the cutter grid in Kenmore, Whirlpool, KitchenAid, Maytag, GE and JennAir freestanding ice makers.
Instructions
- 1. Disconnect power
Remove any ice that is in the storage bin of the ice maker and store it in a separate container during this repair.
Cover the drain hole in the ice bin with a cloth to prevent hardware from falling inside.
Unplug the ice maker or shut off the house circuit breaker to disconnect electrical power.
- 2. Remove the cutter grid cover
Open the ice maker door and remove the screws from the bottom of the cutter grid cover.
Pull the cutter grid cover out and set it aside.
Remove any uncut slabs of ice from the top of the cutter grid.
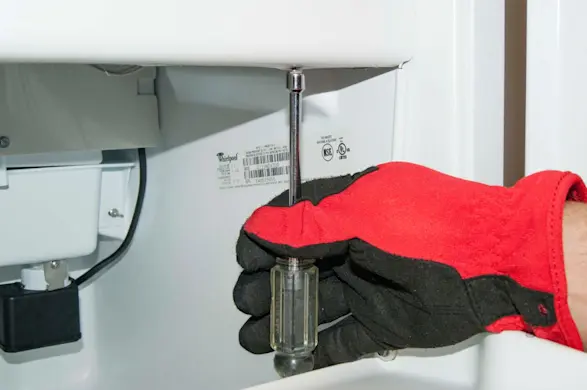
PHOTO: Remove the cutter grid cover screws. 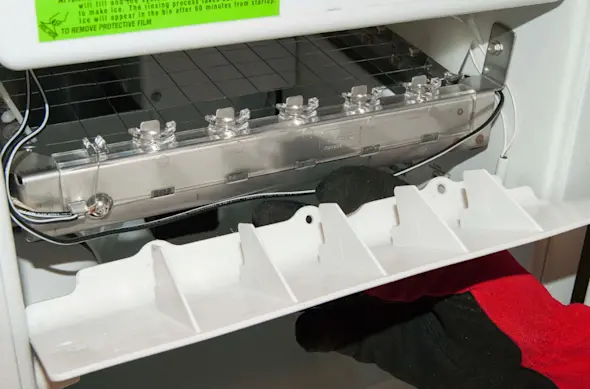
PHOTO: Remove the cutter grid cover.
- 3. Remove the cutter grid
Remove the hex-head mounting screws from both sides of the cutter grid.
Pull the cutter grid down slightly to access the cutter grid wire harness connection.
Disconnect the cutter grid wire harness connector from the bottom of the control housing.
Pull the cutter grid out of the ice maker.
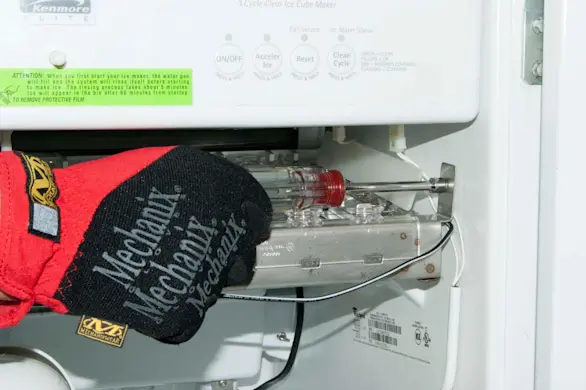
PHOTO: Remove the cutter grid mounting screws. 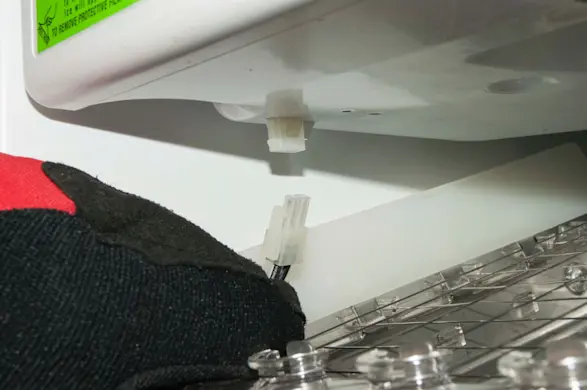
PHOTO: Unplug the cutter grid wire harness. 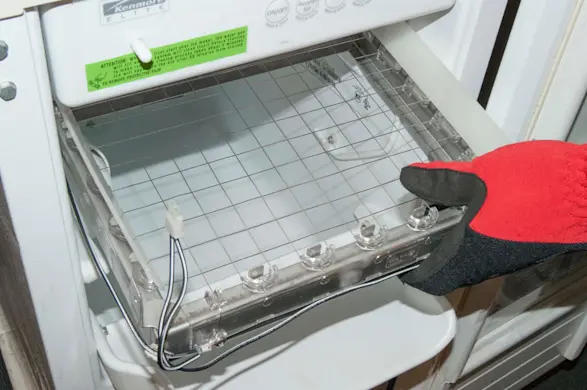
PHOTO: Remove the cutter grid.
- 4. Install the new cutter grid
Push the new cutter grid into the ice maker and plug the cutter grid wire harness into the connector in the bottom of the control housing.
Line up the mounting screw holes and reinstall the hex-head mounting screws.
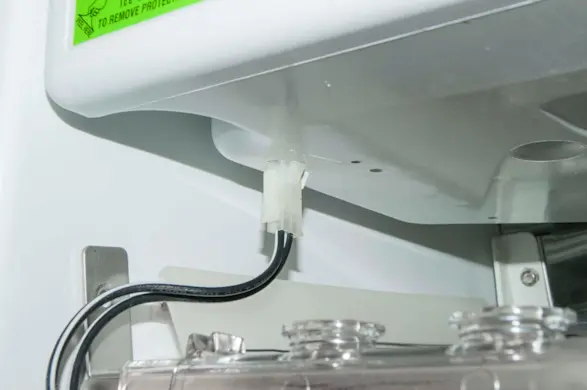
PHOTO: Plug in the cutter grid wire harness.
- 5. Reinstall the cutter grid cover
Position the cutter grid cover in front of the cutter grid and secure it with the mounting screws.
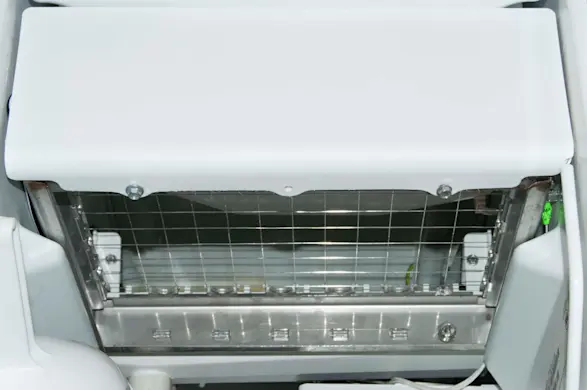
PHOTO: Reinstall the cutter grid cover.
- 6. Restore power
Plug the ice maker into the wall outlet or reset the house circuit breaker to restore power.
- 7. Fill the ice storage bin
Remove the cloth that was used to cover the drain hole in the ice storage bin.
Fill the ice bin with ice that was stored in a separate container during this repair.
Note: If you need help completing this repair on a Frigidaire ice maker, schedule [Frigidaire ice machine repair](https://www.searshomeservices.com/repair/frigidaire/ice-maker-freestanding) and we'll send a service technician to your home to fix the problem.