Samsung RF26 model French door refrigerator error codes

These error code explanations can help you diagnose a problem with your Samsung RF26 French-door refrigerator. For repair how-to help, visit the PartsDirect repair help section, which includes repair help for major appliances, lawn and garden equipment, garage door openers, vacuum cleaners and more. Search for your model number to find a complete list of replacement parts for your refrigerator.
This refrigerator displays an error code on the freezer and refrigerator temperature digital displays when the control detects a component failure. The freezer temperature display shows the number designation of the code and the refrigerator temperature display shows E.
When the control detects a communication error between the control panel and the electronic control board, the freezer temperature display shows Er and the refrigerator display shows Pc.
Refer to the chart below to find the cause of the error code and get troubleshooting advice to clear the code.
The refrigerator may work properly even though the control displays an error code. A power outage can sometimes cause the control to detect a problem and display a code. The control may continue to display the code even if the component failure no longer exists. To reset the display so it shows freezer and refrigerator temperatures, press and hold the Power Freeze and Power Cool buttons simultaneously for 8 seconds. The error code will disappear and the display will resume normal operations.
If the code reappears on the display, follow the troubleshooting steps in the chart below to fix the problem and clear the code.
If you cleared an error code from the display and encounter cooling problems in the refrigerator, the component problem that caused the code likely still exists even though you cleared the code from the display. You can redisplay a detected error code by pressing and holding the Power Freeze and Power Cool buttons simultaneously for 8 seconds. The display will chime and display the code for 30 seconds. The display will then revert back to showing freezer and refrigerator temperatures.
Follow the troubleshooting steps described for the code to fix the component failure and clear the code.
Freezer temperature sensor failure
Unplug the refrigerator and check the wire harness connection on the freezer temperature sensor. Reconnect the wire harness if it's loose. If the wire harness connection is okay, check sensor resistance using a multimeter. The meter should measure about 5,600 ohms if the sensor temperature is 72 degrees (room temperature), 13,290 ohms at 32 degrees and 29,000 ohms at 0 degrees. Replace the temperature sensor if resistance is off by more than 10 percent. If sensor resistance is okay, reinstall the temperature sensor and check the sensor's wire harness connections to the electronic control board (red wire on CN30 and gray wire on CN76). Reconnect the wires if loose. If the wire connections are okay, disconnect the sensor wires from the electronic control board and measure resistance through the sensor's wires. The meter should read the same resistance as for the temperature sensor. If the meter measures correct sensor resistance through the wires, you'll likely need to replace the electronic control board because it's not accurately detecting sensor resistance. Find and repair the sensor wiring failure if the meter measures incorrect resistance through the sensor wires.
Refrigerator compartment temperature sensor failure
Unplug the refrigerator and check the wire harness connection on the refrigerator compartment temperature sensor. Reconnect the wire harness if it's loose. If the wire harness connection is okay, check sensor resistance using a multimeter. The meter should measure about 5,600 ohms if the sensor temperature is 72 degrees (room temperature), 13,290 ohms at 32 degrees and 11,700 ohms at 37 degrees. Replace the temperature sensor if resistance is off by more than 10 percent. If sensor resistance is okay, reinstall the temperature sensor and check the sensor's wire harness connections to the electronic control board (white wire on CN30 and gray wire on CN76). Reconnect the wires if loose. If the wire connections are okay, disconnect the sensor wires from the electronic control board and measure resistance through the sensor's wires. The meter should read the same resistance as for the temperature sensor. If the meter measures correct sensor resistance through the wires, you'll likely need to replace the electronic control board because it's not accurately detecting sensor resistance. Find and repair the sensor wiring failure if the meter measures incorrect resistance through the sensor wires.
Freezer evaporator defrost temperature sensor failure
Unplug the refrigerator and check the wire harness connection on the freezer evaporator defrost temperature sensor. Reconnect the wire harness if it's loose. If the wire harness connection is okay, check sensor resistance using a multimeter. The meter should measure about 5,600 ohms if the sensor temperature is 72 degrees (room temperature), 13,290 ohms at 32 degrees and 29,000 ohms at 0 degrees. Replace the temperature sensor if resistance is off by more than 10 percent. If sensor resistance is okay, reinstall the temperature sensor and check the sensor's wire harness connections to the electronic control board (orange wire on CN30 and gray wire on CN76). Reconnect the wires if loose. If the wire connections are okay, disconnect the sensor wires from the electronic control board and measure resistance through the sensor's wires. The meter should read the same resistance as for the temperature sensor. If the meter measures correct sensor resistance through the wires, you'll likely need to replace the electronic control board because it's not accurately detecting sensor resistance. Find and repair the sensor wiring failure if the meter measures incorrect resistance through the sensor wires.
Refrigerator evaporator defrost temperature sensor failure
Unplug the refrigerator and check the wire harness connection on the refrigerator evaporator defrost temperature sensor. Reconnect wire harness if it's loose. If the wire harness connection is okay, check sensor resistance using a multimeter. The meter should measure about 5,600 ohms if the sensor temperature is 72 degrees (room temperature) and 13,290 ohms at 32 degrees. Replace the temperature sensor if resistance is off by more than 10 percent. If sensor resistance is okay, reinstall the temperature sensor and check the sensor's wire harness connections to the electronic control board (sky blue wire on CN30 and gray wire on CN76). Reconnect the wires if loose. If the wire connections are okay, disconnect the sensor wires from the electronic control board and measure resistance through the sensor's wires. The meter should read the same resistance as for the temperature sensor. If the meter measures correct sensor resistance through the wires, you'll likely need to replace the electronic control board because it's not accurately detecting sensor resistance. Find and repair the sensor wiring failure if the meter measures incorrect resistance through the sensor wires.
Ambient temperature sensor failure
Unplug the refrigerator and check the wire harness connection on the ambient temperature sensor. Reconnect the wire harness if it's loose. If the wire harness connection is okay, check sensor resistance using a multimeter. The meter should measure about 5,600 ohms if the sensor temperature is 72 degrees (room temperature). Replace the temperature sensor if resistance is off by more than 10 percent. If sensor resistance is okay, reinstall the temperature sensor and check the sensor's wire harness connections to the electronic control board (blue wires on CN78). Reconnect the wires if loose. If the wire connections are okay, disconnect the sensor wires from the electronic control board and measure resistance through the sensor's wires. The meter should read the same resistance as for the temperature sensor. If the meter measures correct sensor resistance through the wires, you'll likely need to replace the electronic control board because it's not accurately detecting sensor resistance. Find and repair the sensor wiring failure if the meter measures incorrect resistance through the sensor wires.
Refrigerator pantry drawer temperature sensor failure
Unplug the refrigerator and check the wire harness connection on the pantry drawer temperature sensor in the refrigerator compartment. Reconnect the wire harness if it's loose. If the wire harness connection is okay, check sensor resistance using a multimeter. The meter should measure about 5,600 ohms if the sensor temperature is 72 degrees (room temperature), 11,700 ohms at 37 degrees and 13,290 ohms at 32 degrees. Replace the temperature sensor if resistance is off by more than 10 percent. If sensor resistance is okay, reinstall the temperature sensor and check the sensor's wire harness connections to the electronic control board (yellow wire on CN30 and gray wire on CN76). Reconnect the wires if loose. If the wire connections are okay, disconnect the sensor wires from the electronic control board and measure resistance through the sensor's wires. The meter should read the same resistance as for the temperature sensor. If the meter measures correct sensor resistance through the wires, you'll likely need to replace the electronic control board because it's not accurately detecting sensor resistance. Find and repair the sensor wiring failure if the meter measures incorrect resistance through the sensor wires.
Ice maker temperature sensor failure
Unplug the refrigerator and check the ice maker wire harness connection. Reconnect the wire harness if it's loose. If the ice maker wire harness connection is okay, check the ice maker temperature sensor resistance (through the white wires that connect the sensor to the ice maker harness plug) using a multimeter. The meter should measure about 5,600 ohms if the sensor temperature is 72 degrees (room temperature), 13,290 ohms at 32 degrees and 29,000 ohms at 0 degrees. Replace the ice maker if resistance is off by more than 10 percent (the temperature sensor comes with the ice maker and isn't available separately). If sensor resistance is okay, reinstall the ice maker and check the ice maker temperature sensor's wire harness connections to the electronic control board (red and white wires on pins 8 and 9 of CN90). Reconnect the wires if loose. If the wire connections are okay, disconnect the sensor wires from the electronic control board and measure resistance through the sensor's wires. The meter should read the same resistance as for the temperature sensor. If the meter measures correct sensor resistance through the wires, you'll likely need to replace the electronic control board because it's not accurately detecting sensor resistance. Find and repair the sensor wiring failure if the meter measures incorrect resistance through the ice maker temperature sensor wires.
Humidity sensor failure
Unplug the refrigerator and check the humidity sensor wire harness connection. Reconnect the wire harness if it's loose. If the humidity sensor wire harness connection is okay, unplug the humidity sensor and check resistance through the yellow and gray humidity sensor wires using a multimeter. The meter should measure around 50 ohms of resistance. If the meter measures infinite resistance or near 0 resistance through the yellow and gray humidity sensor wires, replace the humidity sensor. If humidity sensor resistance through the yellow and gray wires is around 50 ohms, plug the humidity sensor back into the wire harness and check resistance through the gray and white/blue humidity sensor wires that connect to CN30 on the electronic control board. If the meter measures around 50 ohms through the gray and white/blue wires, then you'll likely need to replace the electronic control board because it isn't accurately detecting humidity sensor resistance. Find and repair the humidity sensor wiring failure if the meter measures incorrect resistance through the gray and white/blue humidity sensor wires.
Freezer evaporator fan failure
Unplug the refrigerator and check the wire harness connections on the freezer evaporator fan. Reconnect any loose wires. Check for evaporator frost and ice buildup that can block fan blade rotation. Defrost any ice buildup from the evaporator. Check the freezer evaporator fan wiring connections (yellow, gray and brown wires) on the CN76 electronic control board connector. Reconnect any loose wires. If the wiring connections are okay, replace the freezer evaporator fan.
Refrigerator evaporator fan failure
Unplug the refrigerator and check the wire harness connections on the refrigerator evaporator fan. Reconnect any loose wires. Check for evaporator frost and ice buildup that can block fan blade rotation. Defrost any ice buildup from the evaporator. Check the refrigerator evaporator fan wiring connections (orange, gray and red wires) on the CN76 electronic control board connector. Reconnect any loose wires. If the wiring connections are okay, replace the refrigerator evaporator fan.
Condenser fan failure
Unplug the refrigerator and check the wire harness connections on the condenser fan. Reconnect any loose wires. Check for an obstruction that could block the condenser fan blade from spinning and remove obstruction to fan blade rotation. Check the condenser fan wiring connections (sky blue, gray and blue wires) on the CN76 electronic control board connector. Reconnect any loose wires. If the wiring connections are okay, replace the refrigerator evaporator fan.
Freezer evaporator defrost system failure
Unplug the refrigerator and remove the electronic control board cover. Using a multimeter, check the resistance through the brown wire on the CN70 control board connector to the gray wire on CN72. If the freezer is at operating temperature (around 0 degrees) then the meter should measure about 63 ohms of resistance. If the meter measures 63 ohms, check the freezer evaporator defrost temperature sensor as described in troubleshooting for the 4 E error code. Replace the freezer evaporator defrost temperature sensor if it's bad. If the freezer evaporator defrost temperature sensor is good, then you may need to replace the electronic control board because the board isn't sending electric current to the defrost heater. If the meter measures infinite resistance through the brown and gray wires with the freezer at operating temperature, check resistance through the defrost bi-metal thermostat and the defrost heater. The meter should measure about 63 ohms through the defrost heater. Replace the defrost heater if the meter measures infinite resistance through the defrost heater. The meter should measure near 0 ohms of resistance through the defrost bi-metal thermostat. Replace the bi-metal thermostat if the meter measures infinite resistance. If the defrost heater and bi-metal thermostat are both okay, find and repair the wiring break in the defrost circuit that's preventing the defrost heater from getting electrical current.
Refrigerator evaporator defrost system failure
Unplug the refrigerator and remove the electronic control board cover. Using a multimeter, check the resistance through the white wire on the CN70 control board connector to the gray wire on CN72. If the refrigerator compartment is at operating temperature (around 37 degrees) then the meter should measure about 120 ohms of resistance. If the meter measures 120 ohms, check the refrigerator evaporator defrost temperature sensor as described in troubleshooting for the 5 E error code. Replace the refrigerator evaporator defrost temperature sensor if it's bad. If the refrigerator evaporator defrost temperature sensor is good, then you may need to replace the electronic control board because it's not sending electric current to the defrost heater. If the meter measures infinite resistance through the white and gray wires with the refrigerator compartment at operating temperature, then check resistance through the defrost bi-metal thermostat and the defrost heater. The meter should measure about 120 ohms through the defrost heater. Replace the defrost heater if the meter measures infinite resistance through the defrost heater. The meter should measure near 0 ohms of resistance through the defrost bi-metal thermostat. Replace the bi-metal thermostat if the meter measures infinite resistance. If the defrost heater and bi-metal thermostat are both okay, find and repair the wiring break in the defrost circuit that's preventing the defrost heater from getting electrical current.
Ice maker failure
Check freezer temperature because the ice maker won't cycle if freezer temperature is above 15 degrees. If freezer temperature is above 15 degrees, check the freezer door gasket and replace if it's torn or damaged, allowing warm air to leak into the freezer and preventing the ice maker from cycling. If freezer temperature is near 0 degrees (normal operating temperature), unplug the refrigerator and check the ice maker wire harness connection. Reconnect the ice maker wire harness plug if it's loose. If the wire harness connection is okay, check the ice maker wire harness connections on the electronic control board (CN90 connector and the black and gray wires on CN51). Reconnect any loose wires. If the ice maker wiring connections to the electronic control board are okay, replace the ice maker.
Pantry drawer air damper heater failure
Unplug the refrigerator and pull out the pantry drawer. Check the pantry drawer air damper motor wire harness connection. Reconnect the air damper motor wire harness if it's loose. Using a multimeter, check resistance through the air damper heater (connected to the black and brown wires in the air damper motor wire harness). The meter should measure about 135 ohms through the air damper heater. Replace the pantry drawer air damper motor if the meter measures infinite resistance through the air damper heater. The air damper heater is included with the pantry drawer air damper motor and isn't available as a separate component. If the meter measures near 135 ohms through the damper heater, plug the pantry drawer air damper motor wiring harness back in and check the damper heater wiring connections to the electronic control board (black and brown wires on CN77). Reconnect any loose wires. If the wiring connections are okay, check resistance through the black and brown air damper heater wires. If the meter measures near 135 ohms through the damper heater wires, replace the electronic control board because it isn't sending voltage to the air damper heater or the control board isn't detecting the feedback signal from the air damper heater accurately. If the meter measures infinite resistance through the air damper heater wires, find and repair the wiring break in the air damper heater wires
Ice maker water tube heater failure
Unplug the refrigerator and remove the electronic control board cover. Disconnect the CN79 plug from the control board. Using a multimeter, measure resistance through the yellow and pink wires on the CN79 plug. The yellow and pink wires connect to the ice maker water tube heater. The meter should measure around 102 ohms. If the meter measures correct resistance, replace the electronic control board because the control board isn't detecting the correct resistance through the ice maker heater tube circuit. If the meter measures infinite resistance, check resistance directly at the ice maker water tube heater. Replace the ice maker water tube heater if the meter measures infinite resistance directly at the ice maker water tube heater. If the meter measures around 102 ohms directly at the water tube heater, find and repair the wiring break between the ice maker water tube heater and the electronic control board.
Communication error between the control panel and electronic control board
Unplug the refrigerator and check the wire harness connections between the control panel and the electronic control board. Reconnect any loose wires. If wiring connections are sound, you'll likely need to replace the electronic control board. If the problem continues, replace the control panel.
Compressor failed to start
Unplug the refrigerator and check the wire harness connections between the inverter board and compressor. Reconnect any loose wires and repair any damaged wires. If wiring connections are okay, call a service technician to diagnose and repair the compressor failure. The technician will need to conduct live voltage checks to determine the cause of the problem.
Inverter board failure
Unplug the refrigerator and check wire harness connections between the electronic control board and inverter control board. Reconnect any loose wires. Check wiring connections between the inverter board and compressor. Reconnect any loose wires and repair any damaged wires. If all wiring connections are okay, call a service technician to diagnose and repair the failure. The technician will need to conduct live voltage checks to determine the cause of the problem.
Compressor locked
Call a service technician to diagnose and repair this failure. The technician will likely need to replace the compressor. That repair requires the recovery and recharge of refrigerant.
Voltage supply to the compressor is too low
Call a service technician to diagnose and repair the failure. The technician will need to conduct live voltage checks to determine the cause of the problem.
Voltage supply to the compressor is too high
Call a service technician to diagnose and repair the failure. The technician will need to conduct live voltage checks to determine the cause of the problem.
Most common symptoms to help you fix your refrigerators
Choose a symptom to see related refrigerator repairs.
Main causes: control board or cold control failure, broken compressor start relay, compressor motor failure, defrost tim…
Main causes: jammed ice cubes, broken ice maker assembly, dirty water filter, kinked water line, bad water valve, freeze…
Main causes: water valve leaking, frozen or broken defrost drain tube, overflowing drain pan, cracked water system tubin…
Main causes: damaged door seal, faulty defrost sensor or bi-metal thermostat, broken defrost heater, bad defrost timer o…
Main causes: blocked vents, defrost system problems, evaporator fan failure, dirty condenser coils, bad sensors, condens…
Main causes: blocked air vents, compressor problems, condenser or evaporator fan not working, control system failure, se…
Main causes: leaky door gasket, defrost system failure, evaporator fan not running, dirty condenser coils, condenser fan…
Things to do: clean condenser coils, replace the water filter, clean the interior, adjust doors to prevent air leaks, cl…
Most common repair guides to help fix your refrigerators
These step-by-step repair guides will help you safely fix what’s broken on your refrigerator.
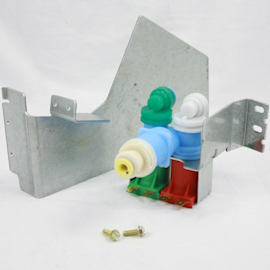
How to replace a refrigerator water valve
Replace the water valve that feeds water to the ice maker and water dispenser if it no longer controls the flow of water…

How to clean refrigerator condenser coils
Help your refrigerator run more efficiently by cleaning the condenser coils. It's easy and takes just a few minutes.…
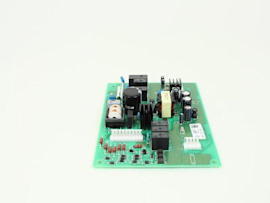
How to replace a refrigerator temperature control board
If the temperature in your refrigerator doesn't match the temperature you set, the problem could be the temperature cont…
Effective articles & videos to help repair your refrigerators
Use the advice and tips in these articles and videos to get the most out of your refrigerator.
No matter what style Maytag refrigerator you have, we can walk you through replacing the water filter.…

Learn about all the convenient features on our Sears PartsDirect website that make your parts purchases easier.…
Get tips and advice on replacing the water filter in your LG refrigerator.…