Kenmore 110 series laundry center error codes

These error code explanations can help you diagnose a problem with your Kenmore 110.81442 or 110.81452 model laundry center. An error code appears on the washer's digital display when the washer's electronic control detects a problem. Follow the troubleshooting tips to resolve the washer problem and restore normal washer operations. The dryer in this laundry center uses a timer, which doesn't display error codes. Use the tips in our DIY laundry center repair help section to diagnose and repair dryer problems in the laundry center. Search for your model number to find a complete list of replacement parts for your laundry center.
Water level sensor failure or washer is overfilling
The EA error code appears when the electronic control board detects an errant or overflow signal from the water level sensor. If the error code appears when you try to start a cycle and the washer doesn't fill with water, unplug the laundry center and check the wire harness connections between the electronic control board and the water level sensor. If the wiring connections are tight and wires show no obvious signs of damage, replace the water level sensor because the electronic control board is indicating the sensor has failed. If the error code continues after replacing the water level sensor, replace the electronic control board because it isn't detecting the water level sensor signal correctly. If the washer fills and then the EA error code appears, the electronic control board likely detected an overflow signal from the water level sensor. When the control board detects this signal, the control stops the washer and runs the drain pump until water drains to 9.75-inches from the bottom of the spin basket or 3.5 holes from the top of the basket. The drain pump then stops and the lid remains locked. Unplug the laundry center and check to see if the tub continues to fill with water. If it does, shut off the water supply and replace the water inlet valve assembly because an inlet valve is stuck open. If the washer tub doesn't continue to fill with water, replace the water level sensor because it has likely failed. If the problem continues after replacing the water level sensor, replace the electronic control board because the control board isn't detecting water level sensor signals correctly.
Not filling
If the E1 error code appears, make sure the water supply faucets behind the washer are fully open. Check the water fill lines for kinks or freezing in the winter. Check the inlet screens on the inlet water valves and replace the valves if the screens are clogged. The inlet screens shouldn't be cleaned because removing them from the valve body can let debris into the inlet water valves and cause leaks when re-attached. If the screens are clear, unplug the laundry center and check the wire harness connections between the electronic control board and the water valve assembly. Reconnect any loose wires and repair any broken wires. If the wire are okay, test the resistance through the inlet water valve solenoid coils using a multimeter. The meter should measure between 900 and 1,320 ohms through each solenoid coil. Replace the inlet water valve assembly if either coil resistance is out of that resistance range. If the washer tub fills with water when the E1 error code appears, then a disconnected or broken air hose might be preventing the water level sensor from detecting water level correctly. Check the air hose connections on the bottom of the washer tub and the water level sensor and reconnect the hose if disconnected. Replace the air hose if it's cracked or broken. If the air hose is okay, you'll likely need to replace the water level sensor. If the problem continues after replacing the water level sensor, you'll likely need to replace the electronic control board because the control board isn't detecting water level sensor signals correctly.
Not draining
If the E2 error code appears, check the house's washer drain, drain pump and the washer's drain hose for clogs and clear any clogs found. If the drain pump buzzes in the drain mode, then replace the drain pump because the pump is running but not draining water. If the pump doesn't run in the drain mode, unplug the laundry center and check the wire harness connections between the drain pump and the electronic control board. Reconnect any loose wires and repair any broken wires. If the wiring is okay, check resistance through the drain pump motor using a multimeter. The meter should measure between 14 and 18 ohms through the drain pump motor. Replace the drain pump if motor resistance is outside that range. If the drain pump is okay, you'll likely need to replace the electronic control board because it isn't sending electric current to the drain pump.
Unbalanced load
The E3 error code appears if a tub switch inside the washer cabinet detects the tub banging against the cabinet sides because of an unbalanced load. Redistribute the unbalanced load. If the tub bangs against the cabinet sides when the load is balanced or the tub is empty, then a broken damper assembly is likely allowing too much washer tub movement. Unplug the laundry center and check the damper assemblies that suspend the tub in the washer cabinet. Replace any damaged or broken damper assemblies. If the tub isn't banging against the cabinet sides when the E3 error code appears, then a broken tub switch or a wiring failure could be causing the code. Unplug the laundry center and check the wiring connections between the tub switch and the electronic control board. Reconnect any loose wires and repair any broken wires. If the tub switch wires are okay, check continuity through the switch using a multimeter. The meter should measure near 0 ohms of resistance through the tub switch when the switch lever isn't pushed in. If the meter measures infinite resistance through the tub switch with the lever extended outward, replace the tub switch.
Drive motor speed not detected
Check the wire harness connections between the electronic control board and the washer drive motor if you see the EC error code. Reconnect any loose wires and repair any broken wires. If the wires are okay, you may need to replace the drive motor. If the problem continues after replacing the drive motor, replace the electronic control board because the control board isn't detecting motor speed.
Lid is open or the tub switch detected an unbalanced load
The E4 error code will appear if you open the lid or if the lid switch detects the lid is open when starting the spin cycle. The code will also appear if the tub switch detects an unbalanced load. If the lid is open, close the washer lid. If the lid is shut, check if the load has shifted to one side of the spin basket and redistribute the load if needed. If the code appears when the lid is shut and the load is balanced, unplug the laundry center and check the wire harness connections between the electronic control board and the lid lock assembly. Reconnect any loose wires and repair any broken wires. If the wires are okay, check for continuity through the lid switch circuit by measuring resistance through the black wires connected to CN7 pins 2 and 3 on the electronic control board. With the lid closed, the multimeter should measure near 0 ohms of resistance through that circuit. Replace the lid lock assembly if the meter measures infinite resistance through that circuit.
Lid lock failure
If the EL error code appears, unplug the laundry center and check the wire harness connections between the lid lock assembly and the electronic control board. Reconnect any loose wire and repair any broken wires. If the wires are okay, replace the lid lock assembly.
Electronic control board failure
Unplug the laundry center for 1 minute to reset the electronic control board if either an E5 or EP error code appears. If the code remains after restoring power, replace the electronic control board.
Most common symptoms to help you fix your laundry centers
Choose a symptom to see related laundry center repairs.
Main causes: lack of water supply, failed lid switch or lid lock, bad water level pressure switch, control system failur…
Main causes: bad lid switch or lid lock, drive motor failure, broken motor coupler, bad timer, faulty electronic control…
Main causes: blocked exhaust vent, clogged lint screen, bad timer, moisture sensing problems, weak gas valve coils, bad …
Main causes: broken dryer drive belt, weak drive motor, binding drum seals…
Main causes: control system failure, broken heating element, bad gas valve coils, gas supply failure, voltage supply pro…
Main causes: unbalanced load, broken suspension springs or shocks, worn snubber ring…
Main causes: door not fully shut, bad door switch, faulty push-to-start switch, wiring failure, bad drive motor, blown f…
Main causes: clogged drain system, blocked drain hose, bad drain pump…
Main causes: broken lid switch or lid lock, faulty drive motor, drain system problem, broken drive system components…
Most common repair guides to help fix your laundry centers
These step-by-step repair guides will help you safely fix what’s broken on your laundry center.

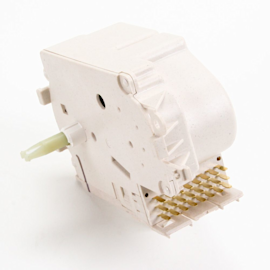
How to replace a laundry center washer timer
If the washer doesn't fill, spin or drain, the timer could be the problem. …

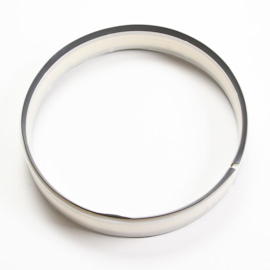
How to replace a laundry center washer snubber ring
If the washer tub bangs the cabinet during the spin cycle even though the load is balanced, you might need to replace th…

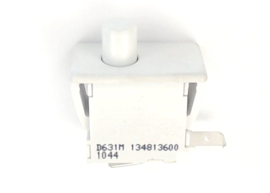
How to replace a laundry center dryer door switch
The dryer won’t start if the door switch is defective. Your can replace it in about 15 minutes.…
Effective articles & videos to help repair your laundry centers
Use the advice and tips in these articles and videos to get the most out of your laundry center.

Learn about all the convenient features on our Sears PartsDirect website that make your parts purchases easier.…

Get answers to frequently asked questions about Sears and Sears PartsDirect.…

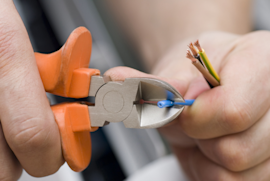
Learn how to repair broken, frayed or damaged wires in your appliances.…