- Kenmore refrigerator water filters
- Whirlpool refrigerator water filters
- Samsung refrigerator water filters
- GE refrigerator water filters
- LG refrigerator water filters
- Frigidaire refrigerator water filters
- KitchenAid refrigerator water filters
- Maytag refrigerator water filters
- Kenmore Elite refrigerator water filters
- Estate refrigerator water filters
- GE Profile refrigerator water filters
- Amana refrigerator water filters
- Bosch refrigerator water filters
- Dacor refrigerator water filters
- Electrolux refrigerator water filters
Top DIY repair help
View All Repair Categories
Appliances
Lawn & Garden
Power Tools
Home Improvement
Sports & Leisure
Heating & Cooling
Quick Links
How to replace a water heater element
less than a minute readMay 20Lyle Weischwill
Repair time and Difficulty
30 minutes or less
Tools Required
- Work gloves
- Phillip screwdriver
- Heating element removal socket
This repair guide and DIY YouTube video provide easy-to-follow, step-by-step instructions for replacing the heating element in an electric water heater.
How to tell if a water heater element is bad
You may assume (sometimes incorrectly) that a heating element is bad when:
Water isn’t heating at all.
Hot water is only lukewarm.
Hot water runs out quickly.
The house circuit breaker for your water heater trips and won’t reset.
Although these symptoms point to a failed heating element, they can also be caused by other problems such as a failed thermostat or shorted wiring.
To accurately determine whether a heating element is bad, follow the troubleshooting steps in our No Hot Water DIY YouTube Troubleshooting video. Make sure that the heating element is bad before you replace it so you don’t waste money on a part that you don’t need.
How to find the right replacement water heater element
Most replacement water heater elements are the same size and somewhat universal. That being said, you should still make sure that you get the right replacement element for your model of water heater to avoid any potential problems that can be caused by using the wrong part.
To find the right replacement element for your water heater, key its model number in the search field at the top of the page and look up the element part number in the parts list diagram.
The part number of the heating element shown in this repair video is 9000147. This element fits common water heater models manufactured by:
Instructions
- 1. Shut off the electricity
Switch the 2 house circuit breakers dedicated for the water heater to OFF.
Wear work gloves to protect your hands.

PHOTO: Switch the water heater circuit breakers off.
- 2. Drain the water heater
Turn off the cold water supply to the water heater.
Attach a garden hose to the drain valve located at the bottom of the unit and run the garden hose outside.
Open a hot water faucet in the house or flip the relief valve open on the water heater.
Open the drain valve and allow the tank to drain until empty.

PHOTO: Turn off the cold water supply. 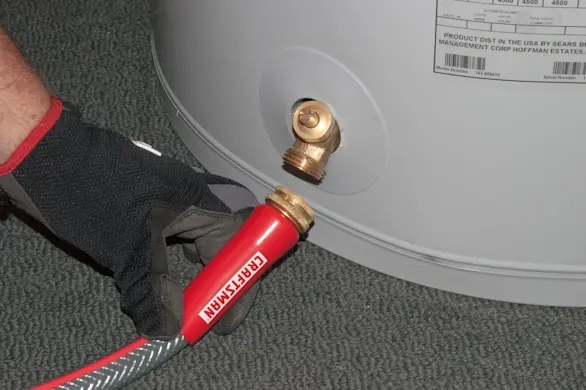
PHOTO: Attach the garden hose the water heater heater drain valve. 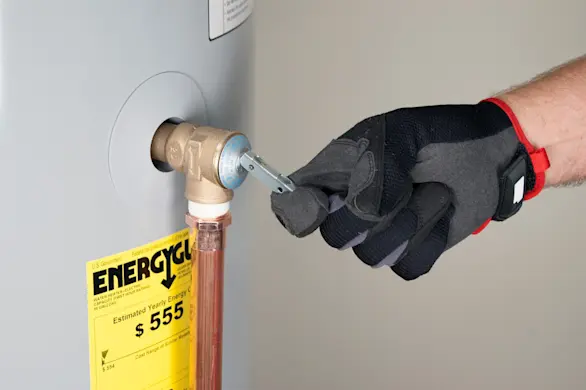
PHOTO: Flip the pressure relief valve to the open position. 
PHOTO: Open the drain valve. Tip: You don't have to drain all the water if you're only replacing the top heating element. If you're replacing the lower heating element, drain all the water.
- 3. Remove the heating element
Remove the heating element’s access cover mounting screw and pull off the cover. Fold the insulation back to expose the heating element.
Lift up the tab located at the top of the plastic shield to release the shield from the thermostat and remove the shield.
Loosen the screws securing the wires to the heating element and disconnect the wires.
Unscrew the heating element from the tank using a heating element socket.
Pull the heating element out of the tank.

PHOTO: Remove the access cover screw. 
PHOTO: Remove the element cover. 
PHOTO: Fold the insulation up. 
PHOTO: Remove the shield. 
PHOTO: Remove the wires. 
PHOTO: Unscrew the heating element. 
PHOTO: Pull out the heating element. Tip: Clean the area around the element opening of any sediment before installing the new element.
- 4. Install the new heating element
Insert the new heating element in the tank and tighten firmly.
Reconnect the wires to the new heating element and tighten the screws.
Reinstall the plastic shield over the thermostat and heating element.
Fold the insulation back over the thermostat and heating element.
Reinstall the heating element cover and screw.

PHOTO: Install the new heating element. 
PHOTO: Tighten the new heating element. 
PHOTO: Reconnect the wires to the new heating element. 
PHOTO: Reinstall the thermostat shield. 
PHOTO: Fold the insulation down in place. 
PHOTO: Reinstall the heating element cover. 
PHOTO: Reinstall the screw. Tip: Install a new gasket on element when replacing the heating element or when reinstalling it after cleaning.
- 5. Close the drain valve
Close the drain valve and remove the garden hose. Flip the relief valve to the closed position.
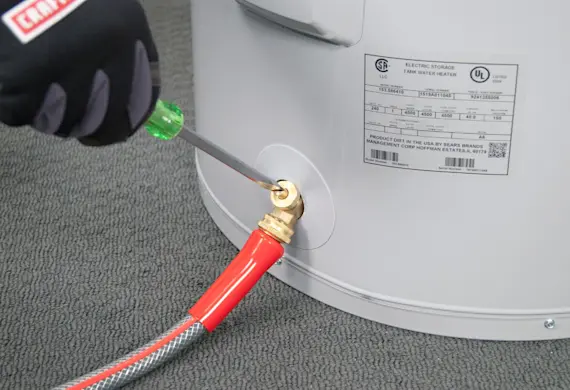
PHOTO: Close the drain valve. 
PHOTO: Remove the garden hose. 
PHOTO: Flip the pressure relief valve to the close position.
- 6. Fill the tank with water
Turn the cold water supply on to the water heater and allow the tank to fill with water.
Once you see water coming out of the hot water faucet, turn the hot water faucet off.
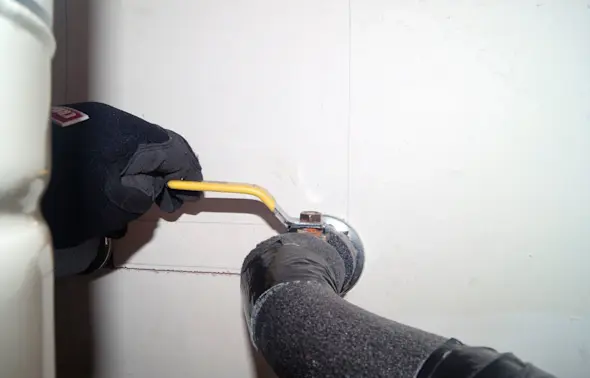
PHOTO: Turn on the cold water supply. Warning: Don't restore power to the water heater until the tank is full of water.Tip: Clean the area around the element opening of any sediment before installing the new element.
- 7. Restore power
Flip the house circuit breakers to the on position.

PHOTO: Flip the circuit breakers to the On position.