- Kenmore refrigerator water filters
- Whirlpool refrigerator water filters
- Samsung refrigerator water filters
- GE refrigerator water filters
- LG refrigerator water filters
- Frigidaire refrigerator water filters
- KitchenAid refrigerator water filters
- Maytag refrigerator water filters
- Kenmore Elite refrigerator water filters
- Estate refrigerator water filters
- GE Profile refrigerator water filters
- Amana refrigerator water filters
- Bosch refrigerator water filters
- Dacor refrigerator water filters
- Electrolux refrigerator water filters
Top DIY repair help
View All Repair Categories
Appliances
Lawn & Garden
Power Tools
Home Improvement
Sports & Leisure
Heating & Cooling
Quick Links
How to replace a dryer blower wheel
less than a minute readJul 28Lyle Weischwill
Repair time and Difficulty
60 minutes or less
Tools Required
- Nut driver set
- Phillips screwdriver
- Putty knife
- Slot screwdriver
- Vacuum cleaner or shop vac
- Wrench set - SAE
- Adjustable wrenches
- Work gloves
This DIY dryer repair guide explains how to replace a dryer blower wheel. The blower wheel is attached to the drive motor shaft. It spins to blow air throughout the drum and out the exhaust vent. If air isn't moving through the dryer, or if the blower wheel rattles, replace it with a manufacturer-approved dryer part.
The video below shows a gas dryer, but the basic repair is the same. These steps work for Kenmore, Whirlpool, Maytag, Amana, Roper, Crosley and Estate dryers with a lint screen housing located in the top dryer panel.
Instructions
- 1. Shut off the power
Unplug the dryer. If it's a gas dryer, shut off the gas.
Wear work gloves to protect your hands.
- 2. Raise the top panel
Pull the lint screen out of the housing in the top panel of the dryer.
Use a Phillips screwdriver to remove the 2 screws that secure the lint screen housing to the top panel. To release the clips that lock the top of the dryer in place, push a putty knife under the lid near the left and right edges of the front of the dryer. Lift the top and prop it securely against the wall behind the dryer.

PHOTO: Remove the lint screen. 
PHOTO: Remove the lint screen housing screws. 
PHOTO: Release the panel locking clips. 
PHOTO: Lift the top panel.
- 3. Remove the front panel
Use a slot screwdriver to release the locking tab on the wire harness plug for the door switch. Disconnect the wire harness.
Use a 5/16-inch nut driver to remove the front panel mounting screws from the inside of the dryer.
Pull the front panel forward slightly, and then lift and unhook it from the 2 bottom hangers.
Pull the front panel off of the dryer and set it aside.

PHOTO: Disconnect the wire harness for the door switch. 
PHOTO: Remove the front panel mounting screws. 
PHOTO: Remove the front panel.
- 3. Remove the drum
Note the configuration of the belt on the idler pulley and the motor pulley before removing it—take a digital picture of it so you know how to reinstall it.
Push the idler pulley to the right to release tension on the drive belt.
Pull the drive belt off of the idler pulley and the motor pulley.
Pull the drum out of the dryer and set it aside.

PHOTO: Release the drive belt. 
PHOTO: Remove the drum. Tip: Use the drive belt that you just released from the pulleys to lift the drum up and out of the dryer.
- 5. Remove the motor clamp
Use a slot screwdriver to pry out and release the rear mounting clamp on the drive motor. Remove the rear clamp and set it aside.
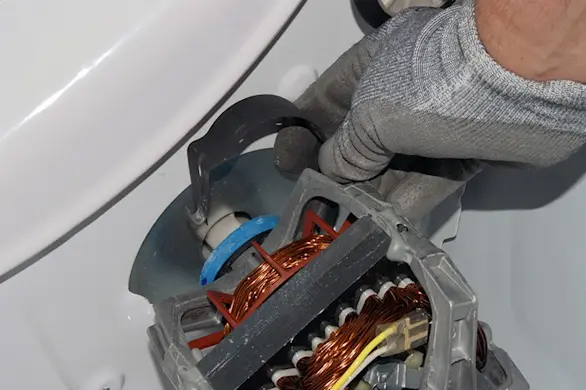
PHOTO: Release the motor rear mounting clamp.
- 6. Loosen the blower wheel
Place a 13/16-inch wrench or adjustable wrench on the back of the blower wheel that's behind the drive motor. Place a 7/16-inch wrench or adjustable wrench on the flat portion of the drive shaft at the front of the motor. Rotate the drive motor shaft clockwise (the blower wheel is reverse threaded) while holding the blower wheel stationary to loosen it.
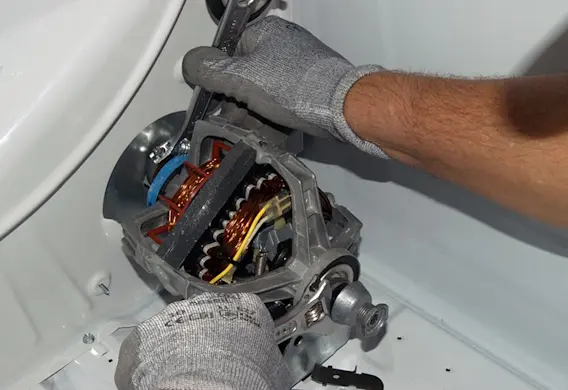
PHOTO: Loosen the blower wheel.
- 7. Remove the back panel
Lower the top panel and move the dryer forward so that you can remove the back panel.
Remove the screws from the back panel.
Remove the back panel from the dryer and set it aside.

PHOTO: Remove the back panel screws. 
PHOTO: Remove the back panel from the dryer.
- 8. Remove the blower wheel
Remove the mounting screws from the air duct. Pull the air duct off and set it aside.
Spin the blower wheel clockwise to remove it from the drive motor shaft. If the motor shaft turns with the blower wheel, hold the motor shaft stationary.
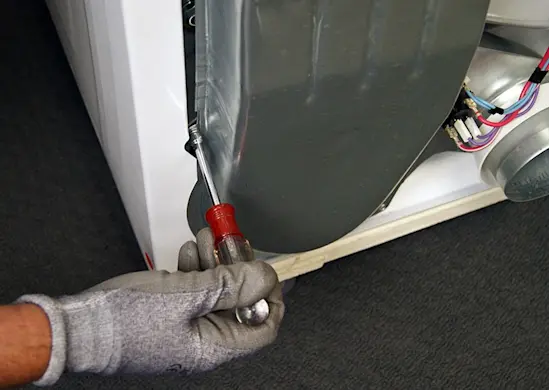
PHOTO: Remove the air duct mounting screws. 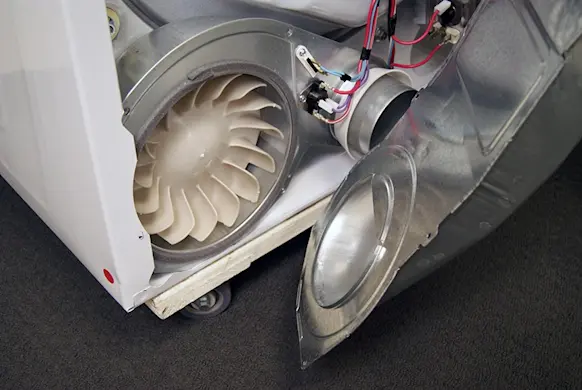
PHOTO: Remove the air duct. 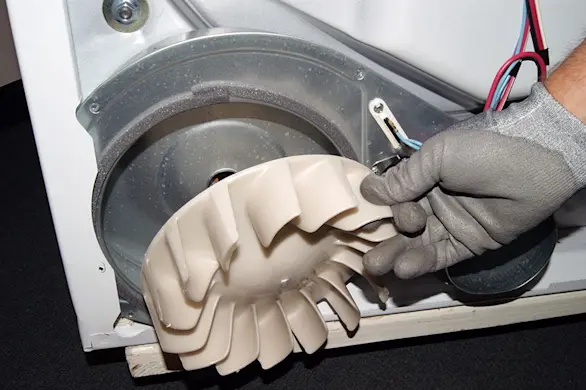
PHOTO: Remove the blower wheel.
- 5. Install the new blower wheel
Thread the new blower wheel onto the motor shaft. Spin it counterclockwise to tighten it. Then use the wrenches to tighten the blower wheel on the motor shaft. To avoid overtightening the blower wheel, turn the wrenches until they stop and then apply moderate force to tighten the blower wheel on the shaft.
Position the rear mounting clamp on the motor and snap it into place on the mounting bracket.
Push the air duct into place and line up the mounting screw holes. Insert the mounting screws and tighten them firmly.
Tip: While the dryer is open, vacuum the dust and lint from inside the dryer.
- 10. Reattach the back panel
Position the back panel on the back of the dryer. Line up the mounting screw holes.
Insert the mounting screws and tighten them firmly.
- 11. Reinstall the drum
Lift the top panel and prop it securely against the back wall.
Place the rear of the drum on top of the support roller on the rear panel inside the dryer.
Lift the front of the drum to access the drive motor and idler pulley.
Referring to the digital picture of the configuration, thread the drive belt through the idler pulley.
Push the idler pulley to the right and loop the drive belt over the motor pulley.
- 12. Reinstall the front panel
Position the front panel on the hangers at the bottom of the dryer. Line up the mounting holes and reinstall the screws in the top of the front panel to secure it to the dryer.
Plug the wire harness back into the plug on the door switch. Make sure the locking tab engages properly.
- 13. Reassemble the top panel
Lower the top panel and snap it into place.
Reinstall the screws in the lint duct housing and reinstall the lint screen.