- Kenmore refrigerator water filters
- Whirlpool refrigerator water filters
- Samsung refrigerator water filters
- GE refrigerator water filters
- LG refrigerator water filters
- Frigidaire refrigerator water filters
- KitchenAid refrigerator water filters
- Maytag refrigerator water filters
- Kenmore Elite refrigerator water filters
- Estate refrigerator water filters
- GE Profile refrigerator water filters
- Amana refrigerator water filters
- Bosch refrigerator water filters
- Dacor refrigerator water filters
- Electrolux refrigerator water filters
Top DIY repair help
View All Repair Categories
Appliances
Lawn & Garden
Power Tools
Home Improvement
Sports & Leisure
Heating & Cooling
Quick Links
How to install an ice maker kit in a top-freezer refrigerator
less than a minute readJul 31Lyle Weischwill
Repair time and Difficulty
15 minutes or less
Tools Required
- Work gloves
- Nut driver set
- Slot screwdriver
- Phillips screwdriver
- Putty knife
- Needle nose pliers
This DIY repair guide gives step-by-step instructions for installing an optional ice maker kit in a compatible top-freezer refrigerator in a refrigerator without a factory-installed ice maker. The ice maker kit includes the ice maker module, water inlet valve, ice maker water supply tube and hardware.
The kit shown in this video fits Kenmore and Frigidaire top-freezer refrigerators. This basic installation procedure is common for installing ice maker kits in Whirlpool, GE, Maytag, Amana, KitchenAid, Gibson, Crosley, LG and Electrolux top-freezer refrigerators.
Instructions
- 1. Connect the water supply line
Connect the water supply connection line to your house water supply.
- 2. Shut off the power
Safely store any food that could deteriorate while the refrigerator is off.
Unplug the power cord from the wall outlet.
Wear work gloves to protect your hands.
- 3. Prepare the freezer compartment
Remove the spacer in the freezer shelf.
Push the shelf to the left to release the right side of the shelf from the holes.
Pull the shelf out of the freezer.
Pry out the two plastic plugs from the freezer side wall using a putty knife.
Release the locking tab and pull off the plastic cover over the wire harness connector and fill tube opening on the evaporator cover.

PHOTO: Remove the freezer shelf spacer. 
PHOTO: Remove the shelf. 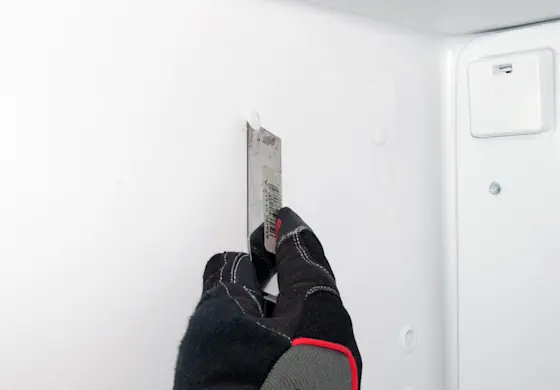
PHOTO: Pry out the plastic hole plug. 
PHOTO: Release the harness cover locking tab. 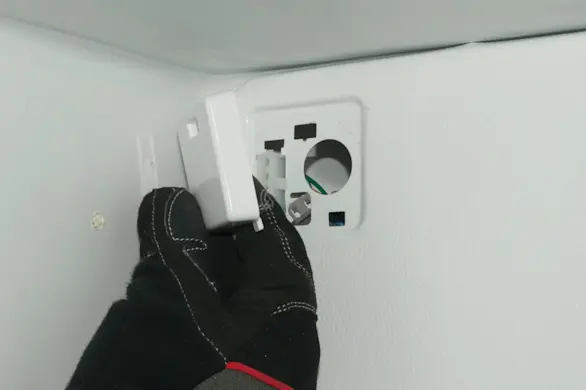
PHOTO: Pull the cover off.
- 4. Prepare the back of the refrigerator
Pull the refrigerator away from the wall.
Remove the screws from the rear compartment cover and then remove the cover.
Punch out the cutout for the water supply line in the rear compartment cover.
PHOTO: Remove the cover screws. 
PHOTO: Remove the rear cover. 
PHOTO: Remove the water valve cutout.
- 5. Install the ice maker water supply line
Peel off the label over the ice maker water line opening on the upper right corner of the outside back panel of the refrigerator.
Pull the foam plug out of the water line opening.
Insert the water inlet tube into the cabinet hole and lock the water inlet tube into place.
Push the black tube seal onto the water tube threads.
Thread the water supply line nylon compression nut onto the threaded end of the water inlet tube.
Tighten the compression nut to finger tight and then tighten the nut another 1/2 turn using a wrench. Do not overtighten the compression nut.
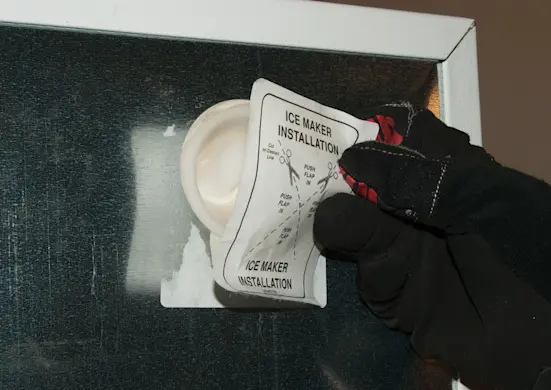
PHOTO: Peel off the label. 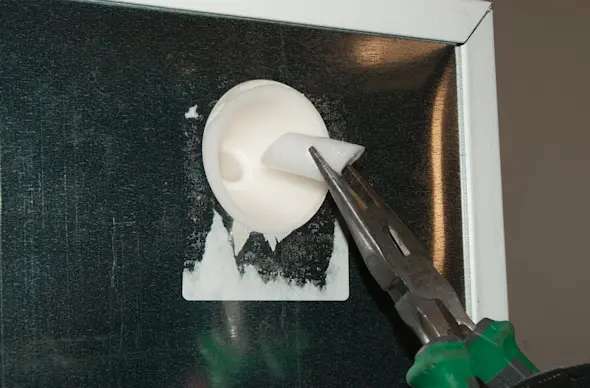
PHOTO: Pull out the foam plug. 
PHOTO: Push the water inlet tube into the cabinet hole. 
PHOTO: Push the tube seal on the water tube threads. 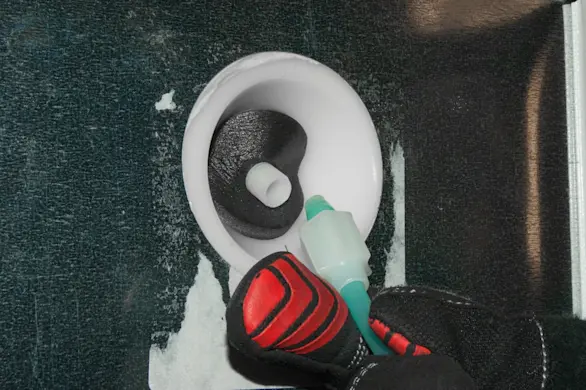
PHOTO: Connect the water supply line. 
PHOTO: Tighten the compression nut. Tip: Insert the water inlet tube through the cabinet hole until the flat surface of the inlet tube is tight against the back of the refrigerator. Slightly rotate the tube and until it catches and locks in place.
- 6. Install the ice maker in the freezer
Install the adjustable leveling bracket on the bottom of the ice maker. Leave the mounting screw loose; you’ll tighten it later.
Install the mounting screws into the side freezer wall leaving enough clearance to hang the ice maker bracket on the screws.
Plug in the ice maker wire harness.
Push the plastic wire harness cover over the plug and snap the cover into place.
Hang the ice maker on the mounting screws. Make sure the fill tube sits inside the fill cup.
Tighten the mounting screws.
Adjust the leveling bracket so the gap between the freezer wall and the ice maker is equal at the top and bottom of the ice maker.
Tighten the leveling bracket mounting screw when the ice maker is level.
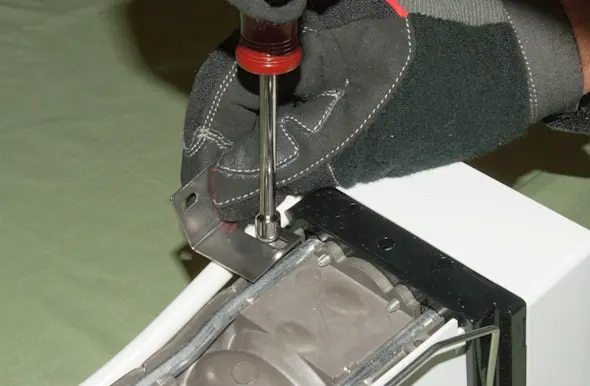
PHOTO: Install the leveling bracket. 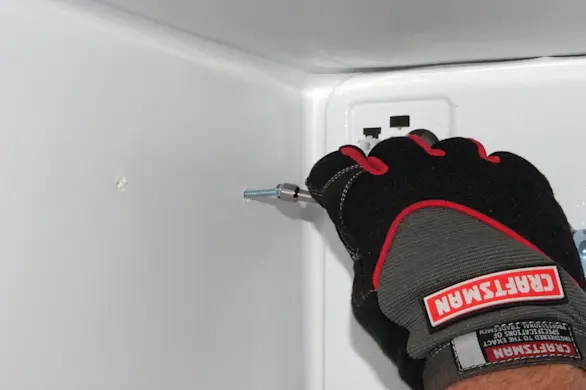
PHOTO: Install the mounting screws. 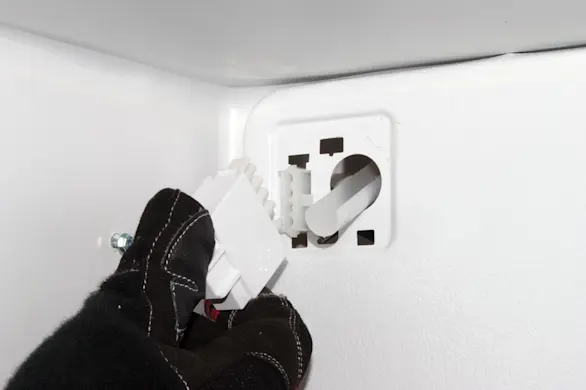
PHOTO: Plug in the wire harness. 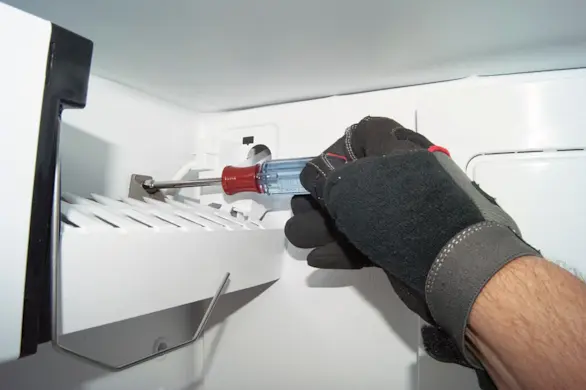
PHOTO: Tighten the mounting screws.
- 7. Install the ice container
Reinstall the freezer shelf in the lower position.
Set the ice container on the shelf under the ice maker.

PHOTO: Reinstall the freezer shelf. 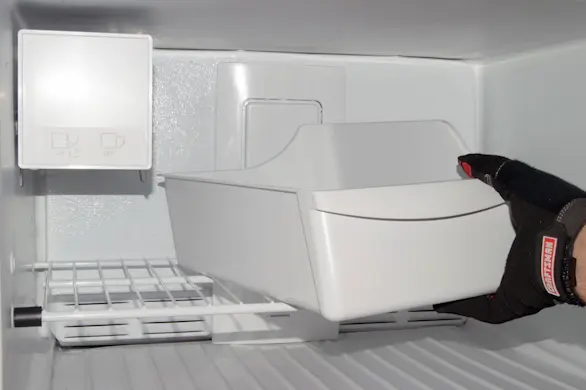
PHOTO: Install the ice bucket.
- 8. Install the inlet water valve
Push the ice maker water supply line firmly into the outlet fitting on the inlet water valve until the water line hits the bottom. Tug the water line to make sure it's locked into the fitting.
Connect the wire harness to the inlet water valve.
Align the valve mounting bracket with the mounting holes and attach the valve using the mounting screws.

PHOTO: Push the water line into the valve. 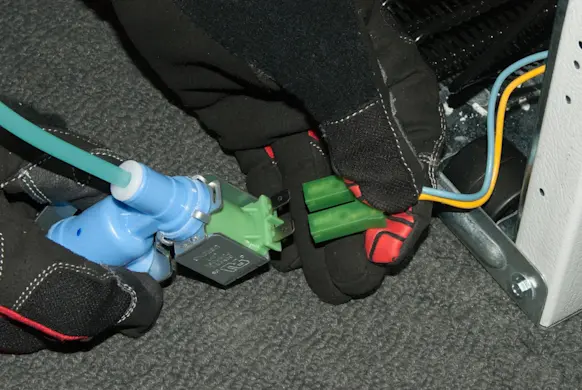
PHOTO: Connect the valve wire harness. 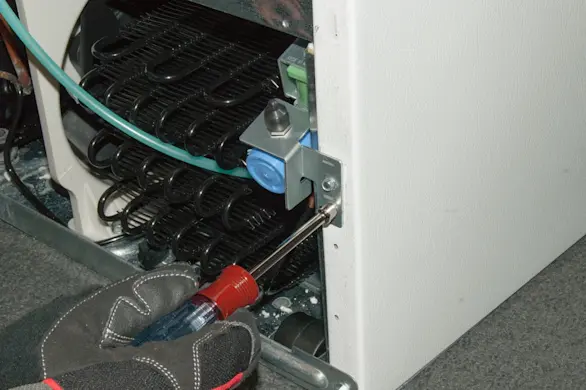
PHOTO: Attach the water inlet valve.
- 9. Install the water supply line clamps
Clean the mounting area for the plastic supply line clamps using rubbing alcohol or soapy water. Dry the areas thoroughly before installing the clamps.
Install the plastic supply line clamps on the cabinet.
Mount the plastic water tubing to the rear of the cabinet using the two plastic clamps.
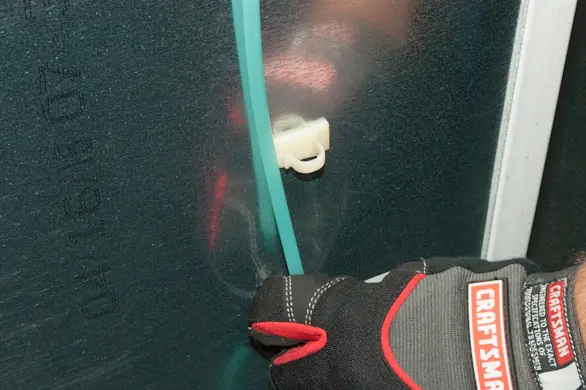
PHOTO: Mount the plastic water supply line.
- 10. Connect the refrigerator water supply line
Position the rear compartment cover on the back of the refrigerator and reinstall the mounting screws.
Remove the black rubber cap from the water supply line fitting.
Connect the water line onto the water inlet valve fitting and firmly tighten the compression nut.
Open the water supply cut-off valve.
If the fitting leaks, tighten the compression nut and check again.
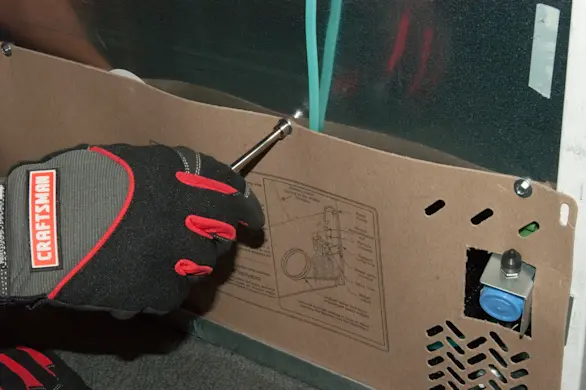
PHOTO: Reinstall the rear cover. 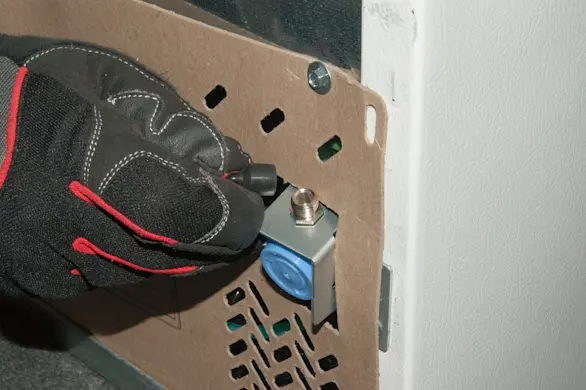
PHOTO: Remove the black rubber cap. 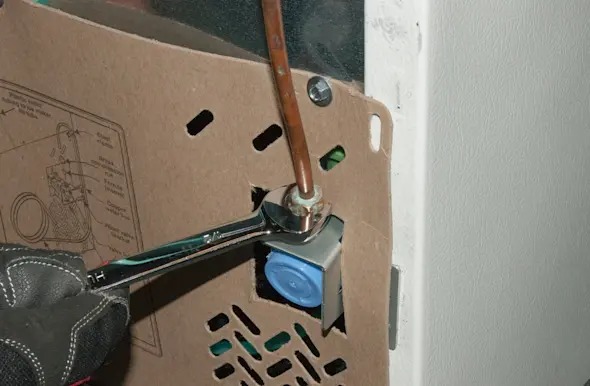
PHOTO: Connect the water supply line. 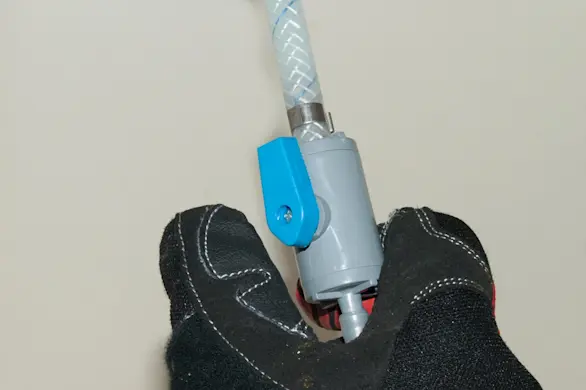
PHOTO: Open the water supply valve.
- 11. Restore electrical power
Plug in the refrigerator and push it back into place.