How to maintain a garage door opener
The garage door is likely the single largest moving part in your home, so it’s important that your garage door opener gets regular maintenance and safety checks. If you’re like many people, though, the last time you really paid attention to your garage door opener was the last time you had a problem with it.
Yeah, we know, life keeps you busy. But these regular checks can ensure your garage door opens wide to greet you every day, no matter what. And if you do want to learn more about DIY garage door opener repairs or get troubleshooting tips, check out our DIY garage door opener repair page.
Monthly garage door opener inspections
Travel limits and force
If the garage door travel limits—how far up and down the door goes—and force get out of whack, your garage door won’t open or close like it should. Weather extremes affect how the door moves, so check travel limits and force each month. Freezing-cold weather thickens the oil in the garage door opener motor and on the rollers, causing the door to reverse because it thinks it has hit something. Heat and humidity also can affect the electronics in the opener, and you might notice the door not closing.
The travel limit settings tell the garage door opener when to stop moving the door up or down. Once a month, open and close the garage door. If the garage door doesn’t quite reach the ground when closed or opens when it should stay closed, follow your owner’s manual’s instructions for adjusting travel limits.
The force setting controls the power the door uses when opening and closing. If the force is too low, your garage door stops while opening, or reverses direction while closing. Too much force can make a garage door unsafe if the opener doesn’t reverse the door’s direction when it senses an object in the door’s path. If your garage door opener operates with too little or too much force, watch our troubleshooting video on how to make force adjustments or check your owner’s manual for information on adjusting force limits.
Safety reversal system test
The safety reversal system on a garage door opener automatically reverses the door if a person, animal or object is under the door. Check the downward force before doing the safety reversal test to avoid damaging the garage door.
With the door fully open, place an object under the garage door that is lower than the safety sensors—a board works, or a roll of paper towels in its side.
Close the garage door. The door should automatically reverse when it touches the board. If the door stops but doesn’t reverse, increase the down travel limit setting.
Repeat the test after adjusting the down travel limit setting. Continue adjusting until the door reverses when it touches the board. Open and close the garage 3 or 4 times to test the adjustment.
In addition to monthly checks, do the safety reversal test if you make adjustments to the door travel limits or force controls, or if you repair the garage door, floor or opener.
Manual operation
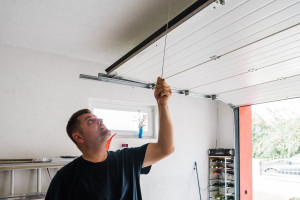
Once a month, open the garage door by hand to check how smoothly the door opens and closes. By lifting the garage door manually, you might notice that one side of the door opens higher than the other or catches slightly, possibly indicating a loose bracket connecting the door to the tracks. You’re more likely to notice a binding or balance issue opening the door manually than from inside the car when you push the remote.
To manually open and close your garage door, close the door and disconnect it from the trolley by pulling the red emergency release cord until it snaps the trolley release arm into a vertical position. After you disconnect the door from the trolley, open the door by hand. If it doesn’t open easily, check for an obstruction such as a loose bracket connecting the door to the tracks, or bent tracks. Fix any problems you see.
Don’t use force adjustments to compensate for a sticking garage door. If you don’t see an obstruction on the tracks or a loose bracket, contact a qualified Sears garage door opener repair technician.
Twice a year: check chain tension
For a chain-drive garage door opener, disconnect the trolley and check the chain tension. The chain should be about 1/4-inch above the base of the rail at the rail’s midpoint. Adjust the tension following instructions in your owner's manual.
Yearly garage door opener care
Lubricate the garage door rollers, bearings and hinges with a silicone spray such as Super Lube or a white lithium spray grease. Don’t use WD-40 because it will dry out the bearings, rollers and hinges. Don’t grease the door tracks—grease will attract dust and dirt, inhibiting roller movement.
Make sure the emergency release handle is no more than 6 feet above the floor.
Check that the entrapment-warning label is attached to the wall near the door control and the manual release and safety reverse test label is attached to a visible location inside the garage door.
If your garage door opener has a battery backup, test the battery. To test the battery, unplug the garage door opener; the battery status LED light should glow solid orange, indicating the opener is running on battery power. If the LED light flashes, that means it’s time to replace the battery because the battery power is low.


Most common symptoms to help you fix your garage door openers
Choose a symptom to see related garage door opener repairs.
Main causes: garage door opener misaligned, travel limits need adjustment, bad travel limit switches, faulty logic contr…
Main causes: garage door locked, damaged garage door tracks, up-force setting needs adjustment, RPM sensor failure, bad …
Main causes: safety sensor beams blocked, safety sensors not aligned, downforce setting needs adjustment, damaged garage…
Things to do: check garage door travel, tighten brackets and fasteners, test safety sensors, check travel limits and for…
Main causes: radio interference, weak remote batteries, sunlight interference with safety sensor beams, safety sensors n…
Main causes: faulty logic control board, bad RPM sensor, broken gears in the drive system, bad drive motor…
Main causes: neighbor's remote programmed at the same time as yours, faulty wall control wiring, bad wall control unit…
Main causes: loose fasteners, broken brackets, need preventive maintenance, worn drive gears, loose or worn belt, loose …
Most common repair guides to help fix your garage door openers
These step-by-step repair guides will help you safely fix what’s broken on your garage door opener.

How to replace a chain-drive garage door opener gear and sprocket assembly
Learn how to replace the gear and sprocket assembly on your garage door opener if the drive motor runs but the door won'…

How to replace a garage door opener logic board
The logic board is the brains of the garage door opener. If the remote doesn't work or the door doesn't open and close p…

How to replace a garage door opener drive chain and cable assembly
If your garage door won’t move, the chain and cable assembly on your garage door opener could be broken. Follow these st…
Effective articles & videos to help repair your garage door openers
Use the advice and tips in these articles and videos to get the most out of your garage door opener.

Learn how to repair broken, frayed or damaged wires in your appliances.…

If your remotes don't work, you might need to disable the lock feature, eliminate RF interference or check the batteries…

Learn how to use a multimeter to check for wiring problems in an appliance that's not working…