- Kenmore refrigerator water filters
- Whirlpool refrigerator water filters
- Samsung refrigerator water filters
- GE refrigerator water filters
- LG refrigerator water filters
- Frigidaire refrigerator water filters
- KitchenAid refrigerator water filters
- Maytag refrigerator water filters
- Kenmore Elite refrigerator water filters
- Estate refrigerator water filters
- GE Profile refrigerator water filters
- Amana refrigerator water filters
- Bosch refrigerator water filters
- Dacor refrigerator water filters
- Electrolux refrigerator water filters
Top DIY repair help
View All Repair Categories
Appliances
Lawn & Garden
Power Tools
Home Improvement
Sports & Leisure
Heating & Cooling
Quick Links
How to replace the user interface board in a front-load washer
less than a minute readMay 20Lyle Weischwill
Repair time and Difficulty
30 minutes or less
Tools Required
- Slot screwdriver
- Phillips screwdriver
- Work gloves

This step-by-step washer repair guide explains how to replace the user interface control board in the control panel of a front-load washer. The user interface board holds the display lights and buttons you press when selecting the washer's cycles and settings. If a control button or display light on the control panel won't work because of a failed user interface board, replace it with a manufacturer-approved replacement part.
Use the steps in this guide to replace the user interface board in Kenmore and LG front load washers. You also can use the same basic procedure to replace the user interface board in some Samsung, Whirlpool, Maytag, Amana, Frigidaire and GE front-load washers.
Instructions
- 1. Shut off the electricity
Unplug the power cord from the wall outlet.
Wear work gloves to protect your hands.
Have someone help you move the washer away from the wall.
- 2. Remove the top panel from the washer
Remove the 2 screws on the back of the washer that hold the top panel.
Pull the top panel toward the rear of the washer and lift it up and off.
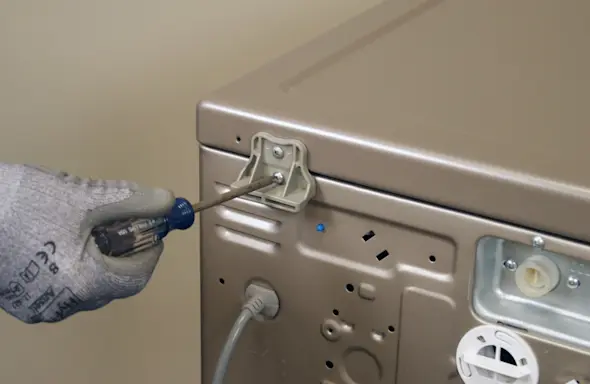
PHOTO: Remove the 2 screws from the back of the top panel. 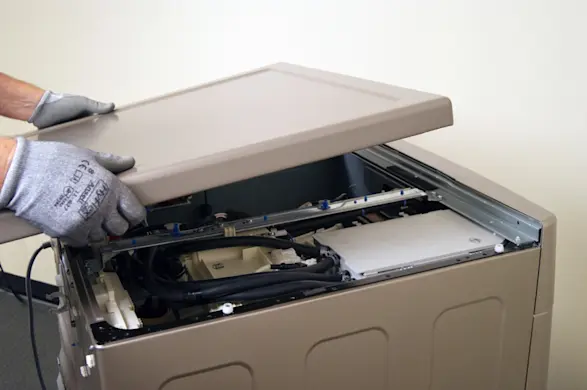
PHOTO: Remove the washer top panel.
- 3. Remove the screw on the back of the control panel
Using a Phillips screwdriver, remove the screw on the back of the control panel.
The screw is on the right side as you face the front of the washer.

PHOTO: Remove the screw on the back of the control panel.
- 4. Remove the screws in the dispenser drawer housing
Pull the dispenser drawer forward until it stops.
Release the locking tab at the back of the dispenser drawer and then pull it completely out of the dispenser housing.
Using a Phillips screwdriver, remove the screws on each side of the dispenser housing.

PHOTO: Pull the dispenser drawer out. 
PHOTO: Release the dispenser drawer. 
PHOTO: Remove the screws from each side of the dispenser housing.
- 5. Remove the control panel
Unplug the wire harness connections for the control panel by pressing on the release tabs and sliding the connectors apart.
Stand in front of the washer and lift up on the control panel to release the top. Pull the control panel off the washer.

PHOTO: Disconnect the control panel wires. 
PHOTO: Pull the control panel off the washer.
- 6. Remove the user interface board
Remove the screws that secure the user interface board in the control panel.
Pull the user interface board out.

PHOTO: Mounting screws in the user interface board. 
PHOTO: Remove the screws that hold the user interface board. 
PHOTO: Remove the user interface board from the washer.
- 7. Install the new user interface board
Place the new interface control boards into the control panel and install the screws loosely.
Make sure that all the buttons are lined and can depress the switches on the interface board when you push the buttons.
Carefully tighten the mounting screws.
- 8. Reinstall the control panel
Position the control panel on the top of the front panel.
Reinstall the screws in the dispenser housing.
Reinstall the screw on the back right side of the control panel.
Plug in the wire harness connections for the control panel.
Push the detergent dispenser back into the drawer housing.

PHOTO: Position the control panel on the top of the front panel. 
PHOTO: Reinstall the screws on each side of the dispenser housing. 
PHOTO: Reinstall the screw on the right side of the control panel. 
PHOTO: Plug in the control panel wire harness connections.
- 9. Reinstall the top panel
Push the panel down and forward to seat it on the washer frame.
Reinstall the screws to secure the back panel. Avoid overtightening.
- 10. Restore the power
Plug the washer into the electrical outlet.
Return the washer to its original location.