- Kenmore refrigerator water filters
- Whirlpool refrigerator water filters
- Samsung refrigerator water filters
- GE refrigerator water filters
- LG refrigerator water filters
- Frigidaire refrigerator water filters
- KitchenAid refrigerator water filters
- Maytag refrigerator water filters
- Kenmore Elite refrigerator water filters
- Estate refrigerator water filters
- GE Profile refrigerator water filters
- Amana refrigerator water filters
- Bosch refrigerator water filters
- Dacor refrigerator water filters
- Electrolux refrigerator water filters
Top DIY repair help
View All Repair Categories
Appliances
Lawn & Garden
Power Tools
Home Improvement
Sports & Leisure
Heating & Cooling
Quick Links
How to replace an electric water heater anode rod
less than a minute readMay 20Lyle Weischwill
Repair time and Difficulty
15 minutes or less
Tools Required
- Work gloves
- 1-1/16-inch deep well socket
- Ratchet
- Needle nose pliers
- Pipe thread sealing tape
This DIY repair guide explains how to replace the anode rod in an electric water heater. The anode rod helps prevent tank corrosion. Natural micro-organisms and sulfates that exist in some water can react to the aluminum or magnesium anode rods in the hot water tank, creating a rotten egg smell. If your hot water begins to smell bad, replace the anode rod with a less reactive zinc-aluminum rod to help combat the smell.
Use these steps to replace the anode rod in Kenmore, State, A. O. Smith, Rheem, Reliance and Whirlpool water heaters.
Instructions
- 1. Shut off the electricity
Switch the two house circuit breakers dedicated for the water heater to OFF.
Wear work gloves to protect your hands.

PHOTO: Switch the water heater circuit breakers off.
- 2. Drain the water heater
Turn off the cold water supply to the water heater.
Attach a garden hose to the drain valve located at the bottom of the unit and run the garden hose outside.
Open a hot water faucet in the house or flip the relief valve open on the water heater.
Open the drain valve and allow the tank to drain about 5 gallons of water and then close the drain valve and remove the garden hose.

PHOTO: Turn off the cold water supply. 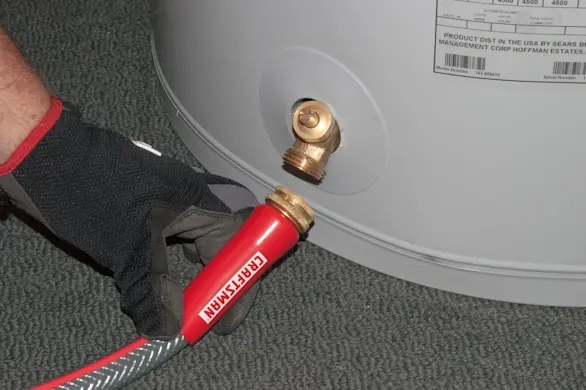
PHOTO: Attach the garden hose the water heater heater drain valve. 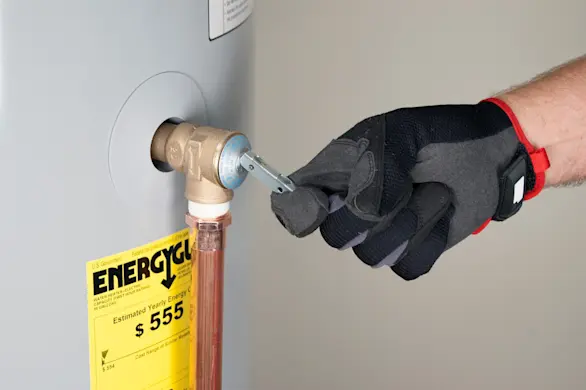
PHOTO: Flip the pressure relief valve to the open position. 
PHOTO: Open the drain valve. 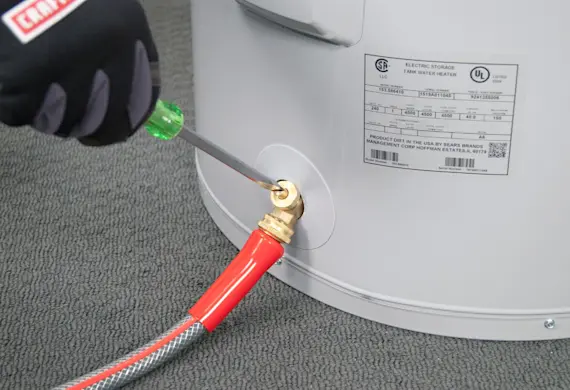
PHOTO: Close the drain valve. 
PHOTO: Remove the garden hose.
- 3. Remove the anode rod
Pry the plastic cap off from the top of the water heater covering the anode rod.
Remove the foam insulation covering the anode rod.
Unthread the anode rod and pull it up and out from the tank.

PHOTO: Pry off the anode rod cap. 
PHOTO: Unthread the anode rod. 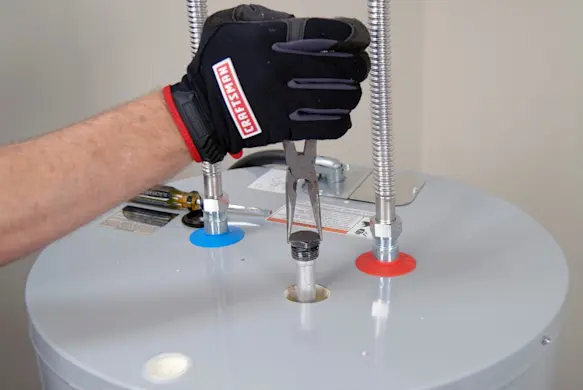
PHOTO: Remove the anode rod.
- 4. Install the new anode rod
Wrap pipe thread-sealing tape around the threads of the new anode rod.
Thread the new anode rod into the tank and tighten firmly.
Reinsert the plastic cap.

PHOTO: Apply thread sealing tape to the anode rod threads. 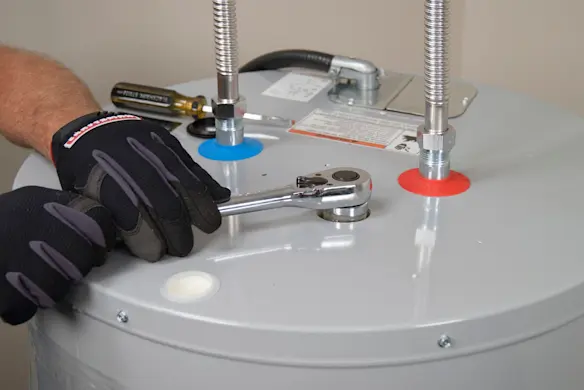
PHOTO: Install the new anode rod. 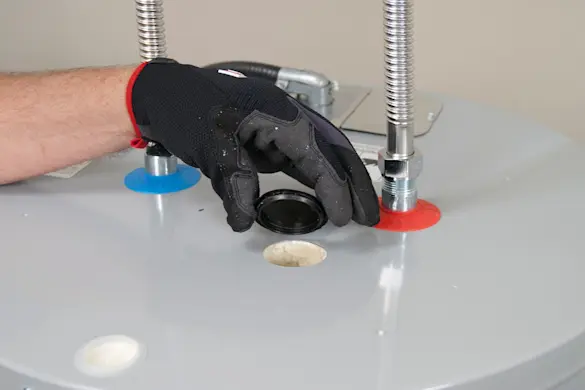
PHOTO: Reinstall the anode rod cap.
- 5. Fill the tank with water
Turn the cold water supply on to the water heater and allow the tank to fill with water.
When water begins to flow from the open hot water faucet, turn the hot water faucet off.
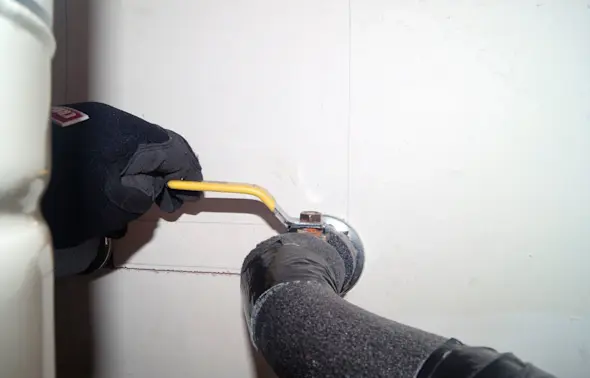
PHOTO: Turn on the cold water supply.
- 6. Restore power
Flip the house circuit breakers to the ON position.

PHOTO: Flip the circuit breakers to the On position.