- Kenmore refrigerator water filters
- Whirlpool refrigerator water filters
- Samsung refrigerator water filters
- GE refrigerator water filters
- LG refrigerator water filters
- Frigidaire refrigerator water filters
- KitchenAid refrigerator water filters
- Maytag refrigerator water filters
- Kenmore Elite refrigerator water filters
- Estate refrigerator water filters
- GE Profile refrigerator water filters
- Amana refrigerator water filters
- Bosch refrigerator water filters
- Dacor refrigerator water filters
- Electrolux refrigerator water filters
Top DIY repair help
View All Repair Categories
Appliances
Lawn & Garden
Power Tools
Home Improvement
Sports & Leisure
Heating & Cooling
Quick Links
How to replace a stand mixer worm gear
less than a minute readAug 02Lyle Weischwill
Repair time and Difficulty
30 minutes or less
Tools Required
- Work gloves
- Drift punch
- Hammer
- Phillips screwdriver
- Slot screwdriver
- #1 square head driver
- Putty knife
- Shop towels
- Rubber mallet
This step-by-step repair guide explains how to replace the worm gear in a stand mixer. Located inside the lower cover, the worm gear turns on the inner edge of the stationary planetary gear to spin the attachment. If the attachment won't turn, the worm gear teeth might be stripped (the teeth are designed to strip if the drive system binds up, to protect other gears and the motor from damage). Replace the worm gear with the manufacturer-approved replacement part if the worm gear teeth are worn or damaged.
These repair steps show how to replace the worm gear in KitchenAid and Whirlpool stand mixers.
Instructions
- 1. Shut off the electricity
Unplug the power cord.
- 2. Remove the end cover
Remove the end cover mounting screw and pull off the end cover.

PHOTO: Remove the end cover screw. 
PHOTO: Remove the end cover.
- 3. Remove the trim band
Remove the 2 screws securing the ends of the trim band and remove the trim band.
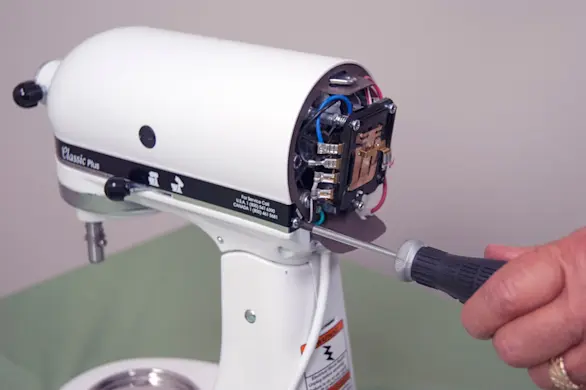
PHOTO: Remove the trim band screws. 
PHOTO: Remove the trim band.
- 4. Remove the pedestal
Flip the mixer over onto a padded cradle.
Loosen but don't remove the pedestal hinge pin setscrew.
Push the hinge pin out.
Lift the pedestal off the mixer.
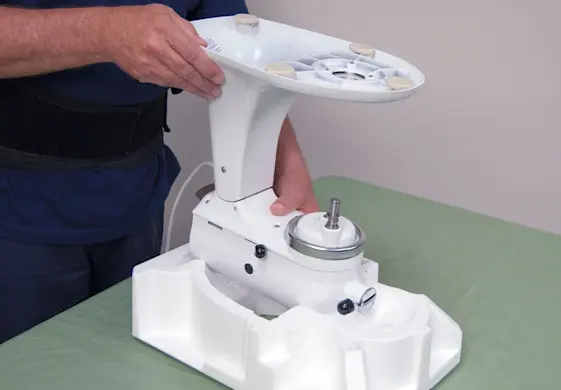
PHOTO: Flip the mixer over. 
PHOTO: Loosen the set screw. 
PHOTO: Drive the hinge pin out. 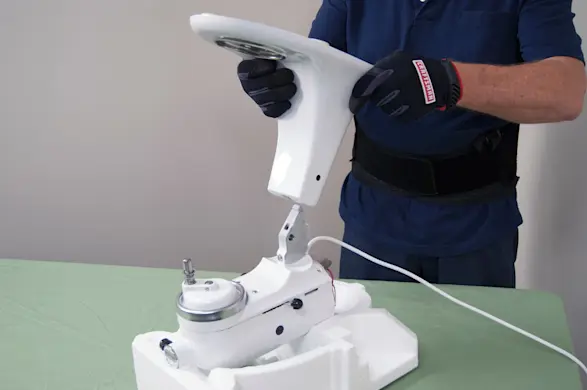
PHOTO: Lift off the pedestal.
- 5. Remove the planetary gear housing
Remove the planetary drip ring by gently tapping it using a slot screwdriver and hammer.
Using a 5/32-inch drift punch and hammer, drive the pin out that holds the planetary gear housing to the vertical center shaft.
Use 2 slot screwdrivers to pry off the planetary gear housing.
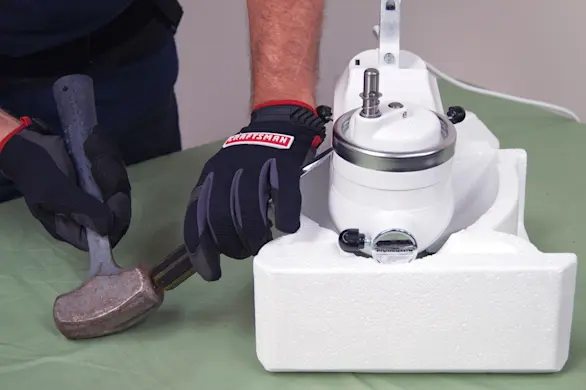
PHOTO: Remove the drip ring. 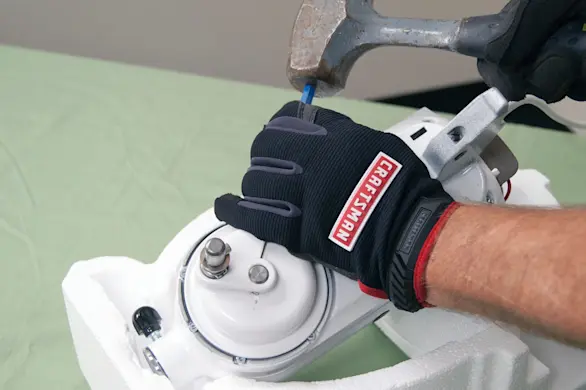
PHOTO: Drive the pin out. 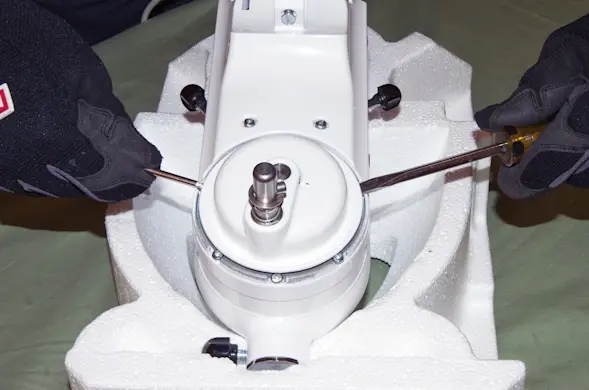
PHOTO: Pry off the gear housing.
- 6. Remove the bottom cover
Remove the power cord from the bottom cover by sliding the molded strain relief out of the slot in the bottom cover.
Remove the 5 screws from around the planetary gear.
Remove the 4 mounting screws from the cover. One of the rear mounting screws has a lock washer. Remove the lock washer along with the mounting screw.
Slide the 5/32-inch drift punch through the center shaft hole to help lift the bottom cover.
Gently pry the bottom cover up while lifting the center shaft with the drift punch and remove the bottom cover.
Set the bottom cover on a work surface.
Transfer grease from the worm gear to the upper housing.

PHOTO: Remove the power cord. 
PHOTO: Remove the planetary gear screws. 
PHOTO: Remove the cover screws. 
PHOTO: Insert a drift punch through the shaft hole. 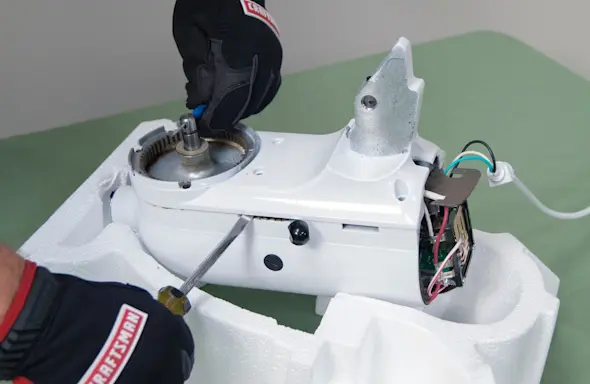
PHOTO: Pry the bottom cover up. 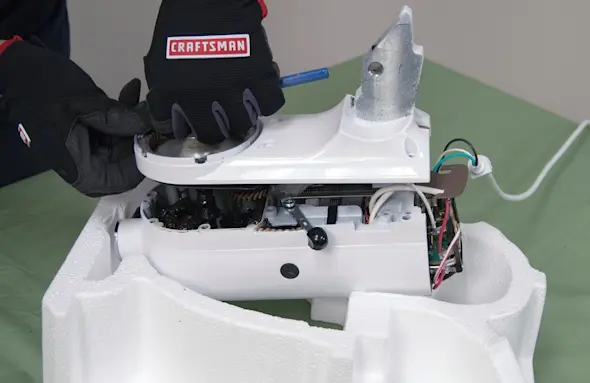
PHOTO: Remove the bottom cover.
- 7. Remove the worm gear
Remove the 3 Phillips screws and washers from the worm gear bracket.
Pull the worm gear assembly up and off.
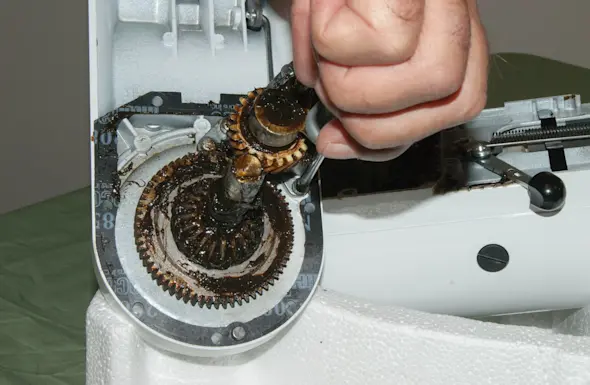
PHOTO: Remove the screws and pull off the worm gear.
- 8. Install the new worm gear
Position the new worm gear assembly on the bottom cover and line up the mounting holes.
Reinstall the mounting screws and washers.
Lubricate the worm gear assembly with grease.

PHOTO: Install the new worm gear assembly. 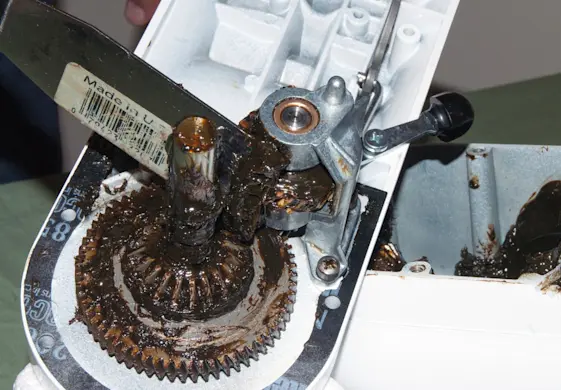
PHOTO: Lubricate the worm gear.
- 9. Reinstall the bottom cover
Insert the drift punch into the center shaft hole to help you lift the bottom cover and align the gears.
Lower the bottom cover down into the upper housing, working the gears back into place by slightly twisting the center shaft.
Once the gears mesh, lower the bottom cover fully down into the upper housing.
Reinstall the screws around the planetary gear.
Reinstall the cover mounting screws. On the rear mounting screw that includes the lock washer, reinstall the lock washer along with the mounting screw.

PHOTO: Reinstall the bottom cover. 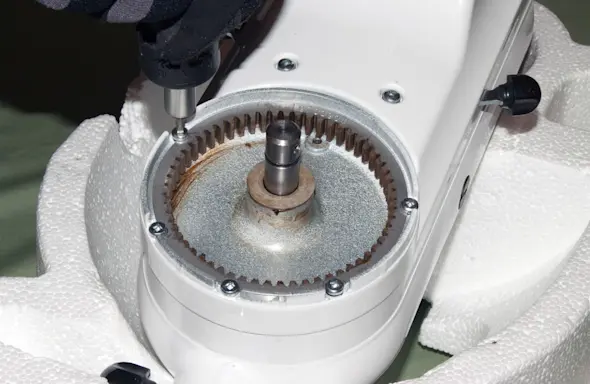
PHOTO: Rinstall the planetary gear screws. 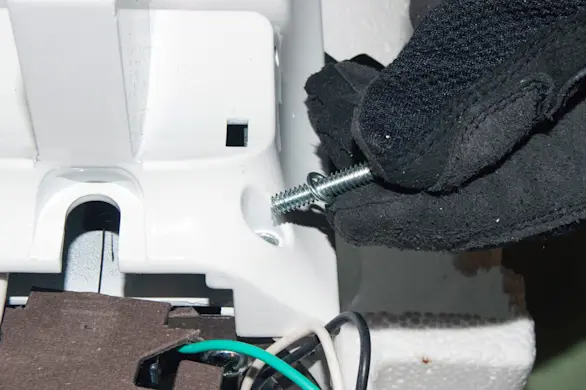
PHOTO: Reinstall the bottom cover screws.
- 10. Reinstall the planetary gear housing
Slide the planetary gear housing down onto the center shaft.
Using the drift punch, align the mounting pin holes in the housing with the hole in the center shaft.
Reinstall the mounting pin.
Reinstall the drip ring by gently tapping it back onto the housing using a rubber mallet.
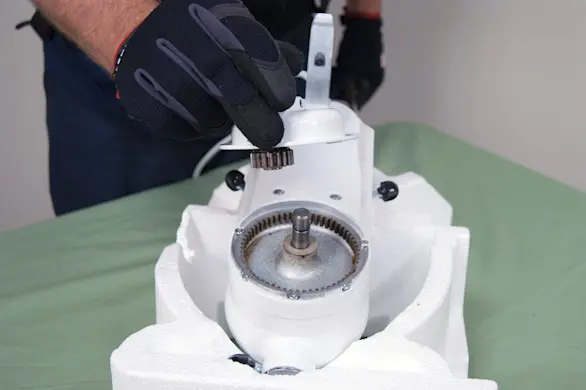
PHOTO: Reinstall the planetary gear housing. 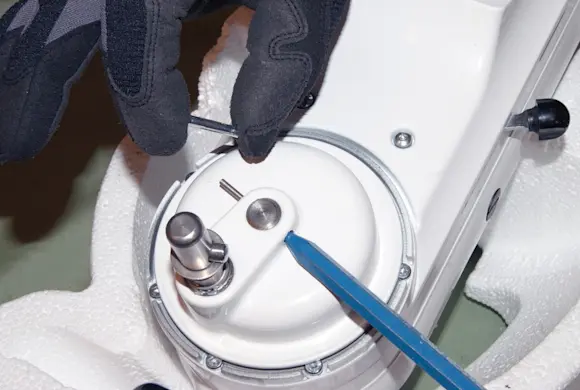
PHOTO: Align the pin holes. 
PHOTO: Reinstall the mounting pin. 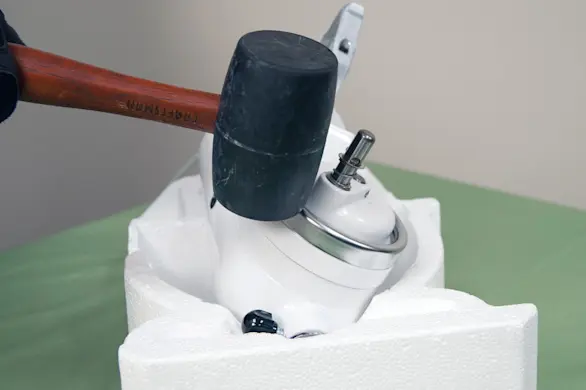
PHOTO: Reinstall the drip ring.
- 11. Reinstall the pedestal
Position the pedestal on the bottom cover and line up the hinge pin holes.
Reinstall the hinge pin.
Tighten the hinge pin set screw using a slot screwdriver.
Reinstall the power cord strain relief.

PHOTO: Reinstall the pedestal. 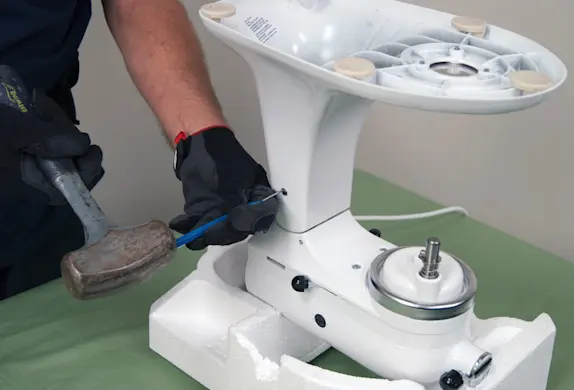
PHOTO: Reinstall the hinge pin. 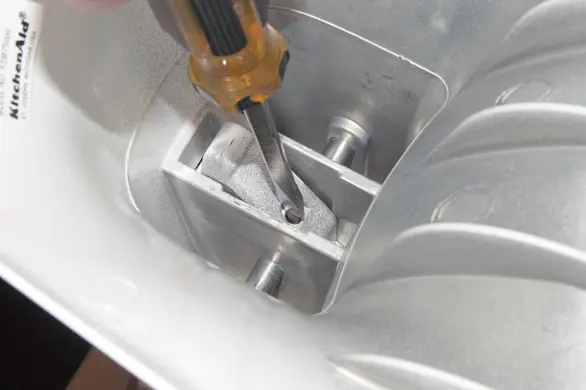
PHOTO: Tighten the set screw. 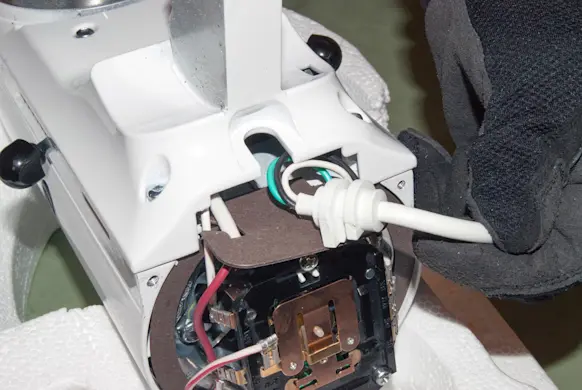
PHOTO: Reinstall the power cord. Tip: Use a rubber mallet to tap the hinge pin into the pedestal if needed.
- 12. Reinstall the trim band
Reinstall the trim band on the upper housing and secure it with the mounting screws.
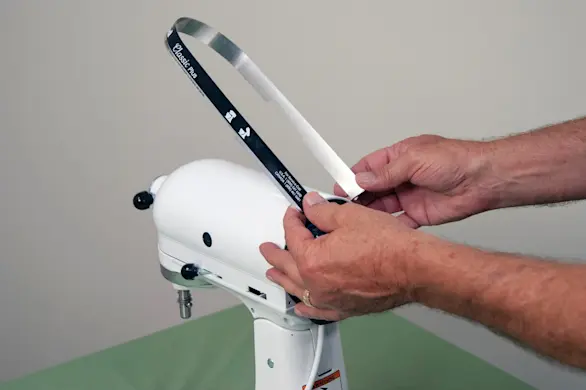
PHOTO: Reinstall the trim band. 
Reinstall the trim band screws.
- 13. Reinstall the end cover
Position the end cover on the upper housing and line up the screw holes. Reinstall the end cover mounting screw.

PHOTO: Reinstall the end cover. 
PHOTO: Reinstall the screw. Warning: Do not pinch any wires when reinstalling the end cover.
- 14. Restore power
Reconnect the power cord.