How to use your dishwasher efficiently


Using a dishwasher efficiently can help save time, water, and energy. Additionally, dishes will get cleaner and the dishwasher will last longer when you use it wisely.
Use these expert tips to maximize the efficiency of your dishwasher.
Load the dishes properly
Properly loading the dishwasher will help the appliance to clean the dishes thoroughly and efficiently. Follow these loading tips to get the best use of your dishwasher.
Scrape off excess food
Large food particles can clog up filters in the dishwasher sump – inhibiting water flow and cleaning efficiency. Scrape off excess food before loading dishes. You don’t need to thoroughly pre-rinse dishes unless they have stubborn or dried-on food stains.
Remove labels from jars and bottles
Labels can fall off during washing, clogging the screens and pumps inside the dishwasher. Water won’t circulate and spray properly when paper labels
Don’t overload the dishracks
Dishes need space around them so spray water can circulate. Overcrowding dishracks will prevent spray from reaching some parts of the dishes. You’ll wind up wasting water by having to wash dirty parts of dishes after the cycle finishes when you overload the dishwasher. Follow the owner’s manual guidelines for maximum loading capacity of your dishwasher.
Organize dishes properly when loading
Load your dishes strategically to make the most of the available space. Here are guidelines on how to load each dishrack.
Top dishrack
The top rack is best suited for cups, glasses and lightweight plastic items.
Place cups and glasses in the rows between tines — not over them, which can cause glasses to break.
Put all your plastic dishes and storage containers on the upper rack — some plastics can melt if they’re too close to the heating element at the bottom of the dishwasher tub.
Wedge the lids of storage containers between the tines and a glass to prevent the lids from coming loose and falling to the bottom of the tub. Or, use no-flip clips to hold lids or larger plastic items such as cups, bowls or storage containers, in place during washing. These clips fit the tines on most dishwasher model, regardless of brand. Order plenty of clips and use them to keep all your plastic items in place.
Larger cooking utensils also should go on the upper rack, with spoons facing down so they don’t collect water.
Lower dishrack
The bottom rack is best for plates, pots, pans and casserole dishes. Glasses and mugs that don’t fit in the top rack also should go here.
Load plates with the dirty side facing the center, with enough room between each plate to let water reach both sides.
Angle pots, pans and casserole dishes with the dirty surface facing down. If your dishwasher is a Kenmore with TurboZone spray jets, face heavily soiled dishes toward the TurboZone jets and select the TurboZone option for the cycle.
You can load bowls in either rack, but you usually need to load larger mixing or serving bowls in the bottom rack if they're too big for the top rack.
Load taller items like cookie sheets on the outer edges of the bottom rack, making sure not to block the detergent dispenser.
Silverware basket
The silverware basket often fits in or on the bottom dishrack but it may reside in the top rack on some models.
Use the slots in the covers to keep your silverware separated for best cleaning.
Load knives and sharp utensils such as skewers into the slots facing down and all other items facing up.
If your silverware doesn't fit into the slots, flip the covers up and mix silverware types to keep them separated. Alternate the direction of spoon handles up and down so that spoons don't nest together with other spoons—the same goes for forks. Load all knives and sharp objects with the blades and points facing down.
Choose the right dishwasher cycle
Most modern dishwashers have multiple cycles to choose from, such as normal, eco-friendly, quick wash, and heavy-duty. Select the cycle that best matches the level of dirt and the type of dishes you are washing. Choosing shorter cycles for lightly soiled dishes can help save water and energy.
Many dishwashers have energy-saving options that can help reduce water and energy consumption. These options typically involve lower water temperatures and extended wash times. Refer to your dishwasher's user manual to identify and enable these settings.
To save energy, turn off the Heated Dry option. In many dishwashers, dishes will dry without using the heating element.
Check water temperature
The temperature of the water entering your dishwasher affects its efficiency. Ensure that the hot water supply to your dishwasher is at 120 degrees F. To check water temperature, run hot water through the kitchen faucet for 1 minute then fill a glass with hot water. Measure temperature of the water using a thermometer. You should measure around 120 degrees. If not, adjust the water heater setting to heat the water properly for your dishwasher. Use caution when adjusting the
Use the right detergent
Follow the directions in the owner’s manual for your dishwasher regarding the best type of dishwashing detergent to use for your model. Some manuals recommend that you use pods while others tell you to use liquid or gel detergent. Older dishwashers may still recommend that you use powdered detergent. If you use powdered detergent, store it in a dry place like an upper cabinet shelf instead of under the sink so that it stays fresh. When powdered detergent gets old or wet, it gets clumpy and doesn’t clean as well.
Pods, liquid, and gel detergents typically work best in your dishwasher. You don’t have to worry about them getting old or wet and clumping up.
Make sure that you use rinse aid in your dishwasher. Rinse aid reduces spots, which can make your dishes look dirty. Even if you use detergent tablets or pods that include rinse aid, you should still use liquid rinse aid. The rinse aid dispenser in your dishwasher dispenses the right amount during the final rinse cycle so your dishes turn out spotless. Pods and tablets may not release rinse aid at the right time.
Clean and maintain your dishwasher
Regular cleaning and maintenance of your dishwasher will help it run and clean dishes efficiently.
Clean the filters
Clogged filters interfere with water flow, which can cause poor cleaning performance. Remove and inspect your dishwasher filters monthly. You can clean the filters by holding them under running tap water.
Remove dirt or hard water deposits using a soft bristle brush. Scrub the filters whenever you see soil or residue building up on the screens or if dishes feel gritty and you see food particles after the cycle finishes.
Check the spray arms
Dishes won't get clean if the dishwasher can’t spray them thoroughly with water. Check the spray arms for cracks or damage. A cracked spray arm won't rotate and spray correctly. Replace the spray arm if it’s damaged.
If the spray arm isn’t cracked, check the spray arms for clogged openings. Hard water deposits and food debris can clog these holes. You can clear the holes with toothpicks or a bamboo skewer. For severe clogs, remove the spray arms following the instructions in the owner’s manual and clean them in the sink. Use a toothbrush and a bamboo skewer to remove clogs, and soak them in white vinegar to help remove hard water deposits. Rinse the spray arms thoroughly and reinstall them.
If hard water deposits frequently block your spray arm holes, we recommend cleaning your dishwasher once a month with Dishwasher Magic or Affresh dishwasher cleaner.
Schedule professional dishwasher cleaning and maintenance yearly
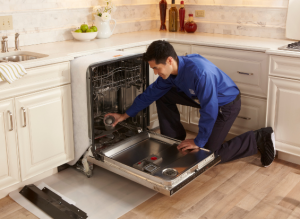
Having your dishwasher professionally cleaned and maintained every year will ensure that it works at peak efficiency and lasts longer. The technician will also be able to see problems that need correcting so that there’s less chances that you’ll face unexpected dishwasher breakdowns during the year.
During the Sears Clean & Maintain service, the Sears Technician will:
Check the electronic control board and sensors. The electronic control board is the "brains" or motherboard of the dishwasher; it starts and stops all the dishwasher's functions — filling, washing, drying and draining. It receives a signal from the control panel when you select a button and displays the cycle status, time and other information on the control panel. The control board also receives signals from temperature sensors, water level sensors and water quality sensors to help control the dishwashing cycle. Electronic control board and sensors not operating properly can lead heating failures, damage to the dishwasher or dishes from overheated water/air, dishes that don’t get clean, water leaks that could damage kitchen cabinets or flooring or excess water/energy use. The tech will check control board and sensor operations and advise you regarding any problems.
Examine and clean pumps and spray arms. The technician will check the wash and drain pumps for proper operation and leaks. Failure of either pump prevents dishes from getting clean during the wash cycle. Leaks from a pump can cause expensive damage to kitchen cabinets and flooring. Spray arms that are cracked or clogged by food debris and hard water deposits don’t distribute water properly for cleaning dishes. The technician will check and clean spray arms and recommend spray arm replacement if damaged. The tech also will recommend the best cleaner for cleaning your dishwasher to remove hard water deposits and food debris, as well as keeping your dishwasher smelling fresh.
Test the detergent and rinse aid dispenser. Because dishes won’t get clean if the dispenser doesn’t open when it’s meant to, the technician will check for proper detergent and rinse aid dispenser operation.
Check the control panel. You may not know when an infrequently used button on your dishwasher control panel isn’t working properly. A faulty control panel button can eventually cause the dishwasher to stop operating. The service technician will check all control panel buttons for proper operation during dishwasher cleaning and maintenance.
Test the heating element. The heating element is mounted on the bottom of the dishwasher tub and heats the water during the wash and rinse portions of the cycle. Raising the water temperature improves cleaning, and in some situations, sanitation. Dishes won’t get clean and/or dry properly if the heating element fails. During this check, the technician inspects the condition and operation of the heating element.
Check and clean dishwasher door gaskets. Door gaskets, also called door seals, prevent water from leaking out of the dishwasher, possibly damaging kitchen flooring and cabinets. Your Sears technician will check for loose, damaged or dirty door gaskets.
Check incoming water supply temperature. Even though you may have already checked it yourself, the technician will check incoming water temperature for the dishwasher and advise you about proper water heater settings for the dishwasher.
Clean all dishwasher water filters. The technician will clean these filters during dishwasher maintenance if you haven’t already cleaned the filters yourself.
In summary, keeping your dishwasher in top shape will help it last longer and work more efficiently — saving you money. You’ll also help the environment by using less water and energy to clean your dishes.
Most common symptoms to help you fix your dishwashers
Choose a symptom to see related dishwasher repairs.
Main causes: broken door spring, damaged or broken door hinge…
Main causes: damaged or stuck spray arm, leaking door seal, damaged door hinge, leaky heating element water seal, cracke…
Main causes: broken door latch, tripped circuit breaker, broken heating element, faulty vent fan, sensor failure, contro…
Main causes: improper loading, low water temperature, improper detergent dosage, detergent dispenser failure, spray arm …
Main causes: clogged kitchen sink drain, clogged drain hose, drain check valve damaged, drain pump failure, control syst…
Main cause: damaged rack height adjuster…
Main causes: glass or popcorn kernel stuck in the chopper blade, drain line vibrating against the cabinet, debris in was…
Main causes: not using rinse aid, rinse aid dispenser failure, broken heating element, malfunctioning vent, drying fan f…
Main causes: light switch beside the sink turned off, lack of power, bad dishwasher door switch, control system failure,…
Most common repair guides to help fix your dishwashers
These step-by-step repair guides will help you safely fix what’s broken on your dishwasher.

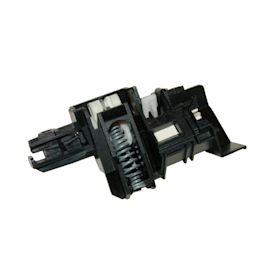
How to replace a dishwasher door latch assembly
If the dishwasher door doesn't click shut, a broken door latch is a likely cause. Follow these instructions to replace i…

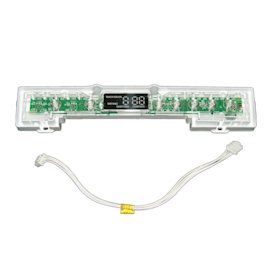
How to replace a dishwasher user interface control
The user interface control houses the selection buttons and display. If it fails, you can't select the cycle and setting…

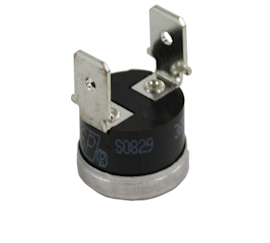
How to replace a dishwasher thermal fuse
A completely dead control panel often indicates that the thermal fuse on the electronic control board is blown; follow t…
Effective articles & videos to help repair your dishwashers
Use the advice and tips in these articles and videos to get the most out of your dishwasher.

Get tips on completing essential holiday cleaning tasks to brighten your home.…

Learn about all the convenient features on our Sears PartsDirect website that make your parts purchases easier.…

Get answers to frequently asked questions about Sears and Sears PartsDirect.…
