How to anchor a dishwasher to the floor video


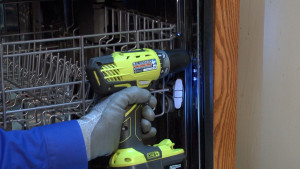
This video shows how to anchor your dishwasher to the floor if you have granite countertops and you can't attach the dishwasher to the cabinet sides, or you can't insert screws in the required areas to hold those brackets in place. This DIY video walks you through the process of removing your dishwasher from the cabinet, marking the appropriate areas on the floor, drilling pilot holes and installing a floor-mounting kit.
Check out our DIY Dishwasher Repair help section for symptoms and troubleshooting tips, repair guides and more.
Hi, Wayne here from Sears PartsDirect. Today we're going to talk about attaching a dishwasher to the floor when you can’t attach it to the underside of the countertop or to the sides of the cabinet. You’ll want to choose this option if you have granite countertops and you can't side-mount the dishwasher or you can't insert screws in the required areas to hold those brackets in place. If these reasons don’t apply to you, check out this video to learn about some easier ways to mount your dishwasher.
Tools and parts needed
First, let's talk about supplies. You need a floor mount kit, which includes the 2 brackets that anchor the dishwasher to the floor. You also need 2 screws appropriate for your type of floor—most likely either wood or a concrete slab—and washers that fit those screws. You’ll need a drill bit for making pilot holes into your floor. If your house has a concrete slab, you need a masonry drill bit. Finally, you need a measuring tape to determine the location of the pilot holes and a pencil for marking the location of the pilot holes.
Additional tools needed
Nut driver set
Towel
Sheet of cardboard
Drill
Short screwdriver or right-angle screwdriver
Torx screwdriver
Pliers
Work gloves
Pull dishwasher out from under counter
You have to pull the dishwasher out from under the counter to install the floor brackets.
Shut off the house circuit breaker to disconnect electrical power.
Close the water supply valve for the dishwasher.
Release the drain hose from the garbage disposal or sink drain connection.
Remove the bottom front access panel and toe panel.
Place a towel under the water line connection on the water inlet valve. Disconnect the water line and wipe up any spilled water.
If the power cord plugs into an electrical outlet, unplug the cord and position the power cord so it moves freely when you pull the dishwasher out from under the counter. If your power cord doesn't plug into an electrical outlet, it’s hard-wired into the junction box. Remove the junction box cover and disconnect the supply wires. Remove the strain relief nut to release the power cable from the junction box.
Mark where dishwasher brackets go
Before we pull the dishwasher all the way out, we will need to mark where the brackets will go on the floor. Draw a line on the floor directly in front each dishwasher frame side brace. Also, draw a line along the inside edge of each side brace as far back as you can reach—at least a little past the midpoint of the side brace. You'll use these marks to zero in on the location for the pilot holes. If your floor is wood or vinyl, it’s a good idea to lay a sheet of cardboard in front of the dishwasher first, to protect it from scratches.
Now, pull the dishwasher out from under the counter. Measure the length of a side brace in inches, divide that number by 2 and then add 1 inch. Measure that distance from the line in front of the side brace along the line parallel to the side brace. Make a mark on that parallel line.
Drill pilot holes and attach brackets
Place the floor bracket about 1/8-inch inside the line at the mark, leaving just enough room so you can slide the side brace past the loosely installed bracket when you push the dishwasher under the counter. Now, mark the center of the floor bracket hole. This is where you'll drill the pilot hole for the screw.
Repeat the process for marking the pilot hole on the opposite side of the dishwasher. Drill the holes using the appropriate drill bit for your type of floor and then attach the floor brackets using the correct screws. Use washers to help the screws hold the brackets firmly in place. Tighten the screws fully and then back the screws out slightly so the floor brackets have plenty of play while you reinstall the dishwasher under the counter.
Turn the brackets to face the back of the cabinet enclosure before you push the dishwasher back under the counter.
Push dishwasher in, position floor brackets
Carefully push the dishwasher back into the cabinet enclosure, straddling the floor brackets between the braces. To reach the brackets, we’ll have to remove the outer door panel and control panel. Open the dishwasher door and remove the Torx screws from the inner door panel. Support the outer door panel with one hand as you remove the final screws so the outer door panel doesn't fall. Separate the outer door panel and control panel slightly from the inner door panel, and rest the outer door panel on the floor while you disconnect the user interface control wire harness.
Pull off the outer door panel and control panel. Now you'll have more room to reach the floor brackets. Position the floor bracket hook over the top of the side brace on one side of the dishwasher. Tighten the bracket's screw firmly with either a short screwdriver or right angle screwdriver. Repeat the process to install the floor bracket on the opposite side of the dishwasher.
Reassemble the dishwasher
Now it's time to reassemble the dishwasher.
Reconnect the water line to the water inlet valve.
Open the water supply valve for the dishwasher.
Check the water supply line connection on the water inlet valve for leaks and tighten the fitting if you find leaks.
Reconnect the drain line to the garbage disposal or sink drain.
Plug the power cord into the electrical outlet. If the dishwasher power cord hardwires into a junction box, push the power cable into the junction box and reinstall the strain relief nut. Reconnect the wires in the junction box and reinstall the junction box cover.
Reinstall the outer door panel and control panel.
Reconnect the user interface control wire harness and attach the outer door panel and control panel to the inner door panel. Reinstall the screws.
Position the toe panel on the dishwasher and then position the access panel in front of the toe panel. Insert and firmly tighten the screws.
Reset the house circuit breaker to restore electrical power.
I hope this video helped you out. You can find links to the parts we talked about in the video description. Check out our other repair videos here on the Sears PartsDirect YouTube channel. Subscribe and we’ll let you know when we post new videos.
Most common symptoms to help you fix your dishwashers
Choose a symptom to see related dishwasher repairs.
Main causes: broken door spring, damaged or broken door hinge…
Main causes: damaged or stuck spray arm, leaking door seal, damaged door hinge, leaky heating element water seal, cracke…
Main causes: broken door latch, tripped circuit breaker, broken heating element, faulty vent fan, sensor failure, contro…
Main causes: improper loading, low water temperature, improper detergent dosage, detergent dispenser failure, spray arm …
Main causes: clogged kitchen sink drain, clogged drain hose, drain check valve damaged, drain pump failure, control syst…
Main cause: damaged rack height adjuster…
Main causes: glass or popcorn kernel stuck in the chopper blade, drain line vibrating against the cabinet, debris in was…
Main causes: not using rinse aid, rinse aid dispenser failure, broken heating element, malfunctioning vent, drying fan f…
Main causes: light switch beside the sink turned off, lack of power, bad dishwasher door switch, control system failure,…
Most common repair guides to help fix your dishwashers
These step-by-step repair guides will help you safely fix what’s broken on your dishwasher.

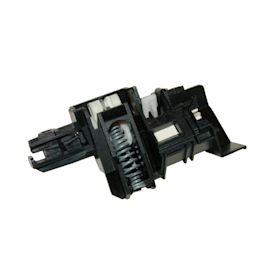
How to replace a dishwasher door latch assembly
If the dishwasher door doesn't click shut, a broken door latch is a likely cause. Follow these instructions to replace i…

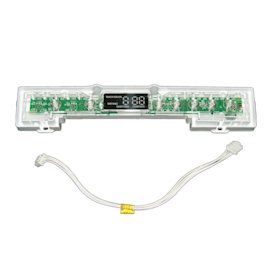
How to replace a dishwasher user interface control
The user interface control houses the selection buttons and display. If it fails, you can't select the cycle and setting…

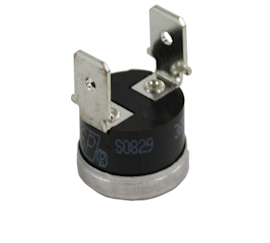
How to replace a dishwasher thermal fuse
A completely dead control panel often indicates that the thermal fuse on the electronic control board is blown; follow t…
Effective articles & videos to help repair your dishwashers
Use the advice and tips in these articles and videos to get the most out of your dishwasher.

Get tips on completing essential holiday cleaning tasks to brighten your home.…

Learn about all the convenient features on our Sears PartsDirect website that make your parts purchases easier.…

Get answers to frequently asked questions about Sears and Sears PartsDirect.…
