Garage door opener wall control troubleshooting video
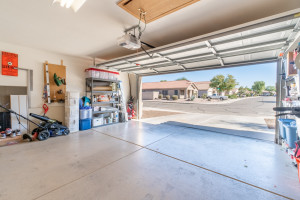

This video from Sears PartsDirect shows what to do if the wall control for your garage door opener isn’t working. We show you how to determine if you have a problem with the power supply or with your logic board. We’ll also walk you through some simple tests to see if the issue is with the wall control itself or the wiring that connects the wall control to the motor unit.
For additional garage door opener repair help, check out our DIY garage door opener repair help section for repair guides, answers to frequently asked questions and symptom troubleshooting.
Tools and parts needed
Wire cutter
Small working lamp
Screwdriver
Logic board
Replacement wiring
Wall control
Check for power
Check the LED light or electronic display on the wall control. If the wall control LED light is lit or the electronic display works, the wall control and garage door opener motor unit have power; Skip to the next section, “Check the wiring between the wall control and motor.”
If the light or display is off, check the garage door opener’s motor unit for power by pressing the Learn button on the motor unit.
If the light on the motor unit comes on, the unit has power. Skip to the next section, "Check the wiring between the wall control and the motor."
If the light on the motor unit doesn't come on, reset the house circuit breaker for the garage door opener electrical outlet.
If resetting the circuit breaker doesn’t solve the problem, test the outlet by plugging in a lamp or small appliance.
If the electrical outlet works, replace the garage door opener logic board.
If the outlet doesn’t work, have an electrician repair it.
Check the wiring between the wall control and motor
If the wall control has power or pressing the Learn button in the previous section showed that the motor unit has power, the next step is to check the wiring between the wall control and the motor unit:
Make sure the wall control wires securely connect to the motor unit. The all-white wire connects to the white terminal and the white wire with the red stripe connects to the red terminal.
Check the wires connected to the wall control. Reconnect any loose wires.
If you can see the path of wires between the motor unit and wall control, look for any visible damage and repair any damage you find.
Check the wiring in the wall
If the connections are secure, and the visible wiring is intact, the next step is to test the wiring you can’t see. How you test it depends on whether your wall control has an LED light or a digital display.
Test the wiring of an LED wall control
This test is for wall control with a single LED light. If your garage door opener has another type of wall control, skip to the next section.
To test this wall control, remove it from the wall and disconnect the wires on the back. Touch the bare ends of the wall control wire together to see if the garage door moves.
If the door moves, the wiring is okay, because the motor unit sensed the wiring connection. In that case, replace the wall control.
If the door didn't move when you touched the bare ends of the wall control wires, it’s likely there’s a wiring problem. Follow these steps to check the wiring:
Disconnect the wires from the motor unit.
Cut a 3-inch strand of insulated wire to use as a jumper wire and strip 1/2-inch of insulation off each end.
Insert the jumper wire into the wall control terminals on the motor unit to see if the garage door moves.
If the garage door works with the jumper wire, there’s a break somewhere in the wall control wiring. Replace the wires.
If the jumper wire didn’t work, you’ve ruled out everything but the logic board. Replace the logic board.
Test other types of wall controls
This test is for wall controls with a digital display.
Pull the wall control off the wall and disconnect the wires from the back.
Disconnect the wall control wires from the motor unit.
Cut a section of insulated 2-strand wire about a foot long and then strip about 1/2-inch of insulation from each end.
Use the 2-strand wire to connect the red and white terminals on the wall control to the corresponding terminals on the motor unit, connecting the all-white wire to the white terminal and the white wire with the red stripe to the red terminal.
If the wall control lights up and works, the wall control is okay and the problem is the wiring. Replace the wiring between the motor unit and the wall control.
If the wall control doesn't light up and work properly, either the wall control or the logic board in the garage door opener is defective. Diagnosing this type of wall control is more complicated than the single LED type. To know for sure what the problem is, you may want to have a service technician check the garage door opener.
Most common symptoms to help you fix your garage door openers
Choose a symptom to see related garage door opener repairs.
Main causes: garage door opener misaligned, travel limits need adjustment, bad travel limit switches, faulty logic contr…
Main causes: garage door locked, damaged garage door tracks, up-force setting needs adjustment, RPM sensor failure, bad …
Main causes: safety sensor beams blocked, safety sensors not aligned, downforce setting needs adjustment, damaged garage…
Things to do: check garage door travel, tighten brackets and fasteners, test safety sensors, check travel limits and for…
Main causes: radio interference, weak remote batteries, sunlight interference with safety sensor beams, safety sensors n…
Main causes: faulty logic control board, bad RPM sensor, broken gears in the drive system, bad drive motor…
Main causes: neighbor's remote programmed at the same time as yours, faulty wall control wiring, bad wall control unit…
Main causes: loose fasteners, broken brackets, need preventive maintenance, worn drive gears, loose or worn belt, loose …
Most common repair guides to help fix your garage door openers
These step-by-step repair guides will help you safely fix what’s broken on your garage door opener.
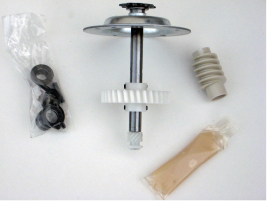
How to replace a chain-drive garage door opener gear and sprocket assembly
Learn how to replace the gear and sprocket assembly on your garage door opener if the drive motor runs but the door won'…
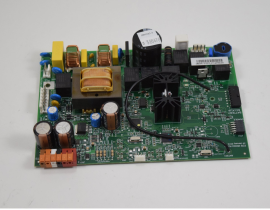
How to replace a garage door opener logic board
The logic board is the brains of the garage door opener. If the remote doesn't work or the door doesn't open and close p…
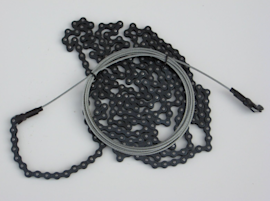
How to replace a garage door opener drive chain and cable assembly
If your garage door won’t move, the chain and cable assembly on your garage door opener could be broken. Follow these st…
Effective articles & videos to help repair your garage door openers
Use the advice and tips in these articles and videos to get the most out of your garage door opener.

Learn about all the convenient features on our Sears PartsDirect website that make your parts purchases easier.…

Get answers to frequently asked questions about Sears and Sears PartsDirect.…
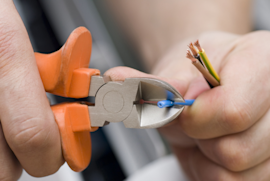
Learn how to repair broken, frayed or damaged wires in your appliances.…
