How to replace a lawn mower drive belt
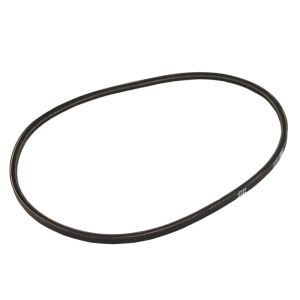
This lawn mower repair guide has step-by-step instructions on how to replace a lawn mower drive belt. The mower won't move with a broken or worn drive belt. Replace the drive belt with a manufacturer-approved lawn mower part if it's worn or broken.
This drive belt replacement procedure works for common Craftsman, Toro, Troybilt, MTD, Husqvarna, Poulan, Murray and Ariens front-wheel drive walk-behind lawn mowers.
A drive belt problem is just one reason the wheels of a lawn mower won't drive forward. To learn how to diagnose a lawn mower drive problem, see Lawn Mower Won't Move Troubleshooting Video: Motion Drive Failure.
This video explains how to replace the drive belt on a walk-behind lawn mower.
Instructions
- 01.
Disconnect the spark plug wire
Disconnect the spark plug wire from the spark plug.
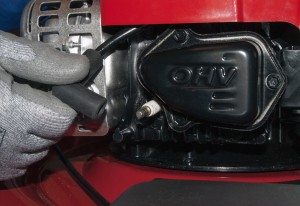
PHOTO: Disconnect the spark plug.
- 02.
Remove the blade
Remove the fuel tank cap.
Place a plastic bag over the fuel tank opening and reinstall the fuel tank cap to prevent gasoline from leaking out through the fuel tank cap vent.
Tilt the mower back to lift the front wheels then secure the mower handle to your worktable to hold the mower steady. Remove the bottom drive cover mounting screws.
Wedge a block of wood between the mower blade and the deck to keep the blade from turning when you loosen the blade nut.
Loosen and unthread the blade nut while holding the cutting blade to keep the blade from falling.
Pull the blade, blade support and blade nut off the crankshaft.
Remove the debris shield mounting screws and pull off the debris shield.
Roll the drive belt off the crankshaft pulley.
Pull the crankshaft pulley off and free the belt from the crankshaft.
Release the clamp from the mower handle and lower the mower to the upright position.
Remove the top drive cover mounting screws.
Release the height adjuster lever and pull the drive cover off.
Pull off the belt keeper from the top of the transmission.
Release the drive belt from the transmission pulley and remove the drive belt.
Tip: If you have the mower on the ground instead of a worktable, tilt the lawn mower on its side with the air filter up to access the mower blade.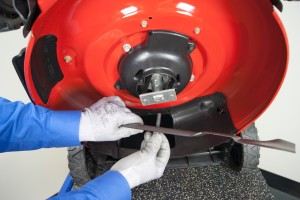
PHOTO: Remove the blade.
- 03.
Remove the drive belt
Remove the bottom drive cover mounting screws.
Remove the debris shield mounting bolts and pull off the debris shield.
Roll the drive belt off the crankshaft pulley.
Pull the crankshaft pulley off and free the belt from the crankshaft.
Release the mower handle and lower the mower to the upright position.
Remove the top drive cover mounting screws.
Release the height adjuster lever and pull the drive cover off.
Pull off the belt keeper from the top of the transmission.
Release the drive belt from the transmission pulley and remove the drive belt.
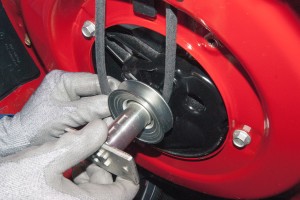
PHOTO: Pull the drive belt off of the pulley.
- 04.
Install the new drive belt
Push the drive belt through the deck opening and install the new drive belt on the transmission pulley.
Reinstall the belt keeper on the transmission.
Insert the drive cover tab into the deck slot by the engine and position the drive cover on the deck tray.
Reconnect the height adjuster lever to the drive cover.
Reinstall the top drive cover mounting screws.
Tilt the mower back to lift the front wheels, then clamp the mower handle to your worktable to hold the mower steady.
Route the drive belt over the crankshaft.
Align the crankshaft pulley shaft indentions with the crankshaft slot and slide the pulley onto the crankshaft.
Roll the drive belt onto the crankshaft pulley.
Push the debris shield tab through the deck opening and reinstall the debris shield.
Reinstall the debris shield mounting bolts.
Reinstall the bottom drive cover mounting screws.
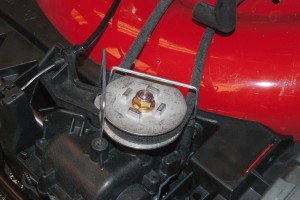
PHOTO: Install the belt on the transmission pulley.
- 05.
Reinstall the blade
Position the blade, blade support and blade bolt on the crankshaft and hand-tighten the blade bolt on the crankshaft.
Wedge a block of wood between the mower blade and the deck to keep the blade from turning when you tighten the blade bolt.
Tighten the blade bolt to 500 in.-lbs. using a torque wrench.
Remove the wood block.
Release the mower handle from the worktable and lower the mower to the upright position.
Remove the plastic bag from the fuel tank opening and reinstall the fuel tank cap.
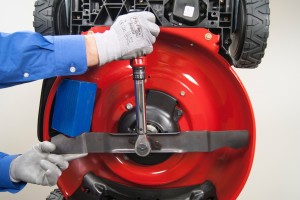
PHOTO: Reinstall the lawn mower blade.
- 06.
Reconnect the spark plug wire
Push the spark plug wire back onto the spark plug.
Symptoms for gas walk-behind mowers
Choose a symptom to see related walk-behind mower repairs.
Main causes: engine needs tune up, dirty or clogged carburetor, damaged flywheel key…
Main causes: uneven wheel height settings, damaged wheel, dull or damaged cutting blade…
Main causes: damaged cutting blade, loose cutting blade, damaged flywheel key, engine needs tune up…
Main causes: stale gas, engine needs tune up, bad spark plug, dead battery, bad recoil starter, faulty safety switch, ba…
Main causes: dirty carburetor, bad spark plug, clogged air filter, engine choke problems, clogged gas cap vent…
Main causes: drive control cable failure, worn or broken drive belt, bad transmission, broken drive wheel…
Repair guides for gas walk-behind mowers
These step-by-step repair guides will help you safely fix what’s broken on your walk-behind lawn mower.
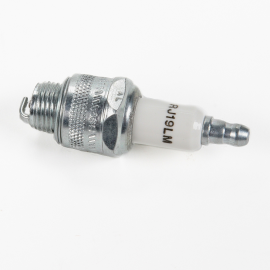
How to replace a lawn mower spark plug
Take a few minutes to replace the spark plug during your lawn mower's annual tune-up or if the spark plug is burnt or cr…

How to replace a lawn mower blade
Check your lawn mower blade regularly and replaced it if it's bent or damaged. …
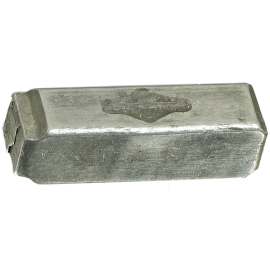
How to replace a lawn mower flywheel key on a flathead engine
When you hit a hard object with your mower, the flywheel can shear to protect more expensive components. Learn how to re…
Effective articles & videos to help repair your walk-behind mowers
Use the advice and tips in these articles and videos to get the most out of your walk-behind lawn mower.

Learn about all the convenient features on our Sears PartsDirect website that make your parts purchases easier.…

Learn about Sears Technical Institute and the advanced technical content being developed for aspiring appliance techs.…

Get answers to frequently asked questions about Sears and Sears PartsDirect.…