How to clean a gas grill video


Grease and food residue build up quickly on a grill—cleaning your gas grill monthly can keep it looking good and cooking like it should. This video from Sears PartsDirect shows what products are safe to use on your grill grates, flame tamers and burners, and how to take your grill apart to reach everything that needs cleaning.
Check out our DIY Gas Grill Repair Help page for more troubleshooting advice, repair guides and grilling articles.
Supplies you might need
Warm, soapy water in bucket
Dishwashing liquid
Heavy duty grill cleaner
Shop rags
Wash cloth
Degreaser
Steel wool
Garden hose
Wire grill brush with scraper
Bamboo skewer or paper clip
Wire coat hanger
Small bottle brush
Canned air
Protective covering (if working on deck or patio)
Work gloves
Hi, Wayne here from Sears PartsDirect. Today we're going to talk about cleaning your gas grill. It doesn't take long for grease and residue to build up on a new grill. Cleaning it monthly can keep it in excellent condition.
Allow the grill to cool completely, shut off the propane tank valve, disconnect the regulator hose and remove the tank. If your grill uses natural gas, just shut off the gas supply valve. Pull out the grease cup and set it aside while you clean the grill. Lay down a protective covering under your grill or move it to a work area for cleaning.
Scrape and remove debris under lid
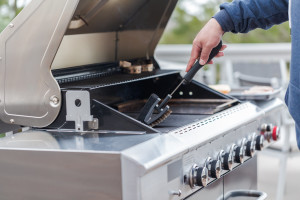
Now, let's get started. We'll clean the grill from the inside out. Clean the underside of the lid first. Use the scraper to remove heavy residue and then wipe the inside of the lid with soapy water. You'll likely see smoke residue under the lid.
Don't worry about removing it, it’ll just reappear the next time you use the grill. Just clean off the heavy residue and grease from the lid.
Clean the grill grates
The grates are up next. If you clean the grates after each use by burning off residual food and grease, this shouldn’t take too long. Use the grill brush to scrape and brush the grates to remove heavy residue. Grills have various types of grates. You’ll need to use the right cleaning method for the type of grate on your grill. Here are your options.
Cast iron grates. If you've seasoned your cast iron grates, you likely need to pull them off and wipe them with the soapy water solution. You may need to scrape and brush off stubborn residue from the underside of the grates. If you use the heavy-duty grill cleaner on cast iron grates, you'll need to re-season them after cleaning. Using a paper towel, coat the grates with vegetable shortening or canola oil and bake them in a 400-degree oven for a half hour to restore their seasoned surface. Allow the grates to cool before reinstalling them in the grill.
Stainless steel grates. Make sure that you only use a stainless steel grill brush when cleaning stainless grates. Stainless steel grill brushes typically have silver bristles. Remove the grates and brush the undersides where residue likes to hide. Clean the grates using the soapy water solution and a washcloth. Use steel wool or a non-abrasive cleanser to remove stubborn residue. Most stainless steel grates discolor with heat, so don't try to restore the perfect, just-out-of-the-box stainless finish. Remove all food residue from the grates and rinse off with plain water to remove all cleaning residue. Set the grates aside and allow them to air dry while you clean the rest of the grill.
Porcelain-coated grates. Don't use a metal brush to clean porcelain-coated grates because metal bristles scratch the smooth porcelain surface. Use a nylon brush to clean off the heavy residue. Remove the grates and clean them thoroughly with soapy water and the nylon brush. Use a toothbrush to clean hard-to-reach areas. Rinse the grates with plain water and set them aside to air dry while you continue cleaning.
Scrub the flame tamers
Now that we're done with the grates, let's move on to cleaning the flame tamers. Almost all grills have these flavor tents over the burner tubes. Scrape heavy residue from the flame tamers before pulling them out.
Remove the flame tamers and wash them with soapy water. Use heavy-duty grill cleaner to cut through tough residue. Rinse the flame tamers with the water hose and set them aside to dry while we clean the burner tubes.
Clean clogged burner tubes
Brush across the holes of the burner tubes with a wire grill brush to remove spills and residue. Then, pull them out of the burner box by removing the carryover tube screws and pulling off the tubes. Remove the cotter pins and pull out the burner tubes.
Clear any clogged holes in the burner tubes using a bamboo skewer or paper clip. Spiders and insects can enter the burner tubes, blocking gas flow. Clean the inside of the burner tubes using one of the following methods.
Heavy wire. Bend a small hook on the end of a stiff wire such as a straightened coat hanger. Run the hook through each burner tube several times to clear out clogs. Dump loosened debris out of the burner tubes.
Small bottle brush. Push a small bottle brush into each burner tube to clear out insects, spiders and debris. Move the brush around vigorously to reach all areas inside the burner tubes. Dump loosened debris out of the burner tubes.
Compressed air. Blow debris out of each burner tube using canned air or an air hose. Wear eye protection while cleaning the burner tubes with air. When using canned air, insert the extension tube in the canned air nozzle. Insert the extension tube into each burner tube and blow debris out using short bursts of air. When using an air hose, push the nozzle into a burner tube opening and cover the air baffle opening with your fingers so air moves into the burner tube. Loosen debris inside the tube using short bursts of air. Repeat the steps to clean all the burner tubes. Dump loosened debris out of the burner tubes.
Brush the burner box
Next, we'll clean the inside of the burner box. Use your scraper to loosen and remove heavy deposits from the sides of the burner box. Brush off debris and deposits with the grill brush.
If your grill has a removable bottom tray, pull out the bottom tray and dump out debris. Scrape and brush the bottom tray and then wash it off using soapy water and a cleaning rag. Rinse the bottom tray with clean water.
If your grill doesn't have a removable bottom tray, clean the bottom of the burner box the same way you cleaned the sides. Wipe out all debris once you finish scraping and brushing the burner box. Clean the burner box with soapy water and rags and rinse with water.
Clean the outside of the grill
One last surface to clean—the grill’s exterior. Close the grill lid and use a garden hose to wet the outside of the grill. Then, use soapy water and rags to clean the exterior. Use degreaser to remove stubborn spills and residue. You may not be able to use degreaser on all grill surfaces. Refer to your owner's manual to find out what cleaners are safe to use on the surfaces of your grill.
Pull off the burner knobs to clean the knobs and bezels easier. Wipe down the manifold with a soapy rag. Rinse off the soap with the garden hose. Wipe the entire grill with a dry towel to prevent water spots. Use stainless steel cleaner to clean and polish stainless surfaces on your grill.
Put the grill back together
Now, it’s time to reassemble the grill. Push the knobs back onto the burner valve stems. Open the lid and reinstall the burner tubes, securing them with the cotter pins. Fasten the carryover tubes to the burner tubes. Reinstall the flame tamers and grates over the burners. Slide the burner box tray back in if you removed it during cleaning.
Clean out the grease cup if it's dirty and hang it back under the grill. Make sure that you have all burner knobs turned off. Reinstall the propane tank and connect the regulator hose.
Dust off your hands and give yourself a pat on the back for a cleaning job well done.
I hope this video helps you out. You can find links to the parts we talked about in the video description. Check out our other videos on the Sears PartsDirect YouTube channel. Subscribe and we'll let you know when we post new ones.
Symptoms for gas grills
Choose a symptom to see related gas grill repairs.
Main causes: nearly empty fuel tank, faulty pressure regulator, burner tube clogs, bad burner tube alignment to gas valv…
Main causes: empty fuel tank, tripped flow-limiting device on the pressure regulator, faulty manifold valves, burner tub…
Main cause: worn wheel…
Main causes: damaged or dirty flame tamers, corroded firebox, accumulated grease and debris in the grease pan…
Main causes: clogged burner tubes, cracked insulators on igniter electrodes, wiring failures, bad ignition module, manif…
Repair guides for gas grills
These step-by-step repair guides will help you safely fix what’s broken on your gas grill.

How to replace a gas grill wheel
Replace a broken or damaged wheel in less than 15 minutes.…

How to replace a gas grill igniter electrode
Replace the igniter electrode on your gas grill if it won’t light the burner.…

How to replace a gas grill ignition module
Follow these steps to replace the ignition module if it doesn't produce a spark. …
Articles and videos for gas grills
Use the advice and tips in these articles and videos to get the most out of your gas grill.

Learn about all the convenient features on our Sears PartsDirect website that make your parts purchases easier.…

Get answers to frequently asked questions about Sears and Sears PartsDirect.…

A conversion kit and a few simple tools are all you need.…