
$19.39 |
9% OFF Phone Price : $21.39
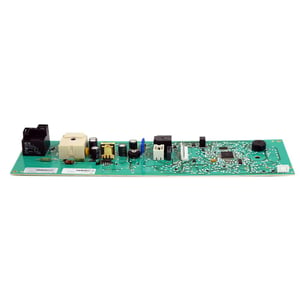


Special details: Replace electronic control board 137008010NH if you see the error code E01 on the dryer display.
This electronic control board (part number 137008010NH) is for dryers.
Electronic control board 137008010NH manages the functions of the dryer such as drying time and temperature.
Unplug the dryer before installing this part. Wear work gloves to protect your hands.
| Model Name | Model Number | Diagram Name |
|---|---|---|
| Model #41788042700 Kenmore dryer | 41788042700 | |
| Model #41788056700 Kenmore dryer | 41788056700 | |
| Model #41784052500 Kenmore dryer | 41784052500 | |
| Model #41798056700 Kenmore dryer | 41798056700 | |
| Model #41798042701 Kenmore dryer | 41798042701 | |
| Model #41798056701 Kenmore dryer | 41798056701 | |
| Model #41798052701 Kenmore dryer | 41798052701 | |
| Model #41798042700 Kenmore dryer | 41798042700 | |
| Model #41794052500 Kenmore dryer | 41794052500 |
First time replacing board so took 40 minutes.Me taking my time .It was straight forward.Online videos helped.But tgr important thing is .My dryer is working again .Code E68 was fixed.
Marilu, West orange NJ
Did you find this review helpful?
Yes, I would recommend this to a friend
After diagnosing my random dryer behavior and determining it was the control board, I ordered this part. Installation was easy and took me about 45 minutes. Removing 2 screws from the back of the dryer allowed the top to be removed. 4 more screws and wire disconnecting to remove the control panel and board. The board housing came apart with relative ease and the new board was easy to install. Reconnecting everything went well, too. The part fixed my dryer and now it works as expected.
roho74029, Dewey, OK
Did you find this review helpful?
Yes, I would recommend this to a friend
Our dryer would only run for about two minutes, stop and flash all the lights on the control panel. After several attempts at the reset procedure I figured it had to be the PC board (40 years of IT experience pays off!) I found the board and purchased it. You have to remove the top panel of the dryer held on by two screws fastened to a piece of sheet metal that is also fastened to the chassis. Once you get the lid off you will see the screws holding the control panel assembly. Be very careful removing them as they can fall into the chassis below and become un-retrievable. Remove the screws from the PCB assembly with the control panel FACE DOWN as there are 5 small springs that actuate the buttons on the front of the panel and they will bounce everywhere (voice of experience speaking here). Also, there are Lucite type light bars (for the front panel indicator lights) that will fall out of the assembly but they are easy to put back in place. Remove the three screws holding the PCB assembly. Lift the PCB assembly out. Disconnect the wiring harness paying particular attention to the Red and Black connectors and in which location they belong. Now carefully pry the small tabs one at a time pushing the PCB away from the tab(s). Once you get the PCB out put on your grounding strap BEFORE removing the new PCB!! MAKE SURE IT IS GROUNDED TO THE CHASSIS! Your body static is enough to ruin your $$ new PCB. Snap the assembly pieces back around the PCB, watch those light bars, and plug back in the wiring harness securing the wires in their holders. Now comes the fun part: Putting the control panel back on the assembly and lining up the knob rods. I removed the one and just aligned the knob once it was back together. Mount the PCB assembly back with the control panel face down (remember those springs? If not they will remind you) Fasten the screws but don't over tighten them as you are dealing with a plastic piece here. Re-mount the whole control panel assembly back to the front with the four screws you previously removed. Replace the top cover and its' two screws, plug the dryer in, be careful! And you are ready to rock and roll! Dry your laundry, that is!
Flying h, Cross Junction, Virginia
Did you find this review helpful?
Yes, I would recommend this to a friend
It took about 35 minutes to make sure everything was aligned and replaced properly. Pretty simple switch-out.
Mandm, Miami
Did you find this review helpful?
Yes, I would recommend this to a friend
Make sure it's the board, if it is, then this is pretty easy to replace (Make sure the power is off)
Bobby, RI
Did you find this review helpful?
Yes, I would recommend this to a friend
Our dryer would cut on and off by itself when not in use. Ordered control board from your company and had service person install it. It was the correct replacement and now our dryer is back to normal, turning on when we want to utilize it. Thank you for having the board.
Loiness, Millsboro, DE
Did you find this review helpful?
Yes, I would recommend this to a friend
Easy to install, maybe 30 minutes total watch YouTube video for help
JR9145, Westfield Ind
Did you find this review helpful?
Circuit board appears to be defective as it did not correct the problem
Disappointed48, Bacliff
Did you find this review helpful?


