CONFIRM THE PART FITS
Part Information
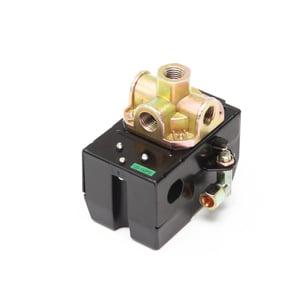
This pressure switch (part number E105176) is for air compressors.
Pressure switch E105176 turns the air compressor pump on and off to regulate tank air pressure.
Unplug the air compressor and bleed the air pressure from the tank before installing this part.
Top models using the same part
| Model Name | Model Number | Diagram Name |
|---|---|---|
| Model #921164710 Craftsman air compressor | 921164710 | Compressor |
| Model #921169130 Craftsman air compressor | 921169130 | Tank assy |
Reviews
Install requires electrical skills
If you plan to install the switch, you need to be completely comfortable with electrical wires and circuits. You need to disconnect 2 positive wires, 2 neutral wires, and 2 ground wires from the existing switch, and reconnect into the new switch. You also need to know how to remove and reinstall the "straight thru relief bushing" on the main power cable. You also have to disassemble some of the brass pipe fittings to remove the switch/gage assembly in order to attach the new switch. The replacement of this switch is not for a novice. If you have the ability to perform all of the necessary steps, installation is straight forward, otherwise hire an electrician or have Sears do the install. Install is difficult only due to the technical aspect, and the actual physical work is easy. No special tools are required, and all that is needed are a standard screw driver, and 1 or 2 wrenches. Be prepared for difficulty in disassembling NPT fittings. For whatever reason, the nipple (item 41) going from the tank into the bottom of the switch was torqued way too high on my system, and the nipple had to be damaged in order to be removed. One other note, the replacement switch I received did not have the appropriate safety label on it's cover (item 43), so I swapped it out for the cover on my original switch. During reassemble of the switch back onto the tank, you need to keep the switch clocked (oriented) in the same was as originally built to allow for re-connection of the exhaust elbow tube (item 68).
likestrucks, Cottage Grove, WI
2 people thought this review was helpful.
- Ease of Installation
- Difficult
- Duration of Installation
- 30 minutes - 1 hour
Easy To install
Installed in a reasonable amount of time. Took no special tools.
Good t, Colville, WA
2 people thought this review was helpful.
- Ease of Installation
- Moderate
- Duration of Installation
- 30 minutes - 1 hour
