How to replace the basket drive in a top-load washer
This step-by-step washer repair guide explains how to replace the basket drive in a direct-drive top-load washer. The basket drive is on top of the transmission and clutch assembly in the washer drive system. The basket drive houses the brake mechanism for the spin basket and has the spin tube shaft that rotates the spin basket during the spin cycle. If the basket won't spin smoothly and the washer squeals or screeches when spinning, replace the basket drive with the manufacturer-approved washer part.
If you're not sure if your top-load washer is a direct-drive washer, check out our washer FAQs to see how you can tell.
Kenmore, Whirlpool, Maytag, Estate, Roper and Crosley top-load washers use the type of basket drive shown in this repair video.
Replacing a basket drive in a direct-drive top-load washer.
Instructions
- 01.
Shut off the electricity and water
Unplug the power cord from the wall outlet. Turn off the water supply valves for the washer.
Wear work gloves to protect your hands.
- 02.
Disconnect the hoses
Move the washer away from the wall so you can reach the fill hoses.
Mark which fill hose goes to the hot connector and which goes to the cold.
Using channel-lock pliers, carefully loosen and remove both hoses. Expect some water to pour out.
Pull the drain hose out of the standpipe behind the washer. Expect some water to pour out of the drain hose as you remove it.
Tip: Wipe up water spills with a towel to prevent slipping. - 03.
Open the control console
Pull the plastic end caps off the sides of the control console.
Remove the screws at the base of the control console.
Pull the control console slightly forward and then swing it up and back over the top of the back panel.
Tip: Some models have the screws on the back of the end caps instead of on the front of the control console. Other models have spring clips under the end caps instead of screws. Remove the rear screws or use a putty knife to release the spring clips.
PHOTO: Remove the plastic endcaps from the control console.

PHOTO: Remove the screws at the base of the control panel console.
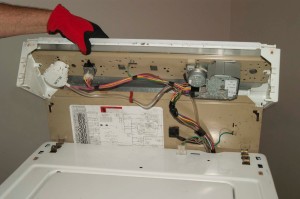
PHOTO: Flip the console up and back.
- 04.
Remove the cabinet
Unplug the wire harness from the lid switch on the washer’s top panel.
Release the clips that secure the cabinet to the washer’s back panel.
Using a slot screwdriver, pry the clips forward to release the clips from the slots in the top panel.
Lift the back of the cabinet and slide the cabinet forward to remove it from the washer frame.
Set the cabinet out of the way.

PHOTO: Unplug the lid switch wire harness connector.
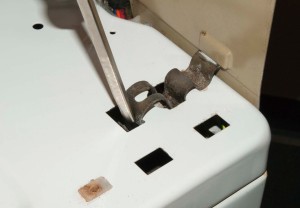
PHOTO: Insert a screwdriver to pry the clips forward.

PHOTO: Release the cabinet clip.

PHOTO: Remove the washer cabinet from the frame.
- 05.
Remove the tub ring
Pull the dispenser hose off of the bottom of the bleach dispenser.
Push down on the top of the tub ring and pull the locking tabs that hold the tub ring in place.
Remove the tub ring from the top of the outer tub.
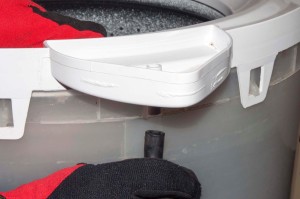
PHOTO: Pull the bleach hose off the bottom of the dispenser.
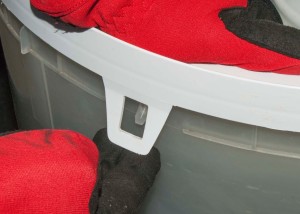
PHOTO: Release the tub ring clips.

PHOTO: Pull the tub ring off the outer tub.
- 06.
Remove the agitator
If your model has a fabric softener dispenser at the top of the agitator, remove the fabric softener dispenser.
Open the washer lid and pry the cap from the top of the agitator.
Remove the 7/16" bolt and washer that secure the agitator to the agitator drive shaft.
Grip the bottom of the agitator and pull the entire agitator assembly up and out of the washer.
Tip: If your washer model has a plastic spring retainer with a square hole at the top of the spring retainer, insert a 1/2" socket drive extension into the square hole and rotate the spring retainer counter-clockwise to release and remove the retainer.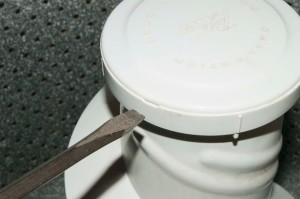
PHOTO: Pry off the agitator cap.
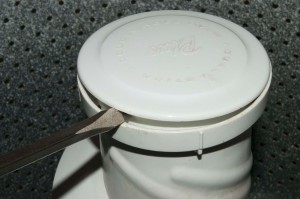
PHOTO: Pry off the agitator cap.
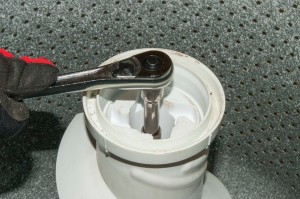
PHOTO: Remove the agitator bolt.
- 07.
Remove the spin basket
Remove the agitator clip on the top of the agitator drive shaft.
Use a spanner wrench to remove the spanner nut. Position the spanner wrench with the notches of the wrench engaged in the slots of the spanner nut. Strike the arm of the spanner wrench to break the spanner nut loose in the counter-clockwise direction and remove the spanner nut.
Carefully lift the spin basket out of the washer.
Tip: Some washer models don’t have an agitator clip on the agitator shaft. Warning: The spin basket is awkward to remove and is fairly heavy. Work with a helper to remove the spin basket.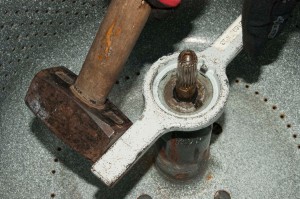
PHOTO: Position the spanner wrench on the spanner nut.
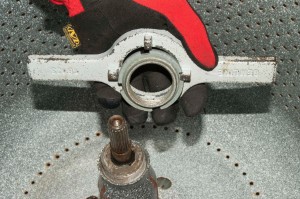
PHOTO: Remove the spanner nut from the shaft.
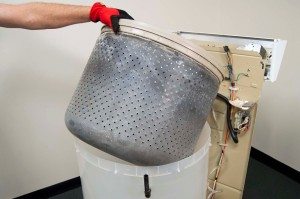
PHOTO: Lift the spin basket out of the tub.
- 08.
Remove the drive block
Tap the bottom of the drive block with a hammer to loosen it and remove the drive block from the basket drive shaft.
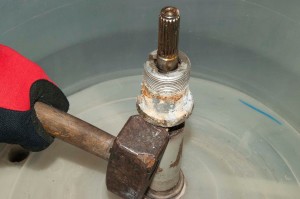
PHOTO: Remove the drive block from the drive shaft.
- 09.
Lay the washer on its back
Move the washer far enough from the wall that you can set the washer on its back. Lay a large towel behind the washer.
Carefully tip the washer back onto the towel to access the drive components at the bottom of the washer.
Tip: The frame of the washer is unstable when the cabinet is removed. Work with a helper to lay the washer down. - 10.
Release the drain pump
Use a slot screwdriver to release the metal mounting clips that secure the drain pump to the front of the drive motor.
Pull the drain pump forward to release it from the drive motor shaft, leaving the hoses connected to the drain pump.
Move the pump off to the side of the motor so it’s out of the way while you replace the clutch assembly.

PHOTO: Remove the drain pump clips.
- 11.
Pull the transmission and drive motor assembly out of the washer
Unplug the wire harness from the drive motor.
Detach the wires from the drive motor capacitor.
Release the drive motor wire harness from the plastic retainer clip on the bottom of the transmission housing.
Remove the bolts that secure the transmission to the base of the washer.
Carefully pull the transmission (with drive motor attached) straight out of the bottom of the washer.
Warning: The transmission and drive motor assembly is heavy. Use a helper to pull the transmission and drive motor assembly out of the washer if necessary.
PHOTO: Unplug the motor wire harness.

PHOTO: Detach the wires from the drive motor capacitor.

PHOTO: Remove the transmission mounting bolts.

PHOTO: Pull the transmission and drive motor out of the washer.
- 12.
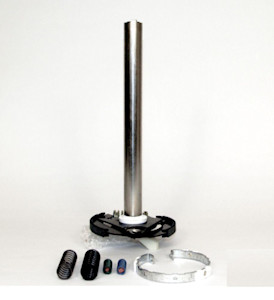
Remove the basket drive
Rotate the plastic brake cam counter-clockwise to release tension on the brake and pull the basket drive out.
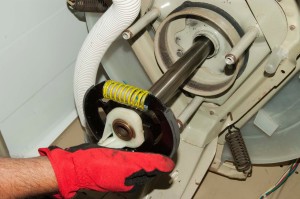
PHOTO: Remove the basket drive.
- 13.
Install the new basket drive
Push the new basket drive into the washer base until it stops. Rotate the brake cam counter-clockwise to release tension on the brake and push the basket drive completely into the brake housing.
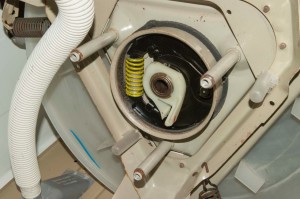
PHOTO: Install the new basket drive.
- 14.
Reinstall the transmission and drive motor assembly
Position the tab on the brake cam directly opposite of the spring on the clutch housing.
Carefully slide the transmission and motor assembly back into the base of the washer. Adjust the alignment of the clutch as necessary so that the transmission is flush with the base of the washer and the mounting holes are lined up.
Reinstall the mounting bolts in the transmission.
Reconnect the wire harness plug on the drive motor.
Reattach the wires to the drive motor capacitor.
Reinstall the wire harness in the plastic retainer clip at the bottom of the transmission.
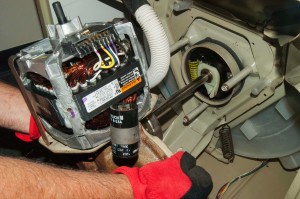
PHOTO: Reinstall the transmission and drive motor.
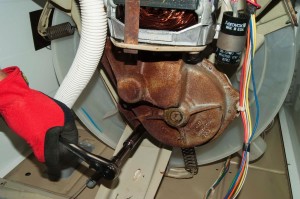
PHOTO: Reinstall the transmission mounting bolts.
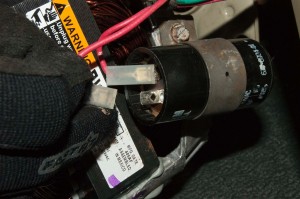
PHOTO: Reattach the wires on the motor capacitor.
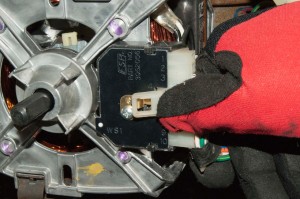
PHOTO: Plug the drive motor wire harness back in.
- 15.
Reinstall the drain pump
Reposition the drain pump on the drive motor shaft and secure the drain pump with the retainer clips.
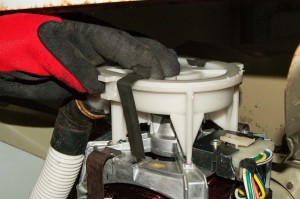
PHOTO: Reinstall the drain pump.
- 16.
Reinstall the drive block
Carefully tilt the washer back to the upright position.
The drive block has slots that fit over tabs at the top of the basket drive shaft.
Position the drive block properly so the tabs fit into the slots in the basket drive.
Push the drive block down and tap it into place with a hammer.
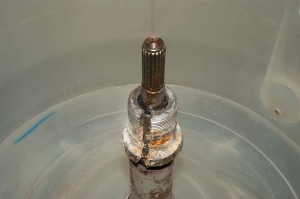
PHOTO: Reinstall the drive block.
- 17.
Reinstall the spin basket
Lower the spin basket into the washer tub.
Thread the spanner nut onto the top of the drive block.
Use the spanner wrench and a hammer to securely tighten the spanner nut.
Reinstall the agitator clip on the top of the agitator drive shaft.

PHOTO: Reinstall the spin basket.
- 18.
Reinstall the agitator
Slide the agitator down on top of the agitator drive shaft.
Insert the agitator bolt and the washer. Tighten the agitator bolt firmly.
Snap the agitator cap back onto the top of the agitator assembly.

PHOTO: Reinstall the agitator.
- 19.
Reinstall the tub ring
Position the tub ring on the top of the outer tub and line up the locking tabs.
Push down on the top of the tub ring and snap the locking tabs in place.
Reinstall the dispenser hose on the bottom of the bleach dispenser.
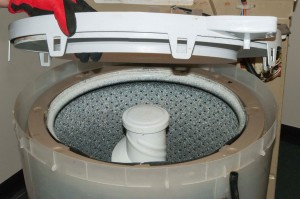
PHOTO: Reinstall the tub ring.

PHOTO: Reinstall the dispenser hose on the bleach dispenser.
- 20.
Reinstall the cabinet
Position the cabinet in front of the washer.
Tip the back of the cabinet up slightly and keep the front lip of the cabinet on the floor. To position the front lip under the washer frame, push the base of the cabinet forward with your foot to slide the front lip of the cabinet under the front base of the washer. Then lower the back of the cabinet so the holes in the back of the sides of the cabinet engage the alignment tabs at the back of the sides of the washer base.
Reinstall the spring clips at the top of the cabinet.
Plug the lid switch wire harness back into the receptacle on the top panel of the washer.
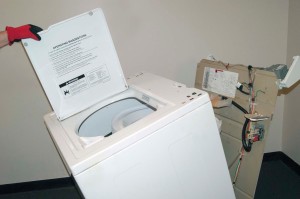
PHOTO: Reinstall the cabinet.
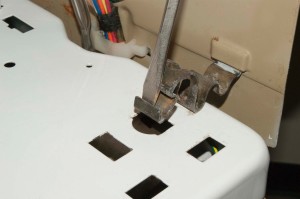
PHOTO: Reinstall the spring clips at the top of the washer cabinet.
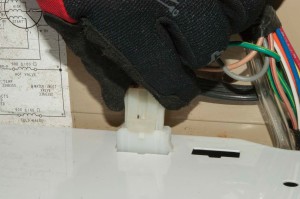
PHOTO: Plug in the lid switch wire harness.
- 21.
Reinstall the control console
Flip the control console down and position it properly on the top panel of the washer.
Reinstall the mounting screws at the base of the control console.
Snap the plastic end caps onto the sides of the control console.
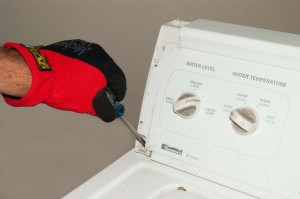
PHOTO: Reinstall the control console screws.
- 22.
Reinstall the hoses
Connect the drain hoses and properly tighten the connections using channel-lock pliers.
Reinstall the drain hose into the drain standpipe behind the washer.
- 23.
Restore the water and power
Turn on the water supply valves. Tighten the connection if you find a slight leak.
Plug the washer into the electrical outlet. Return the washer to its original location.


Most common symptoms to help you fix your washers
Choose a symptom to see related washer repairs.
Main causes: unbalanced load, loose spanner nut, worn drive block, broken shock absorber or suspension spring, debris in…
Main causes: leaky water inlet valve, faulty water-level pressure switch, bad electronic control board…
Main causes: worn agitator dogs, bad clutch, broken motor coupler, shifter assembly failure, broken door lock, suspensio…
Main causes: lack of electrical power, wiring failure, bad power cord, electronic control board failure, bad user interf…
Main causes: clogged drain hose, house drain clogged, bad drain pump, water-level pressure switch failure, bad control b…
Main causes: bad lid switch or door lock, bad timer or electronic control board, wiring failure, bad water inlet valve a…
Main causes: water heater failure, bad water temperature switch, faulty control board, bad water valve, faulty water tem…
Main causes: no water supply, bad water valves, water-level pressure switch failure, control system failure, bad door lo…
Main causes: broken lid switch or lid lock, bad pressure switch, broken shifter assembly, faulty control system…
Repair guides for top-load washers

How to replace a water inlet valve on a vertical modular top-load washer
If the water inlet valve on your vertical modular top-load washer isn't controlling the flow of water into your washing …

How to replace the lid switch/lock assembly on a top-load washer
If the lid switch or lid lock fails, many top load washers won't run. You can install a new switch/lock assembly—this re…

How to replace the lid switch in a direct-drive top-load washer
Replace the lid switch if it doesn't detect the position of the lid.…
Effective articles & videos to help repair your washers
Use the advice and tips in these articles and videos to get the most out of your washer.

Find tips for using your washing machine efficiently to save energy and help reduce utility bills.…

Learn how to repair broken, frayed or damaged wires in your appliances.…

Learn how to use a multimeter to check for wiring problems in an appliance that's not working…