How to replace the timer in a direct-drive top-load washer
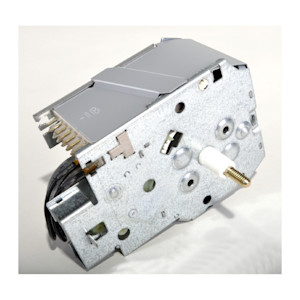
This DIY washer repair guide explains how to replace a mechanical timer on a top-load washer without keypad controls. The timer controls functions such as filling, draining and spinning and the length of each cycle. A motor inside the timer advances the internal cams inside the timer that open and close electrical contacts, starting and stopping the water inlet valve, pump and motor. If the timer doesn't operate correctly, replace it with a manufacturer-approved washer part.
You can use this repair procedure to replace the timer in Kenmore, Whirlpool, Maytag, Estate, Crosley and Roper direct-drive, top-load washers.
This video explains how to replace the timer in a direct-drive top-load washer.
Instructions
- 01.
Shut off the electricity
Unplug the power cord from the wall outlet.
Wear work gloves to protect your hands.
- 02.
Remove the timer knob and dial
With the timer knob pushed in unscrew the timer knob and remove it.
Pull the timer dial up and off the timer stem.
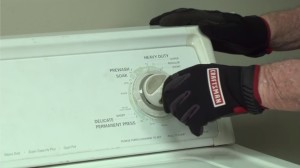
PHOTO: Remove the timer knob from the timer stem.
- 03.
Open the control console
Pull the plastic end caps off the sides of the control console.
Remove the screws at the base of the control console.
Pull the control console slightly forward and then swing it up and back over the top of the back panel.
Tip: Some models have the screws on the back of the end caps instead of on the front of the control console. Other models have spring clips under the end caps instead of screws. Remove the rear screws or use a putty knife to release the spring clips.
PHOTO: Remove the control panel endcaps.
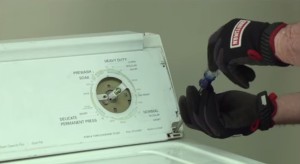
PHOTO: Remove the screws at the base of the control panel.
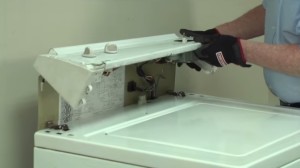
PHOTO: Open the control panel by pulling it slightly forward and then swinging it up and back.
- 04.
Remove the timer
Unplug the timer wire harness.
Remove the timer mounting screws.
Pull the timer out of the control console.
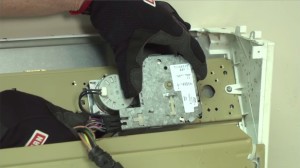
PHOTO: Unplug the timer wire harness.
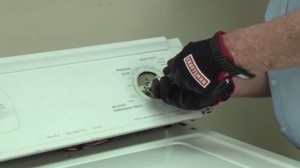
PHOTO: Remove the timer mounting screws.
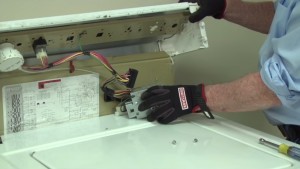
PHOTO: Remove the timer from the control panel.
- 05.
Install the new timer
Position the new timer in the console and line up the mounting holes.
Reinstall the mounting screws in the timer.
Plug the timer wire harness back in.
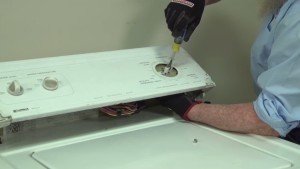
PHOTO: Install the new timer.
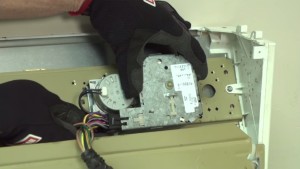
PHOTO: Plug the wire harness into the new timer.
- 06.
Reinstall the control console
Flip the control console down and position it properly on the top panel of the washer.
Reinstall the mounting screws at the base of the control console.
Snap the plastic end caps onto the sides of the control console.

PHOTO: Flip the control panel down and close the console.

PHOTO: Reinstall the control console mounting screws.
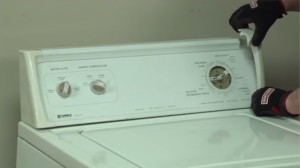
PHOTO: Reinstall the control panel endcaps.
- 07.
Reinstall the timer knob and dial
Line up the dial pointer with the wide slot in the dial stem and push the timer dial onto the stem.
Screw the timer knob onto the timer stem.

PHOTO: Reinstall the timer knob.
- 08.
Restore the power
Plug the washer into the electrical outlet.


Most common symptoms to help you fix your washers
Choose a symptom to see related washer repairs.
Main causes: water heater failure, bad water temperature switch, faulty control board, bad water valve, faulty water tem…
Main causes: leaky water inlet valve, faulty water-level pressure switch, bad electronic control board…
Main causes: lack of electrical power, wiring failure, bad power cord, electronic control board failure, bad user interf…
Main causes: broken lid switch or lid lock, bad pressure switch, broken shifter assembly, faulty control system…
Main causes: worn agitator dogs, bad clutch, broken motor coupler, shifter assembly failure, broken door lock, suspensio…
Main causes: no water supply, bad water valves, water-level pressure switch failure, control system failure, bad door lo…
Main causes: bad lid switch or door lock, bad timer or electronic control board, wiring failure, bad water inlet valve a…
Main causes: clogged drain hose, house drain clogged, bad drain pump, water-level pressure switch failure, bad control b…
Main causes: unbalanced load, loose spanner nut, worn drive block, broken shock absorber or suspension spring, debris in…
Repair guides for top-load washers

How to replace the motor coupler on a top-load washer
If the washer drains but won’t agitate or spin, the motor coupler might have broken to protect the drive motor from dama…

How to replace the agitator dogs in a top-load washer
If the top of the agitator moves both ways instead of just one, replace the agitator dogs, using the steps in this repai…

How to replace the drive block on a top-load washer
The drive block rotates the spin basket. If the basket wobbles or rattles in the spin mode because the drive block is wo…
Effective articles & videos to help repair your washers
Use the advice and tips in these articles and videos to get the most out of your washer.

Find tips for using your washing machine efficiently to save energy and help reduce utility bills.…

Learn how to repair broken, frayed or damaged wires in your appliances.…

Learn how to use a multimeter to check for wiring problems in an appliance that's not working…